
Uncategorized
Step by Step Filter Replacement: Home Guide for 2026
Jun
TL;DR:
- Replacing filters regularly prevents system damage and maintains healthy indoor environments. Proper technique includes using the right tools, verifying orientation, thoroughly flushing water filters, and marking installation dates. Proper installation and maintenance significantly extend equipment lifespan and ensure water and air quality.
Step by step filter replacement is the process of safely removing old filtration media and installing new filters in home water and air systems to maintain clean, healthy indoor environments. Most homeowners skip this process until something goes wrong, which is exactly when filters cause the most damage. A clogged sediment filter pushes contaminants back into your water supply. A collapsed HVAC filter can destroy a blower motor. This guide covers both water and air filter replacements with the detail you need to do the job right the first time, whether you own a Coway water purifier, a whole-house system, or a standard HVAC unit.
What tools and materials do you need for filter replacement?
The right tools make a filter change guide go from frustrating to straightforward. Gather everything before you start. Stopping mid-job to find a wrench or a bucket causes mistakes.
Tools you need
- Filter housing wrench (sized for your specific housing diameter)
- Bucket or shallow pan to catch residual water
- Nitrile gloves to protect hands from sediment and carbon dust
- Permanent marker to write the installation date on the new filter or housing
- Replacement filter cartridges matched to your system’s model number
- Food-grade silicone grease for lubricating O-rings on water filter housings
Filter types and replacement timing
| Filter Type | Replacement Interval | Common System |
|---|---|---|
| Sediment filter | 3–6 months | Whole-house, under-sink |
| Carbon block filter | 6–12 months | Under-sink, countertop, refrigerator |
| HVAC air filter | 30–60 days | Forced-air heating and cooling |
| Reverse osmosis membrane | 2–3 years | Under-sink RO systems |
Sediment filters trap sand, rust, and particulates. They clog faster than carbon filters and need more frequent changes. Carbon filters remove chlorine, odors, and chemical compounds. They degrade chemically over time, not just physically, so replace them on schedule even if the water still looks clear.

Pro Tip: Always buy your replacement cartridge before removing the old one. Confirm the model number on the side of the existing filter, not just the housing label. Manufacturers update cartridge designs, and the wrong size will not seat correctly.
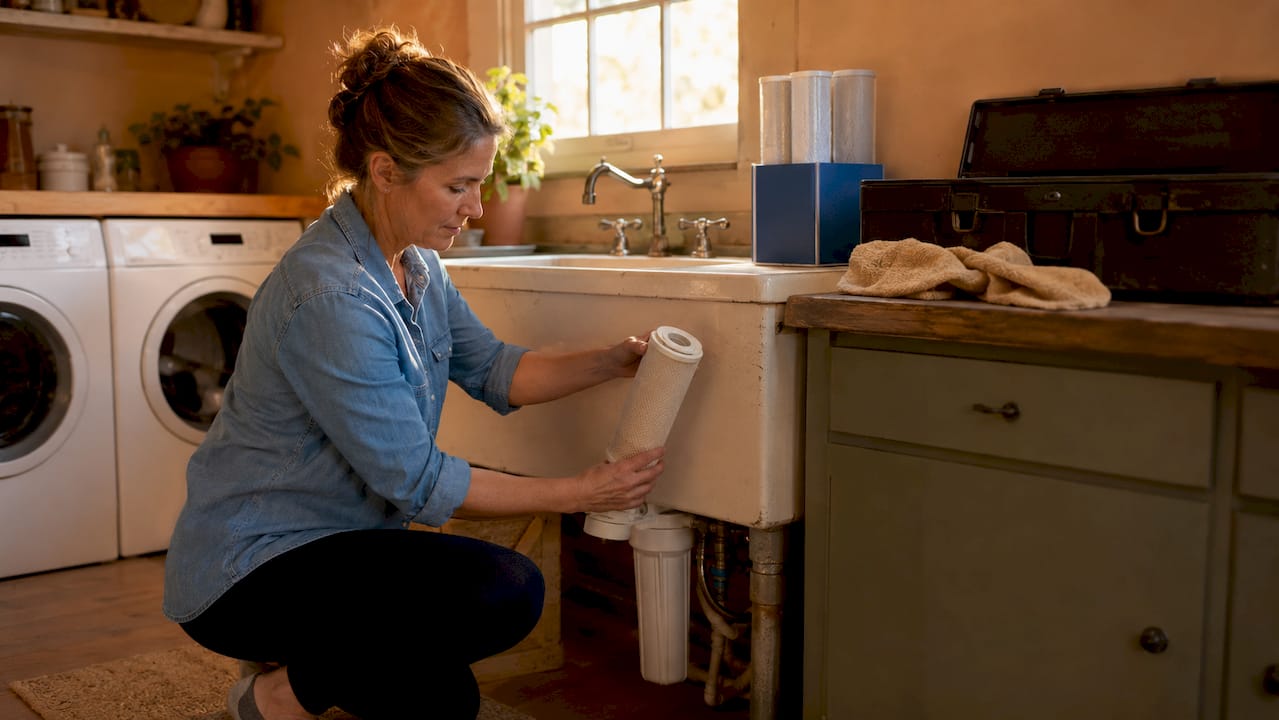
How do you replace water filters step by step?
This is the core of any DIY filter replacement for water systems. The sequence below applies to whole-house housings, under-sink systems, and refrigerator filters. Follow it in order.
- Shut off the water supply. Close the dedicated shutoff valve on the inlet side of your filter housing. If there is no dedicated valve, close the main supply.
- Relieve system pressure. Open a downstream faucet to drain residual pressure. This prevents water from spraying when you open the housing.
- Place your bucket under the housing. Even after pressure relief, water remains in the housing. A bucket prevents floor damage and mess.
- Unscrew the filter housing. Use your housing wrench and turn counterclockwise. Do not use excessive force. If it is stuck, apply steady pressure rather than jerking.
- Remove the old cartridge. Pull it straight out. Note the orientation: some cartridges have a gasketed top end or a flow arrow. Proper cartridge orientation varies by model and is critical for function.
- Inspect and clean the housing. Rinse it with clean water. Pay close attention to the O-ring groove. Micro-particles of sand trapped in this groove cause leaks even after reassembly.
- Lubricate and reseat the O-ring. Apply a thin layer of food-grade silicone grease. Check for cracks or flat spots. Replace the O-ring if it shows any damage.
- Install the new cartridge. Follow the manufacturer’s orientation markings. Insert it fully until it seats against the housing bottom.
- Hand-tighten the housing, then add a quarter-turn with the wrench. Overtightening cracks plastic threads and damages the O-ring seal. Snug plus a quarter-turn is the correct torque.
- Slowly reopen the water supply. Gradual pressure allows the O-ring seal to settle without blowout.
- Flush the system. Run approximately 2 gallons of water through the new filter to clear carbon fines and trapped air. The first water out may appear gray or cloudy. That is normal.
- Check for leaks. Dry the housing exterior and watch for drips for two to three minutes under full pressure.
Safety note: Never skip the flush step. Carbon fines from a new block filter are harmless but will discolor water and affect taste. Two gallons clears the system completely.
Pro Tip: For long-term water filter maintenance, photograph the old cartridge before disposal. If it shows unusual discoloration or heavy sediment loading, your replacement interval may need to shorten.
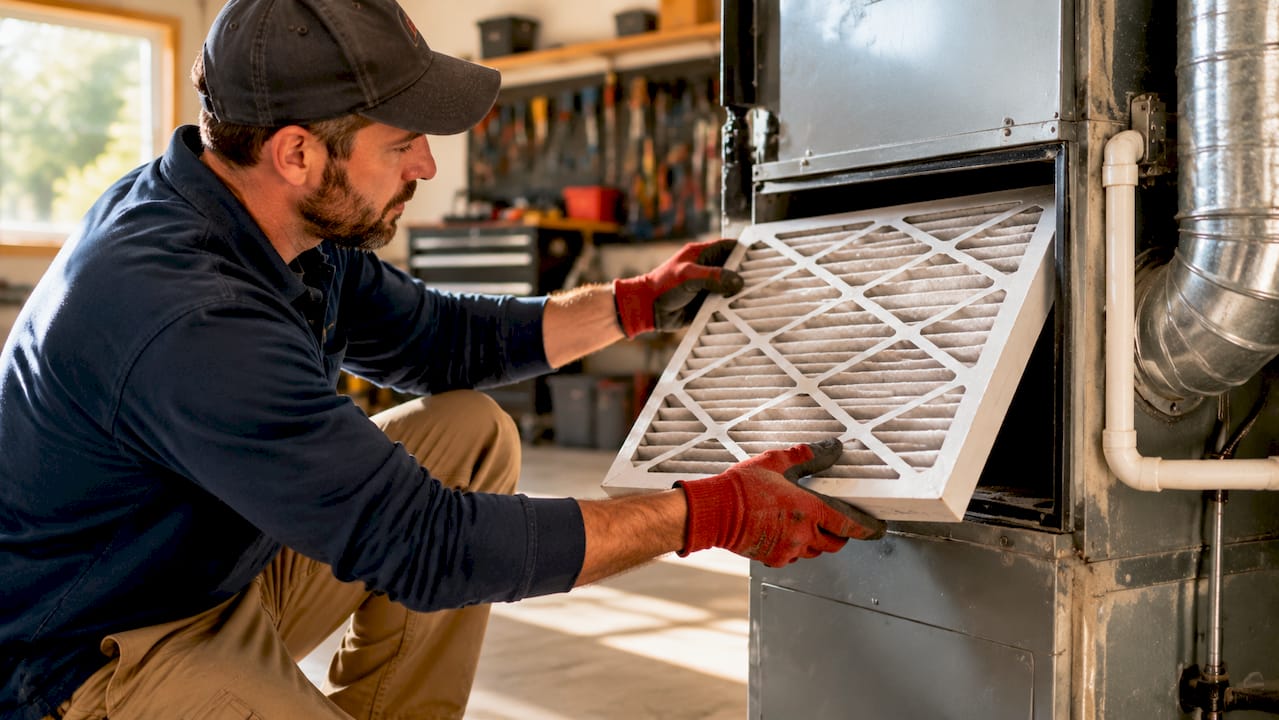
How do you replace HVAC air filters step by step?
An HVAC filter change guide follows a simpler process than water filters, but two mistakes cause serious damage. Getting the airflow direction wrong and leaving gaps around the filter frame are both common and both avoidable.
- Turn off your HVAC system at the thermostat. Do not just set it to fan-off. Cut power at the thermostat so the blower does not pull air during the swap.
- Locate the filter slot. Most systems have a return air vent on a wall or ceiling, or a filter slot on the air handler cabinet itself.
- Slide out the old filter. Hold it flat as you remove it. A tilted filter dumps accumulated dust back into the return air stream.
- Note the airflow arrow on the old filter frame. The arrow points toward the blower motor, not toward the return duct. This direction is not optional.
- Check the filter size. Read the dimensions printed on the old filter frame. Common sizes include 16x20x1, 20x25x1, and 16x25x1 inches. Buy the exact match.
- Select the correct MERV rating. MERV 8 filters work for most homes. MERV 11 or 13 filters capture finer particles but restrict airflow more. Check your system manual before going above MERV 11.
- Insert the new filter with the arrow pointing toward the blower motor. Installing an air filter backward risks collapsing the filter media into the blower, damaging components.
- Check the fit. A snug, gap-free fit is required for the filter to work. If you can see light around the edges or the filter shifts when you push it, air is bypassing the media entirely.
- Write the installation date on the filter frame with a permanent marker. This is more reliable than a phone reminder.
- Restore power at the thermostat.
Safety note: A backward filter does not just reduce efficiency. The media can collapse and get pulled into the blower wheel, causing mechanical failure that costs hundreds of dollars to repair.
Pro Tip: Set a physical reminder by writing your next change date on a piece of tape stuck to the air handler cabinet. Marking installation dates on the filter frame itself is the single most reliable way to stay on schedule.
For homeowners also evaluating air purification options beyond HVAC filters, Cowayswaterpurifier’s air purifier selection guide covers standalone units that complement your HVAC system.
What are common troubleshooting tips and mistakes to avoid?
Most problems after a filter change come down to four issues: leaks, bypassed air, skipped flushing, and wrong orientation. Each one is preventable.
Water filter troubleshooting
- Leak at the housing: Remove the housing and inspect the O-ring groove for grit or debris. Even a microscopic grain of sand breaks the seal under pressure. Clean the groove with a cotton swab before reassembling.
- Dripping after reassembly: The housing is either undertightened or the O-ring is pinched. Disassemble, recheck the O-ring position, and reassemble to snug plus a quarter-turn.
- Cloudy or gray water after replacement: This is carbon fines from a new filter. Flush an additional gallon and the water will clear.
- Reduced flow after replacement: The new cartridge may be installed backward. Check the flow arrow or gasketed end and reinstall correctly.
Air filter troubleshooting
- Increased dust on surfaces after filter change: The filter has gaps around the frame. Remove it, check the dimensions, and confirm the fit is tight on all four sides.
- Higher energy bills after filter change: A MERV rating that is too high for your system restricts airflow and forces the blower to work harder. Drop to MERV 8 if you upgraded beyond your system’s specification.
- Filter looks dirty within two weeks: Your home has an elevated particulate load from pets, renovation work, or high outdoor pollen. Shorten your replacement interval to every 30 days during peak seasons.
Pro Tip: Replace filters slightly early rather than late. A filter at the end of its life does not just stop working. It can push trapped contaminants back into your water or air supply.
Consistency matters more than perfection. Marking installation dates and setting reminders consistently improves long-term air and water quality more than any single replacement technique.
Key takeaways
Proper filter replacement requires the right tools, correct orientation, a thorough flush, and a written installation date to maintain water and air quality over time.
| Point | Details |
|---|---|
| Replace on schedule, not by appearance | Sediment filters need changes every 3–6 months; carbon filters every 6–12 months regardless of how water looks. |
| O-ring cleanliness prevents leaks | Clean the O-ring groove with a cotton swab before every reassembly to remove sand and debris. |
| Airflow direction is non-negotiable | The arrow on an HVAC filter must point toward the blower motor to prevent media collapse and equipment damage. |
| Flush new water filters completely | Run approximately 2 gallons through a new water filter to clear carbon fines and trapped air before drinking. |
| Write the date, not just a reminder | Marking the installation date on the filter frame or housing is more reliable than digital reminders for staying on schedule. |
What I’ve learned from years of watching homeowners skip this step
Most people treat filter replacement as a chore they do when they notice a problem. That is the wrong frame entirely. By the time your water tastes off or your HVAC is struggling, the filter has already been failing for weeks.
The detail that surprises most homeowners is the O-ring groove. I have seen pristine-looking housings leak immediately after reassembly because of a single grain of sand in that groove. You cannot see it. You have to clean it every time, without exception. That one habit eliminates the majority of post-replacement leaks.
The other thing I keep coming back to is the flush step for water filters. Two gallons sounds like a lot when you are standing at the sink. But carbon fines are real, and skipping the flush means your first glass of water from a new filter contains residue from the manufacturing process. The flush is not optional maintenance. It is part of the installation.
For air filters, the backward installation mistake is more common than it should be. The arrow on the filter frame is there for a reason. A collapsed filter media pulled into a blower wheel is a repair bill, not a filter change. Thirty seconds of attention to that arrow saves hundreds of dollars.
My honest recommendation: treat your filter replacement schedule the same way you treat an oil change. Put the next date in writing, on the unit itself, the day you finish the job. That single habit does more for your home’s air and water quality than any premium filter upgrade.
— Soldierboy
How Cowayswaterpurifier makes filter maintenance easier

Cowayswaterpurifier designs its water purifiers and air purifiers with filter accessibility in mind. Coway systems, including countertop, under-sink, and large-capacity models, are built so homeowners can complete a filter change without specialized tools or professional service calls. The brand’s focus on advanced filtration technology means each replacement filter is engineered to deliver consistent performance from the first use. If you want to understand what your water goes through before it reaches your glass, Cowayswaterpurifier’s water purification process guide explains each filtration stage in plain language. Explore the full range of Coway water care products to find the system that fits your home.
FAQ
How often should I replace my home water filter?
Sediment filters need replacement every 3–6 months; carbon filters every 6–12 months. Replace on schedule even if the water looks and tastes fine, since chemical capacity degrades before physical clogging becomes visible.
What happens if I install an air filter backward?
Installing an air filter backward can collapse the filter media into the blower motor, causing mechanical damage. Always confirm the airflow arrow points toward the blower before closing the filter slot.
Why is my water cloudy after replacing a water filter?
Cloudy or gray water after a new filter installation is caused by carbon fines released from a fresh carbon block cartridge. Flush approximately 2 gallons through the system and the water will clear completely.
How do I know if my air filter fits correctly?
A correctly fitted air filter has no visible gaps around the frame and does not shift when you press it lightly. Visible light or a shifting filter indicates air bypass, which means unfiltered air is entering your system.
How do I prevent leaks after replacing a whole-house water filter?
Clean the O-ring groove thoroughly before reassembly, lubricate the O-ring with food-grade silicone grease, and tighten the housing to snug plus a quarter-turn only. Overtightening damages the O-ring and causes leaks just as reliably as undertightening.
Recommended
- Step by Step Filter Maintenance for Water and Air Purifiers – Coway Water Purifier
- Complete Water Filtration Process Guide for Homeowners – Coway Water Purifier
- All Water Filters: A Homeowner’s Buying Guide for 2026 – Coway Water Purifier
- Water Filter Replacement Workflow for Safe Drinking Water – Coway Water Purifier