
Uncategorized
Essential tips to maintain your air purifier for cleaner air
May
TL;DR:
- Regular maintenance prolongs your air purifier’s lifespan, prevents recirculation of contaminants, and ensures optimal performance.
- Monitoring airflow, odors, and indicator lights helps detect issues early, especially in high-pollution environments requiring more frequent checks.
- Customizing your cleaning schedule based on household use and environmental factors guarantees cleaner indoor air and better health protection.
Skipping air purifier maintenance is one of those quiet mistakes that adds up fast. Stale odors linger, allergy symptoms creep back in, and your device works harder than it should, shortening its lifespan and costing you more in the long run. A poorly maintained purifier doesn’t just underperform; it can actually recirculate the particles it’s supposed to capture. This guide walks you through every practical step you need to keep your air purifier running at its best, from gathering the right tools to knowing exactly when something needs your attention.
Table of Contents
- Gathering tools and understanding your purifier
- Step-by-step: Cleaning and replacing filters
- Monitoring performance and troubleshooting issues
- Maintenance frequency: Adjusting for your environment
- Our take: Why most advice on air purifier maintenance falls short
- Upgrade your air with curated guides and top purifier picks
- Frequently asked questions
Key Takeaways
| Point | Details |
|---|---|
| Routine matters | Regular maintenance ensures optimal air quality and extends purifier lifespan. |
| Adapt for usage | Filter replacement schedules should be adjusted based on environmental factors like pets or cooking. |
| Follow indicators | Device indicator lights and performance symptoms are your best early warning for maintenance needs. |
| Avoid common mistakes | Don’t wash HEPA filters unless instructed and always follow proper filter orientation when reinstalling. |
| Connect to upgrades | Well-maintained purifiers work best when paired with expert guides and proven products. |
Gathering tools and understanding your purifier
With a clear understanding of why maintenance matters, the next step is gathering what you’ll need and learning how your specific device works. Not all purifiers are alike. A unit designed for a small bedroom has different maintenance needs than one running around the clock in an open-plan living area.
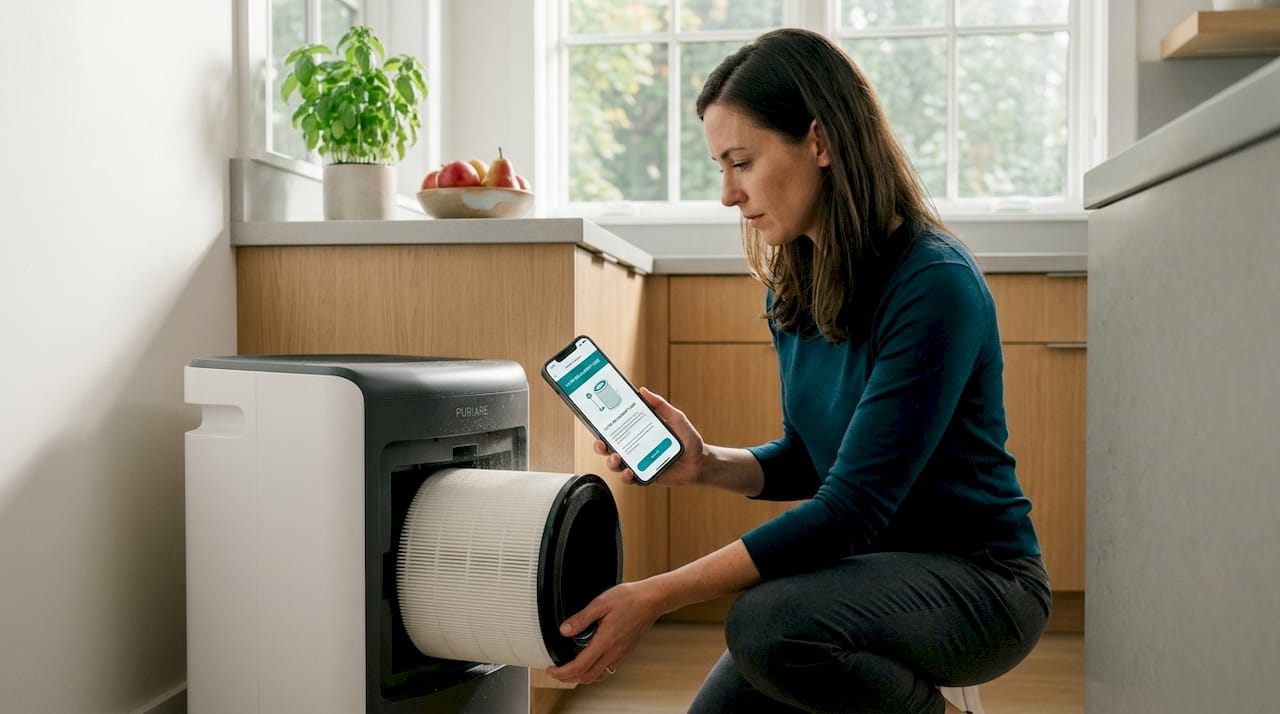
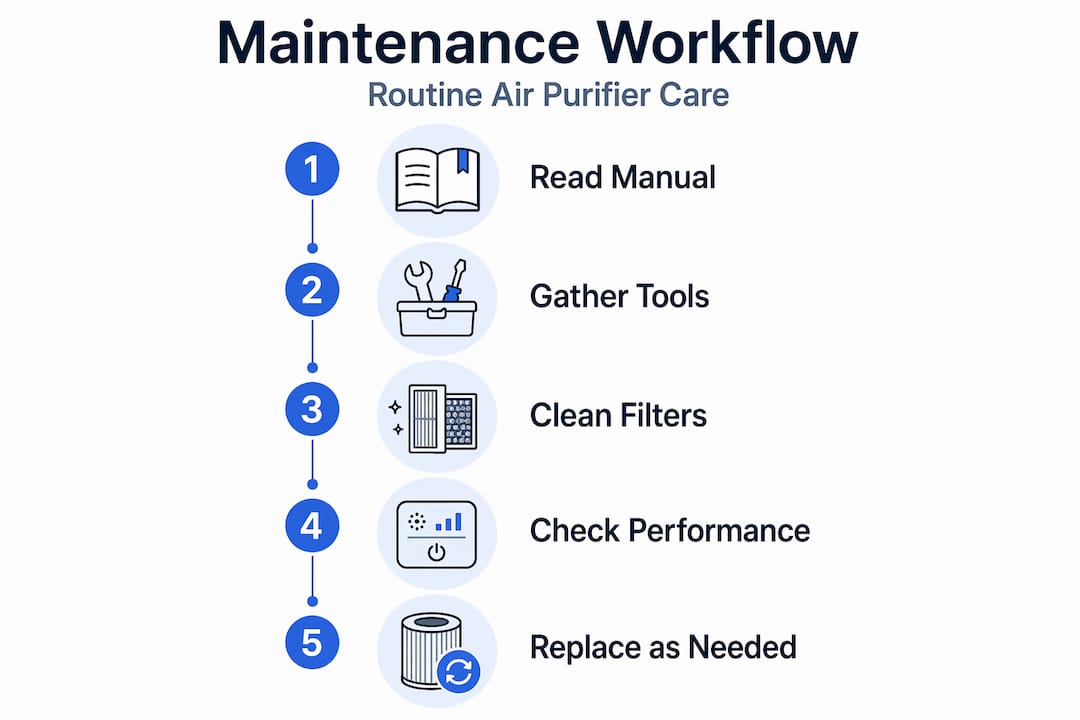
Start with your owner’s manual. This sounds obvious, but most homeowners skim it once and forget it exists. The manual tells you which filters your model uses, what the indicator lights mean, and how frequently the manufacturer recommends cleaning. These details matter because skipping them means guessing, and guessing wastes time and money.
Your air purification checklist is a great starting point before diving into hands-on maintenance. Knowing what to check before and after each session keeps you organized and makes the whole process less overwhelming.
Here’s what you’ll typically need on hand before starting:
- A soft-bristled brush or small vacuum with a brush attachment
- A dry, lint-free microfiber cloth
- Mild dish soap (for washable pre-filters only)
- A small basin for rinsing washable components
- Replacement filters specific to your model (keep at least one set ready)
- A clean, flat surface to work on
These items cover most maintenance scenarios. Keeping them together in one place means you’re not scrambling every few months when the filter light comes on.
| Component | Cleaning method | Replacement timeline |
|---|---|---|
| Pre-filter | Vacuum or rinse (if washable) | Every 2 to 4 weeks |
| HEPA filter | Gentle vacuum (no water) | Every 6 to 12 months |
| Carbon/activated filter | Cannot be cleaned effectively | Every 3 to 6 months |
| Device exterior | Dry microfiber wipe | Monthly |
| Air intake vents | Soft brush or vacuum | Monthly |
One important factor that respiratory health and contaminants specialists point out is that pollutant exposure levels directly affect how quickly filters saturate. If your household has pets, smokers, or you’ve recently dealt with wildfire smoke, those filters absorb contaminants much faster than typical schedules assume. Per filter replacement guidance, running your purifier 24/7 or under heavy pollutant loads means filter replacement and pre-filter cleaning will typically need to happen sooner than standard schedules suggest, with performance symptoms being your best guide.
Having a solid maintenance workflow in place from the start will save you from reactive scrambles later.
Step-by-step: Cleaning and replacing filters
Once you have the right tools and understand your purifier, it’s time to tackle filter maintenance, which is the core of what keeps your air clean. This process doesn’t take long when you know what you’re doing, but doing it wrong can damage filters or reduce effectiveness.
Follow these steps for a thorough cleaning session:
- Power down and unplug the unit. Never clean or open a running purifier. Wait five minutes after unplugging to allow internal components to settle.
- Remove the outer casing. Most units have a panel or door that opens by pressing tabs or turning a latch. Refer to your manual if it’s not obvious.
- Take out the pre-filter first. This is usually the outermost layer, designed to catch larger particles like dust, hair, and pet dander. Shake it gently over a trash can outside.
- Vacuum the pre-filter. Use the brush attachment on your vacuum to remove embedded debris. If your pre-filter is labeled washable, rinse it under cool water, let it dry completely (at least 24 hours), and reinstall only when bone dry.
- Inspect the HEPA and carbon filters. Look for visible discoloration, heavy particle buildup, or a strong odor. A light gray color on a HEPA filter is normal. A dark brown or black surface means it’s saturated.
- Vacuum the HEPA filter surface gently. Use the lowest suction setting and the soft brush attachment. Do not apply water or any cleaning product to a HEPA filter. The fibers will break down and the filter will lose its ability to trap fine particles.
- Replace carbon and HEPA filters as needed. Check the table in the previous section for timing guidelines. When in doubt, replace rather than extend.
- Wipe down the interior housing. Use your dry microfiber cloth to remove any accumulated dust inside the unit before reinstalling filters.
- Reinstall filters in the correct order. Incorrect orientation is a surprisingly common mistake. Most HEPA filters have an airflow arrow printed on the frame. Align it with the direction shown in your manual.
- Plug in and restart the unit. Reset the filter indicator light if your model has one (usually by holding a specific button for a few seconds).
“The most common cleaning mistake we see is homeowners wetting a HEPA filter thinking it’ll clean better. Water destroys the electrostatic charge that helps HEPA fibers trap fine particles, making the filter nearly useless even after it dries.” This is why the purifier cleaning process should always follow the specific guidance for each filter type.
Pro Tip: Label your replacement filters with the purchase date using a small piece of masking tape. When you pull them out months later, you’ll know exactly how old they are without guessing.
Monitoring performance and troubleshooting issues
Now that you know how to clean and change filters, the next step is staying alert to performance changes between sessions. Catching problems early keeps your air quality consistent and prevents small issues from turning into expensive repairs.
Three things to monitor regularly:
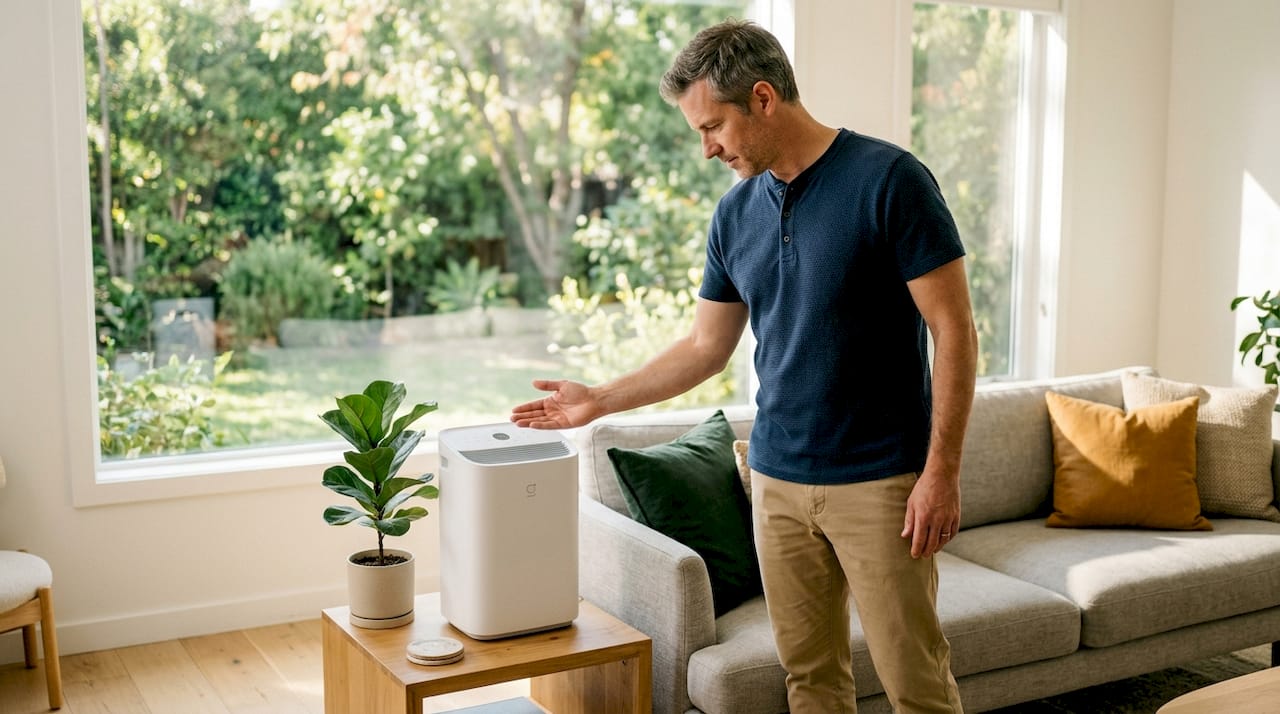
Airflow strength. Hold your hand near the air outlet. You should feel a consistent, strong stream. Weak airflow is almost always a sign of a clogged filter or a blocked air intake vent. Check both before assuming anything is broken mechanically.
Odor output. A properly functioning purifier should be producing neutral, clean-smelling air. If you notice a musty smell coming from the outlet, the carbon filter is likely saturated and needs replacement. A burning smell means you should unplug the unit immediately and contact the manufacturer.
Indicator lights. Most modern air purifiers have a filter change indicator that tracks either run time or a sensor-based estimate of filter saturation. Don’t ignore these lights. As filter change indicators show, responding to them promptly is one of the simplest ways to maintain air quality without overthinking schedules.
The reason these checks matter goes beyond comfort. Environmental health impact research confirms that poor indoor air quality affects physical health in measurable ways, especially for people with allergies, asthma, or respiratory sensitivities. Understanding why maintenance matters is the foundation for sticking to a routine.
| Symptom | Likely cause | Recommended action |
|---|---|---|
| Weak airflow | Clogged pre-filter or HEPA filter | Clean pre-filter; check HEPA for saturation |
| Musty or stale odor | Saturated carbon filter | Replace carbon filter immediately |
| Burning smell | Electrical issue | Unplug and contact manufacturer |
| Filter light stays on after reset | Sensor malfunction or wrong reset | Consult manual for correct reset sequence |
| Increased allergy symptoms | Overdue filter replacement | Replace HEPA filter and deep-clean unit |
| Loud or rattling noise | Loose filter or debris inside unit | Open unit, reseat filters, clear debris |
Keep these safety practices in mind at all times:
- Always unplug the unit before opening it
- Never operate the purifier without all filters installed
- Keep the purifier at least 12 inches from walls and furniture for proper airflow
- Store replacement filters in a dry, sealed bag until ready to use
- Avoid using the unit in excessively humid spaces (above 80% relative humidity)
Per filter maintenance research, heavy pollutant environments will trigger performance symptoms earlier than standard timelines predict. Let what you observe guide you as much as what the calendar says.
Maintenance frequency: Adjusting for your environment
A strong maintenance routine also depends on how often it needs to happen. The answer varies significantly depending on your household and how you use the device.
Standard households (no pets, no smokers, moderate cooking, purifier runs 8 to 12 hours daily):
- Pre-filter cleaning: Every 2 to 4 weeks
- HEPA filter check: Every 3 months, replacement at 6 to 12 months
- Carbon filter replacement: Every 3 to 6 months
- Full unit cleaning: Every 1 to 2 months
High-demand households (pets, smokers, frequent cooking, allergy sufferers, or 24/7 operation):
- Pre-filter cleaning: Every 1 to 2 weeks
- HEPA filter check: Every 4 to 6 weeks, replacement at 3 to 6 months
- Carbon filter replacement: Every 6 to 8 weeks
- Full unit cleaning: Monthly
The gap between these two scenarios is significant. A pet owner with two dogs running their purifier nonstop will blow through a HEPA filter in three months while a single-occupant apartment dweller with no pets might comfortably go ten months.
Adapting your schedule to your actual environment requires paying attention to a few key signals:
- Does the air feel less fresh even after a recent cleaning session?
- Are allergy symptoms worse indoors recently?
- Is the airflow noticeably weaker than when the filter was new?
- Is the pre-filter visibly gray or brown within just a week?
If you answered yes to any of these, your household is likely in the high-demand category and needs a more aggressive maintenance schedule. The filter replacement guidelines are clear: performance symptoms and device indicators should drive your schedule when your environment doesn’t fit the standard mold.
Pro Tip: Set a recurring phone reminder for pre-filter checks every two weeks. It takes less than five minutes and prevents the “out of sight, out of mind” neglect that shortens device life. When choosing your next unit, the how to select an air purifier guide helps match device specs to your specific environment.
Our take: Why most advice on air purifier maintenance falls short
Having covered the practical steps, here’s an honest perspective on what most maintenance guides completely overlook.
Most online advice on air purifier maintenance is written for a hypothetical average home that doesn’t exist. The “replace your HEPA filter every 12 months” instruction assumes a moderate climate, minimal cooking, no pets, and a device running maybe eight hours a day. For a huge portion of homeowners, none of those conditions apply.
The problem isn’t that manufacturers give wrong advice. It’s that they give generic advice designed for liability protection rather than real-world accuracy. Saying “replace every 6 to 12 months” covers them legally. It doesn’t tell you what to do when you’re running three fans worth of purified air through a home with two golden retrievers and a weekly habit of cooking aromatic curries.
What actually works is treating your device like a living system rather than a set-it-and-forget-it appliance. That means building the habit of physically checking filters rather than just waiting for a light to blink. It means learning what your specific indoor environment looks like on a bad air day, whether that’s heavy pollen season, smoke from nearby fires, or winter months when windows stay shut and humidity drops. Filter schedules based on heavy use confirm that static timelines simply don’t account for these real variables.
We also think homeowners underestimate the importance of placement in filter longevity. A purifier stuffed into a corner or placed behind furniture has to work twice as hard to move air through the room, which means filters clog faster. Repositioning the unit to an open area can genuinely extend filter life by weeks.
The shift in mindset we’d encourage is moving from “maintenance as a chore” to “maintenance as a diagnostic habit.” Once you start noticing how your filters look and how the airflow feels, you’ll catch problems before they affect your health. Use the streamline selection workflow to also think critically about whether your current device is appropriately sized for your space.
Upgrade your air with curated guides and top purifier picks
Knowing how to maintain your purifier is the first step. Knowing whether your current device is still the right fit for your home is the next.

Whether you’re troubleshooting an aging unit or thinking about upgrading to something more powerful, the best air purifier guide breaks down top models by room size, filter type, and household need, so you can make a confident, informed decision. If you’re ready to explore specific products, the full range of air care products on our site includes options built for everyday homes and high-demand environments alike. Better maintenance and better equipment work together to protect the air you and your family breathe every day.
Frequently asked questions
How often should I replace my air purifier filter?
Most filters should be replaced every 6 to 12 months, but heavy usage or high pollution levels may require more frequent changes. Always follow device indicators and manufacturer guidance as your primary reference, since actual replacement timing depends on your specific usage conditions.
What are the signs my air purifier needs maintenance?
Reduced airflow, persistent odors coming from the outlet, and lit indicator lights are the clearest signs your purifier needs cleaning or filter replacement. In heavy pollutant environments, these symptoms appear earlier than standard schedules predict.
Can I clean a HEPA filter or should it always be replaced?
Most HEPA filters are not designed to be washed; wetting them breaks down the fiber structure that captures fine particles. Gently vacuuming the surface can remove loose surface debris, but true cleaning is not possible, and replacement on schedule is always the right call.
What’s the best way to monitor air purifier performance between cleanings?
Check for changes in airflow strength, note any unusual smells from the outlet, and observe the behavior of indicator lights. Physically inspecting the pre-filter every two weeks takes only a few minutes and gives you an early warning before performance drops noticeably.
Recommended
- Air purifier maintenance workflow for cleaner home air – Coway Water Purifier
- Air purification checklist: 6 steps for healthier home air – Coway Water Purifier
- Step by Step Filter Maintenance for Water and Air Purifiers – Coway Water Purifier
- 7 Must-Have Air Purifier Features for Healthier Homes – Coway Water Purifier