
Uncategorized
Air Purifier Cleaning Process for Optimal Performance
Feb
Every American homeowner who cares about their family’s health knows that clean indoor air makes a real difference. Keeping an air purifier free of dust and debris is a simple but crucial step in reducing allergens and odors in your home. By following a systematic, safe cleaning process, you can protect your investment and enjoy fresher, healthier air every day.
Table of Contents
- Step 1: Prepare Air Purifier for Cleaning
- Step 2: Remove and Inspect Air Filters
- Step 3: Clean Filters and Internal Components
- Step 4: Wipe Down Exterior Surfaces
- Step 5: Reassemble and Test Air Purifier
Quick Summary
| Essential Insight | Detailed Explanation |
|---|---|
| 1. Unplug Before Cleaning | Always unplug your air purifier before starting any maintenance to avoid electrical hazards and ensure safety. |
| 2. Inspect Filters Regularly | Regularly check the condition of your filters to determine when replacements are needed, ensuring optimal air quality. |
| 3. Use Appropriate Cleaning Techniques | Employ specific cleaning methods for each filter type to avoid damage and maintain the efficiency of your air purifier. |
| 4. Keep a Maintenance Log | Maintain a log of cleaning and replacement dates to help track the upkeep of your air purifier effectively. |
| 5. Test After Reassembly | Always test the air purifier after cleaning and reassembly to confirm it operates effectively and safely. |
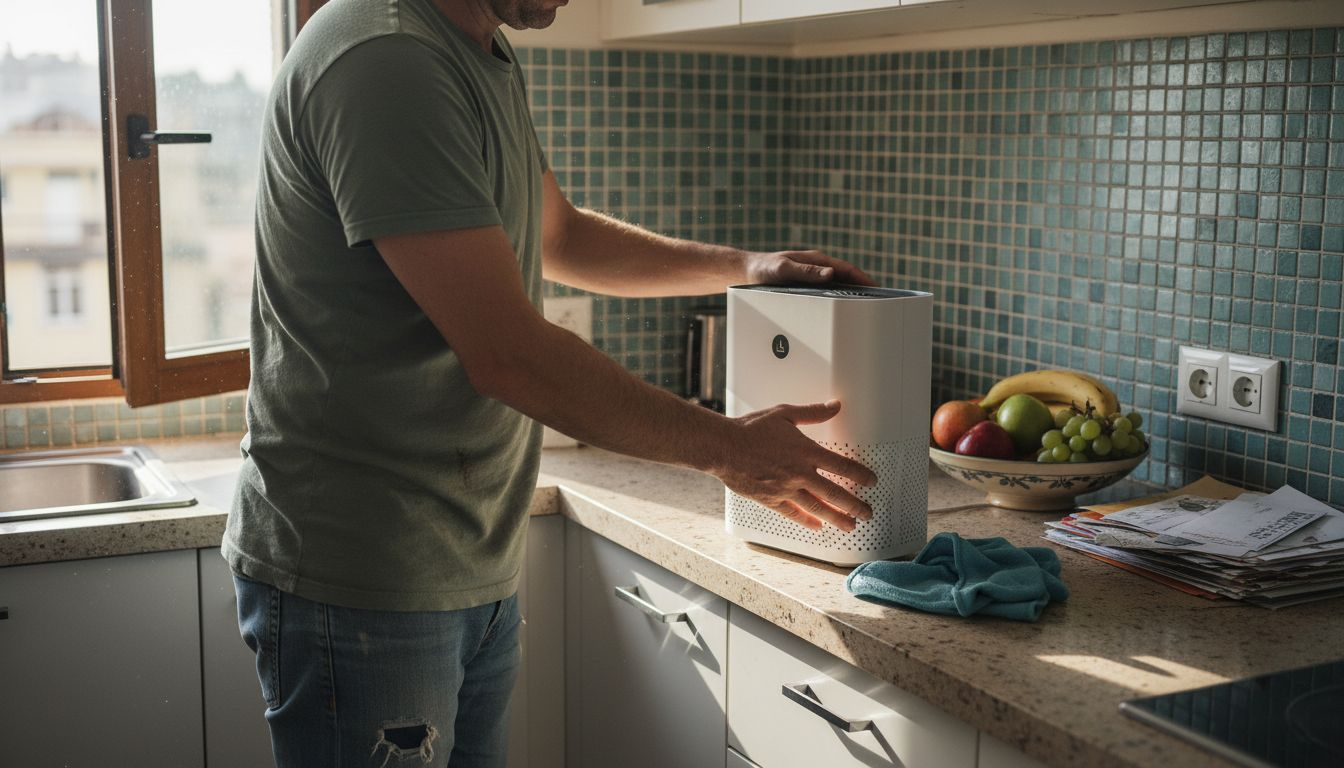
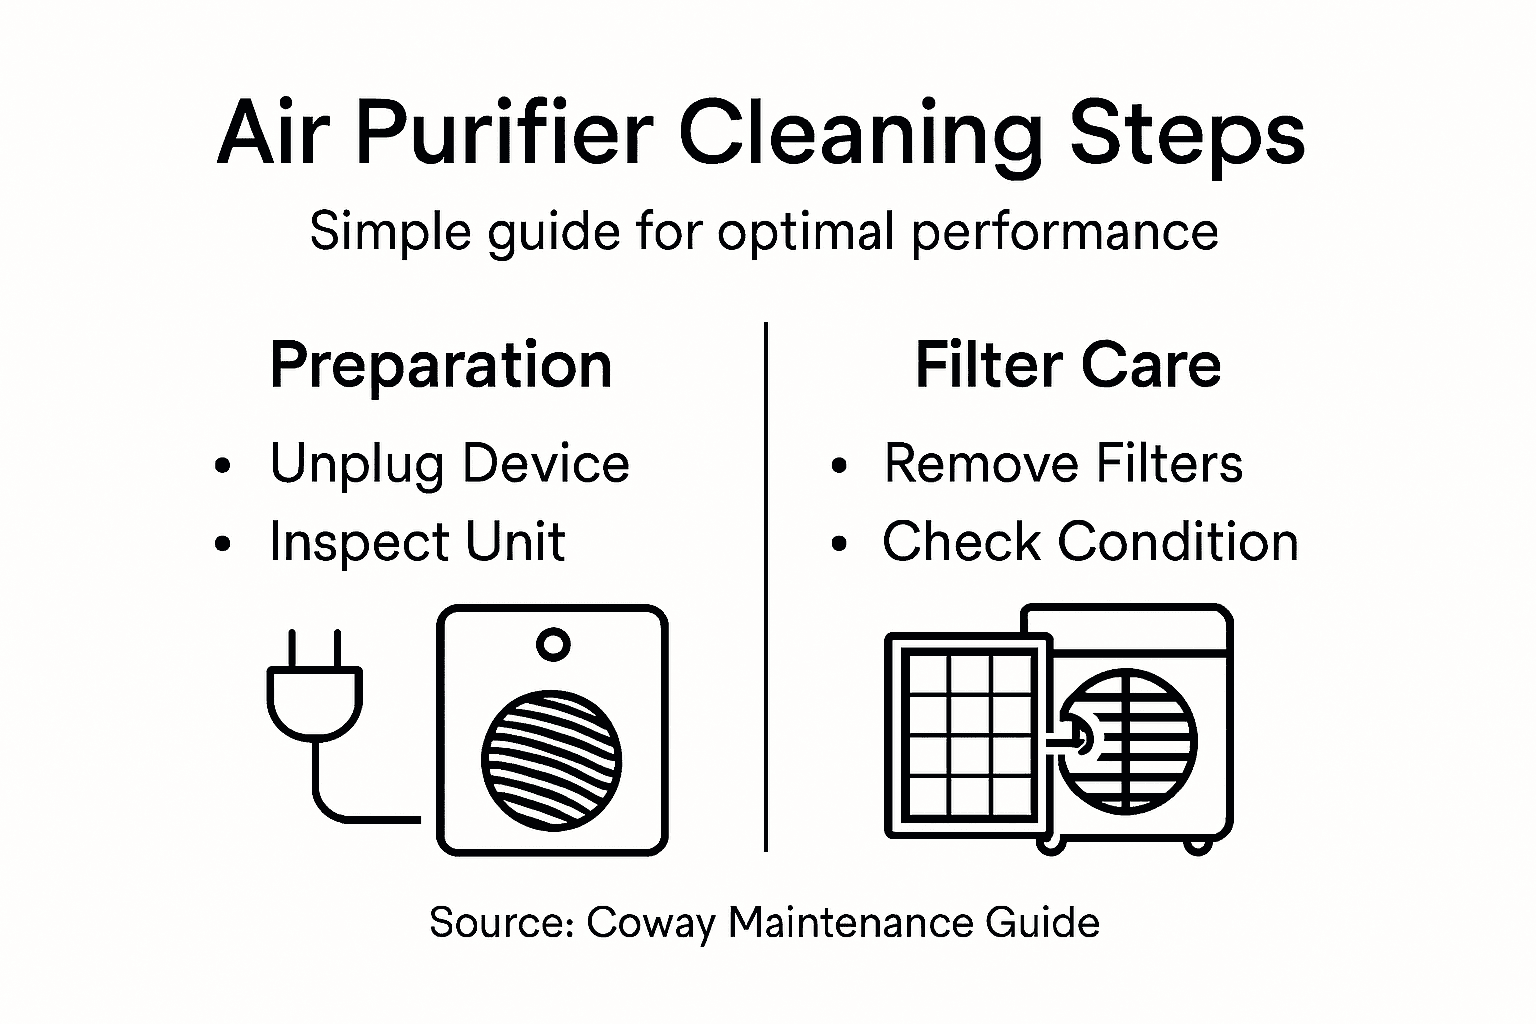
Step 1: Prepare Air Purifier for Cleaning
Before diving into air purifier maintenance, you need to properly prepare your device for safe and effective cleaning. This crucial first step ensures you can thoroughly clean your air purifier without risking damage or personal injury.
To begin, you’ll want to follow a systematic approach that protects both your device and yourself. Here are the essential preparation steps:
- Unplug the device completely from any electrical outlet
- Move the air purifier to a clean, stable work surface
- Gather necessary cleaning supplies like soft cloths and mild cleaning solutions
- Ensure good lighting and ventilation in your workspace
Carefully inspect the air purifier for any visible dust accumulation or damage before starting the cleaning process. You’ll want to identify the specific types of filters in your device, which typically include:
Here’s a reference table explaining different air purifier filter types and their unique roles:
| Filter Type | Primary Function | Typical Lifespan |
|---|---|---|
| Pre-filter | Captures hair, dust, and fibers | 1-3 months |
| HEPA filter | Removes pollen, smoke, allergens | 6-12 months |
| Activated carbon | Absorbs odors, gases, VOCs | 3-6 months |
- Pre-filters for large particle capture
- HEPA filters for microscopic particle removal
- Activated carbon filters for odor and chemical elimination
Proper preparation prevents potential damage and ensures a thorough cleaning process.
Pro tip: Always consult your specific air purifier’s manual for unique manufacturer recommendations before beginning any maintenance routine.
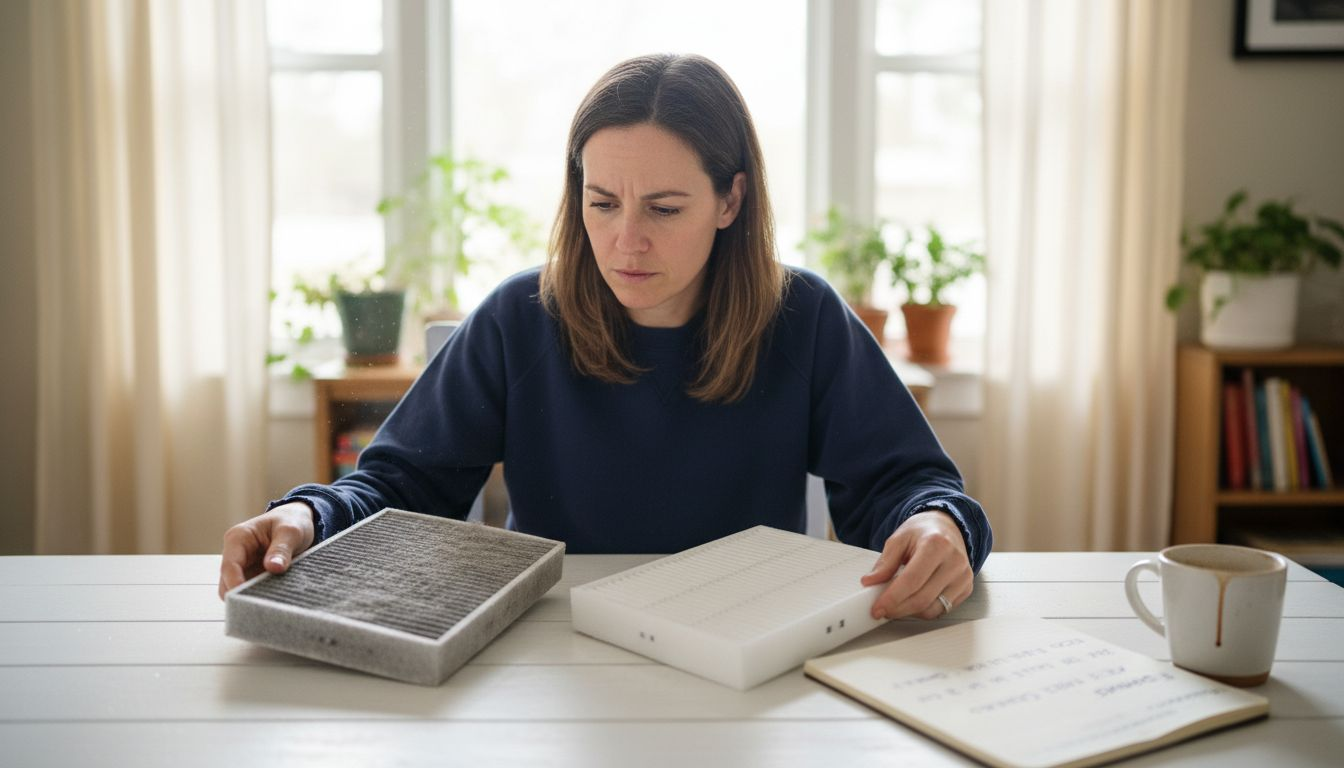
Step 2: Remove and Inspect Air Filters
Removing and inspecting your air purifier’s filters is a critical maintenance step that ensures optimal air quality and device performance. Careful filter examination prevents potential air quality issues and helps you determine when replacement is necessary.
To remove and inspect your air filters, follow these detailed steps:
- Locate the filter compartment on your air purifier
- Carefully open the filter housing without forcing any components
- Remove filters gently, noting their original orientation
- Inspect each filter type thoroughly:
- Pre-filters: Check for large particle accumulation
- HEPA filters: Look for discoloration or visible dust buildup
- Activated carbon filters: Assess for reduced odor absorption
Not all filters can be cleaned – some require complete replacement to maintain air purifier efficiency.
When examining your filters, compare them against a clean white background to accurately assess their condition. Visible grayness or significant discoloration typically indicates it’s time for a replacement.
Pro tip: Keep a maintenance log tracking filter replacement dates to establish a consistent cleaning and replacement schedule.
Step 3: Clean Filters and Internal Components
Cleaning your air purifier’s filters and internal components is essential for maintaining optimal air quality and device performance. Air filtration maintenance requires careful attention to ensure your device continues working effectively.
Follow these systematic cleaning steps for different filter types:
- Pre-filters: Can typically be vacuumed or gently washed
- HEPA filters: Should never be washed – replace when dirty
- Activated carbon filters: Inspect for reduced odor absorption
For internal component cleaning, you’ll need:
- Soft microfiber cloth
- Compressed air canister
- Mild cleaning solution
- Soft-bristled brush
Cleaning internal components requires gentle technique:
- Unplug the device completely
- Use compressed air to remove dust from fan blades
- Wipe down external surfaces with slightly damp microfiber cloth
- Avoid getting moisture near electrical components
Proper cleaning prevents performance degradation and extends your air purifier’s lifespan.
Carefully reassemble all components after thorough cleaning, ensuring each part is completely dry before reconnecting.
Pro tip: Wear clean cotton gloves during internal cleaning to prevent oils from your skin transferring onto delicate components.
Step 4: Wipe Down Exterior Surfaces
Cleaning the exterior of your air purifier is crucial for maintaining its appearance and preventing dust accumulation. Surface cleaning helps remove germs and dirt while keeping your device looking pristine.
To effectively clean the exterior surfaces, you’ll need:
- Soft microfiber cloth
- Mild cleaning solution
- Soft-bristled brush (optional)
- Distilled water
Follow these detailed cleaning steps:
- Unplug the air purifier completely
- Prepare your cleaning materials
- Dampen microfiber cloth slightly
- Gently wipe all exterior surfaces
Cleaning techniques to remember:
- Avoid saturating the surface with liquid
- Use gentle, circular motions
- Pay special attention to control panels and buttons
- Dry immediately with a clean, dry microfiber cloth
Gentle cleaning prevents surface damage and maintains your air purifier’s professional appearance.
Ensure all surfaces are completely dry before plugging the device back in or turning it on.
Pro tip: Use a soft, dry paintbrush to remove dust from hard-to-reach crevices and button edges before wiping down.
Step 5: Reassemble and Test Air Purifier
With all cleaning steps completed, it’s time to carefully reassemble your air purifier and verify its performance. Proper reassembly ensures optimal air purification and maintains your device’s effectiveness.
Reassembly requires precise attention to detail:
- Reinstall filters in their original orientation
- Ensure all components are completely dry
- Check that seals and gaskets are intact
- Align filters correctly in their designated slots
Follow these testing steps:
- Position the air purifier in its original location
- Plug in the device
- Turn on the unit
- Check operation at different fan speeds
Key performance indicators to monitor:
- Consistent airflow
- Normal operating sounds
- No vibration or unusual movements
- Smooth control panel functionality
Careful reassembly and testing protect your investment and ensure continued air quality.
If you notice any irregular performance, double-check your reassembly or consult the manufacturer’s manual.
Pro tip: Keep a small notebook to track maintenance dates and any observations during your air purifier’s testing phase.
The table below summarizes maintenance actions and their benefits for air purifiers:
| Maintenance Action | Benefit Achieved |
|---|---|
| Regular filter checks | Maintains high air quality |
| Internal dust removal | Extends device lifespan |
| Exterior wiping | Prevents dust and germ buildup |
| Proper reassembly | Ensures safe, efficient use |
Keep Your Air Pure with Expert Solutions from Coway
Maintaining your air purifier for optimal performance requires regular filter checks, gentle cleaning, and proper reassembly to ensure the best air quality in your home. If you find the process of inspecting pre-filters, HEPA filters, and activated carbon filters overwhelming or want to upgrade to a device that offers advanced filtration technology with less hassle, explore the trusted options at Uncategorized Archives – Coway Water Purifier. Here you will discover a wide range of air purifiers designed to simplify your maintenance routine while delivering powerful air cleaning results.

Take control of your indoor air environment today and experience the peace of mind that comes from owning a Coway air purifier. Visit https://cowayswaterpurifier.com now to browse models with features like UV sanitization and comprehensive service plans including free installation and maintenance. Act now to breathe cleaner air effortlessly and keep your home healthy and comfortable all year.
For more tips on maintaining household wellness appliances, check out Uncategorized Archives – Coway Water Purifier and start your journey toward fresher air today.
Frequently Asked Questions
How do I prepare my air purifier for cleaning?
To prepare your air purifier for cleaning, unplug it from the electrical outlet and move it to a clean, stable work surface. Gather soft cloths and mild cleaning solutions to ensure a safe and effective cleaning process.
What steps should I take to remove and inspect the air filters?
To remove and inspect the air filters, locate the filter compartment and carefully open it. Gently remove the filters while noting their original orientation, and inspect them for dust accumulation or discoloration to determine if they need replacement.
How can I clean the internal components of my air purifier?
Clean the internal components of your air purifier by using a soft microfiber cloth and a compressed air canister. Gently wipe down the fan blades and external surfaces, ensuring all components are completely dry before reassembling the unit.
What is the proper way to clean the exterior surfaces of my air purifier?
To clean the exterior surfaces, unplug the air purifier and dampen a microfiber cloth with a mild cleaning solution. Wipe down all surfaces gently and avoid saturating them with liquid, ensuring they dry completely before plugging the device back in.
How can I test my air purifier after cleaning?
After cleaning and reassembling your air purifier, plug it in and turn it on to test its operation. Check for consistent airflow and normal sounds at different fan speeds to ensure everything is functioning correctly.
Why is regular maintenance important for my air purifier?
Regular maintenance is crucial for your air purifier to maintain optimal air quality and performance. Schedule filter checks every 1-12 months, depending on the filter type, and clean internal components routinely to extend your device’s lifespan.
Recommended
- 7 Key Benefits of Air Purifiers for Urban Homeowners – Coway Water Purifier
- How Air Purifiers Remove Allergens at Home – Coway Water Purifier
- How to Assess Indoor Air Quality Effectively at Home – Coway Water Purifier
- How Air Purifiers Trap Particles: Cleaner Homes – Coway Water Purifier
- Huisstofmijt Allergie Keelpijn: Alles Wat U Moet Weten – Mijn Voedsel Intolerantie Test