
Uncategorized
How to test tap water safety: homeowner’s step-by-step guide
Apr
TL;DR:
- Public water reports do not reflect contaminants introduced by home plumbing; independent testing is essential.
- Proper sampling and certified lab tests ensure accurate detection of lead, bacteria, nitrates, and other risks.
- Routine and responsive testing, combined with appropriate filtration, is vital for ongoing water safety.
Your water utility may report full compliance with federal standards, yet the water coming out of your faucet could still carry lead, bacteria, or other contaminants introduced by your own home’s plumbing. Annual Consumer Confidence Reports tell you what left the treatment plant, not what arrives in your glass. That gap is exactly why independent testing matters. This guide walks you through understanding your water source, choosing the right test, collecting samples correctly, and acting on your results so your family can drink with real confidence.
Table of Contents
- Understand your water source and its risks
- What you need to test your tap water safely
- Step-by-step: How to sample and test your tap water
- Interpreting your water test results and next steps
- Our take: Why annual tests are not enough for true water safety
- Enhance your home’s water safety with reliable purification solutions
- Frequently asked questions
Key Takeaways
| Point | Details |
|---|---|
| Know your water source | Public water users get reports, but well owners must test themselves for safety. |
| Choose the right tests | Certified lab or mail-in tests provide the most reliable results for health concerns like lead or PFAS. |
| Follow proper sampling steps | Accurate collection, timing, and storage are crucial for credible results and actionable insights. |
| Act on the results | Use EPA benchmarks to decide when to filter, disinfect, or call professionals, then always retest. |
Understand your water source and its risks
Knowing where your water comes from is the first step toward protecting it. Public water systems serve most American households, and they publish annual Consumer Confidence Reports (CCRs) that document compliance with EPA standards. But CCRs only reflect what the utility delivers to your neighborhood. Once water enters your home’s pipes, it’s on its own. Old lead solder joints, corroded galvanized pipes, and aging fixtures can all introduce contaminants that never appear in any public report.
If you rely on a private well, the responsibility is entirely yours. Private well owners must test their water annually at minimum for bacteria, nitrates and nitrites, pH, and total dissolved solids (TDS). There is no regulatory agency checking your well for you. That’s a fact many rural families don’t realize until a problem surfaces.
The most common contaminants worth testing for include:
- Lead: Leaches from older pipes and fixtures, especially in homes built before 1986
- Coliform bacteria and E. coli: Indicate fecal contamination, often from well issues or flooding
- Nitrates and nitrites: Common near agricultural areas, dangerous for infants
- Total dissolved solids (TDS): A broad indicator of mineral and chemical load
- Arsenic: Naturally occurring in many regions, linked to long-term health effects
- PFAS: Emerging “forever chemicals” found near military bases and industrial sites
- pH: Affects how corrosive your water is to pipes and fixtures
Certain situations call for more frequent testing. These include recent flooding, nearby construction or industrial activity, a new baby in the home, pregnancy, or any recent plumbing repairs. Don’t wait for your water to look or smell different. Most serious contaminants are invisible and odorless.
“Your tap water may meet every legal standard and still carry risks specific to your home’s plumbing, your neighborhood’s geology, or local land use. Testing is the only way to know for certain.”
Pro Tip: Search the EWG Tap Water Database to see what contaminants have been detected in your local utility’s supply. It’s a fast way to prioritize which tests matter most for your area before you spend a dollar on a kit.
Understanding tap water quality at home starts with recognizing that your risk profile is unique. A family in a 1950s brick home near farmland faces very different threats than one in a new suburban build. Learning why test drinking water is the foundation for everything that follows, and it shapes which tools you’ll actually need.
What you need to test your tap water safely
Not all water tests are created equal. The method you choose should match the contaminant you’re targeting. A basic test strip can tell you your water’s pH or hardness in two minutes. It cannot reliably detect lead at low concentrations or identify PFAS compounds. Understanding this distinction saves you money and, more importantly, keeps your family safe.
Home test kits using strips are useful for quick screening of pH, hardness, TDS, and basic bacteria indicators. For anything health-critical, certified mail-in labs or EPA-certified local laboratories are the gold standard.
Here’s a comparison to help you choose:
| Feature | DIY test strips | Certified mail-in lab kit |
|---|---|---|
| Cost | $10 to $50 | $30 to $200+ |
| Reliability | Low to moderate | High |
| Turnaround | Immediate | 5 to 14 business days |
| Contaminant coverage | pH, TDS, hardness, basic bacteria | Lead, bacteria, nitrates, PFAS, arsenic, metals |
| Best for | Quick checks, routine screening | Health decisions, well water, suspected contamination |
Essential materials for a credible test include:
- Sterile sample bottles: Provided by the lab, never reuse containers from home
- First-draw sample containers: Needed specifically for lead testing (water sitting in pipes overnight)
- Insulated shipping bag or cooler: Required to keep bacteria samples chilled during transport
- Chain-of-custody form: Documents your sample from collection to lab analysis
- Permanent marker and labels: For accurate sample identification
Pro Tip: For lead or nitrate testing, always use a certified lab. The EPA maintains a list of state-certified laboratories you can access through your state’s drinking water program. Certification means the lab meets strict accuracy and quality standards, which matters when you’re making health decisions for your family.
If you’re comparing options for your household, reviewing the difference between tap vs filtered water can also help you understand what a filter does and doesn’t remove, which in turn clarifies which contaminants you most need to test for before investing in treatment.
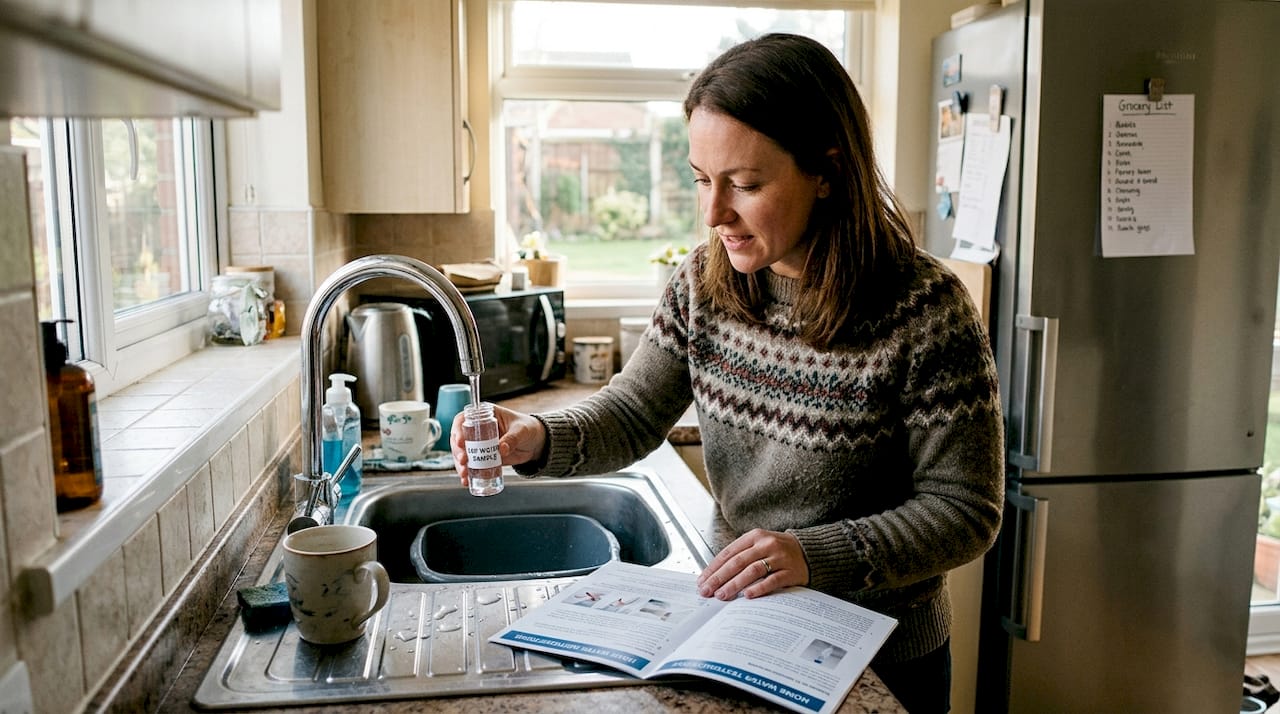
Step-by-step: How to sample and test your tap water
Collecting a water sample sounds simple, but small mistakes can invalidate your results entirely. Follow these steps carefully for accurate, actionable data.
- Choose the right tap. Use the tap you drink from most, typically the kitchen cold water faucet. For lead testing, this is non-negotiable.
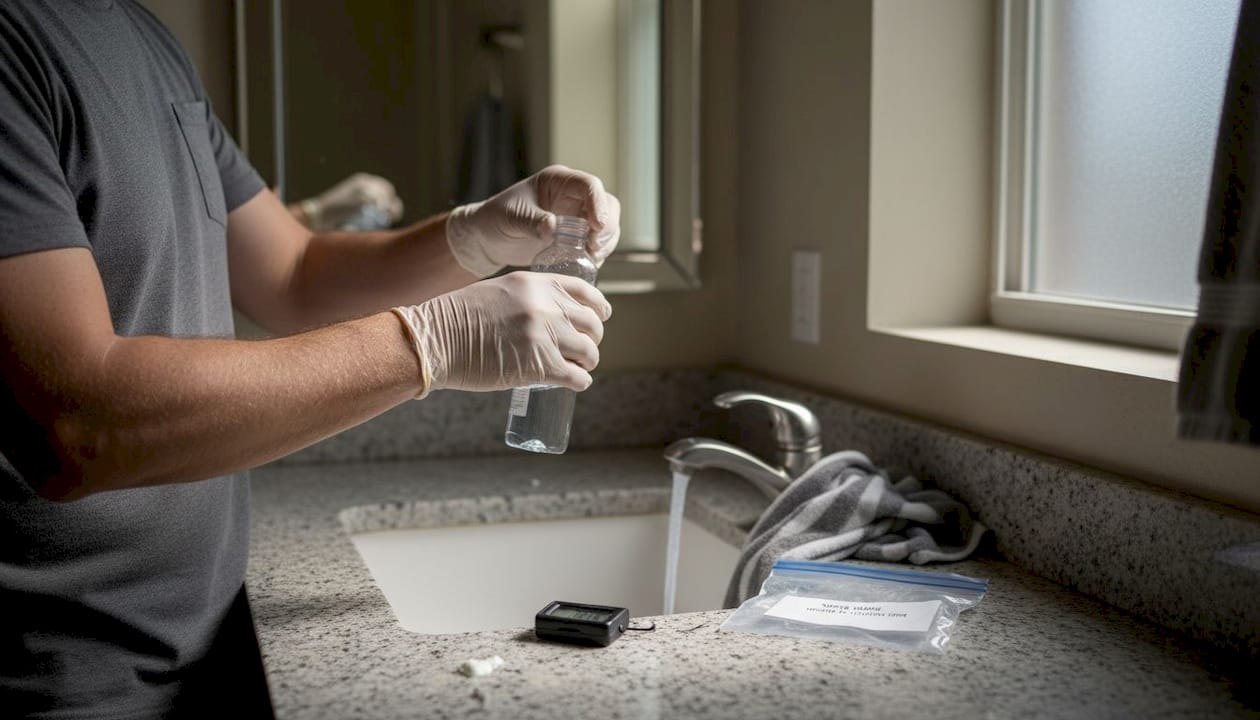
- Prepare your containers. Use only the sterile bottles provided by your lab. Do not rinse, touch the inside of the cap, or pre-fill with anything.
- Collect a first-draw sample for lead. Do not run the water before collecting. This captures water that has been sitting in your pipes overnight, which reflects maximum lead exposure.
- Flush before collecting bacteria samples. Run cold water for two to three minutes, then collect. This captures water from the distribution system rather than your internal plumbing.
- Avoid contamination. Don’t touch the bottle opening, cough near the sample, or let anything contact the water before sealing.
- Label immediately. Write your name, address, date, time, and sample type on each bottle before setting it down.
- Chill bacteria samples. Place them in a sealed bag with ice. Bacteria samples must reach the lab within 24 hours of collection.
- Complete the chain-of-custody form. This document tracks your sample and is required by most certified labs.
Safety note: If you suspect lead contamination and have infants, young children, or anyone who is pregnant in your home, switch to bottled water immediately while awaiting results. Do not wait for confirmation before taking protective action.
Here’s a quick comparison of sampling requirements by test type:
| Test type | Sample timing | Container type | Transport requirement |
|---|---|---|---|
| Lead | First-draw (no flush) | Lab-provided sterile bottle | Room temperature, deliver promptly |
| Bacteria | After 2-3 min flush | Sterile with sodium thiosulfate | Chilled, within 24 hours |
| General quality/TDS | After 1 min flush | Clean lab bottle | Room temperature |
| Nitrates | After 1 min flush | Lab-provided bottle | Chilled preferred |
Proper sampling protocols are the foundation of reliable results. A perfect lab means nothing if the sample was collected incorrectly. Take your time at this stage. If you’re also exploring filtration technologies as a next step, knowing exactly what’s in your water first will help you choose the right system.
Interpreting your water test results and next steps
Your lab report will list each contaminant with a measured value and a unit. Compare those values against EPA benchmarks to understand where you stand.
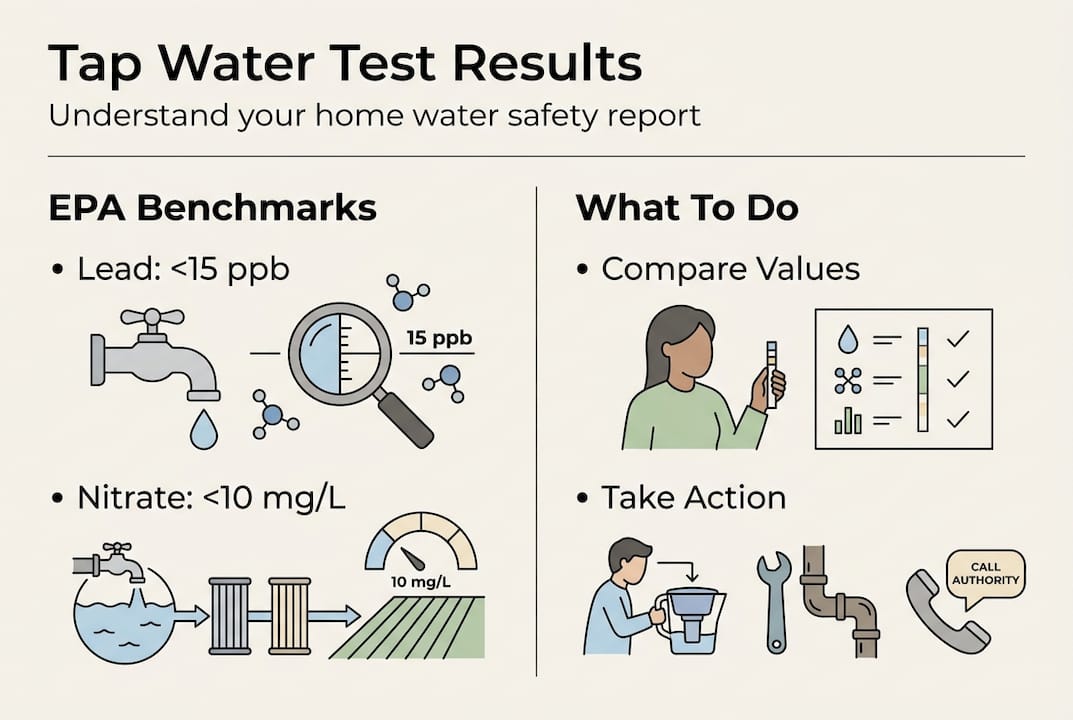
| Contaminant | EPA maximum limit | Health concern if exceeded |
|---|---|---|
| Lead | 15 ppb (action level) | Neurological damage, especially in children |
| Nitrates | 10 mg/L | Blue baby syndrome in infants |
| Coliform bacteria | Zero (absent) | Gastrointestinal illness |
| E. coli | Zero (absent) | Severe gastrointestinal illness |
| pH | 6.5 to 8.5 | Corrosion (low) or mineral buildup (high) |
| Arsenic | 10 ppb | Long-term cancer risk |
Here’s how to read your results and decide what to do:
- All values within limits: Your water is within federal safety standards. Continue annual testing and stay alert to changes in your area.
- Elevated lead: Stop drinking from that tap. Flush pipes longer, replace fixtures, or install a certified filter. Retest after any fix.
- Bacteria detected: Shock-chlorinate your well or contact your utility. Do not drink the water until retested and confirmed safe.
- High nitrates: Use bottled water for infants and pregnant individuals. A reverse osmosis (RO) filter is effective for nitrate removal.
- PFAS detected: Install a certified RO or activated carbon filter rated for PFAS. Contact your state health department for guidance.
Pro Tip: Never assume a filter is working without proof. Always retest your water after installing any treatment system or completing a remediation step. A filter that’s past its service life may no longer be removing the contaminants you’re counting on it to catch.
For ongoing guidance, reviewing tips for clean drinking water can help you build a practical routine around your results rather than treating testing as a one-time event.
Our take: Why annual tests are not enough for true water safety
Here’s something most water safety guides won’t tell you: passing an annual test can actually make families less vigilant, not more. A clean result in January doesn’t protect you from a cracked well casing in July or a neighbor’s chemical spill in October. Water quality is not static. It changes with seasons, infrastructure age, land use, and local events.
Utilities may claim compliance while unregulated or emerging contaminants like PFAS go completely unmonitored. The regulatory framework simply hasn’t kept pace with the science. That’s not a criticism of utilities. It’s a structural reality that puts the burden of vigilance on you.
We believe the families who stay safest aren’t the ones who test once and forget. They’re the ones who treat water safety as an ongoing practice. They test after any disruption, track local news about industrial activity or flooding, and act on results rather than waiting for symptoms. Pairing routine testing with proven [filtration methods](https://cowayswaterpurifier.com/2026/02/07/examples-of-filtration methods for safer home water) creates a layered defense that no single annual report can replicate.
Enhance your home’s water safety with reliable purification solutions
Testing tells you what’s in your water. The next step is doing something about it. Coway water purifiers are designed to address the exact contaminants that testing most commonly reveals, from lead and bacteria to sediment and chemical compounds, using advanced multi-stage filtration and UV sanitization technology.

Whether you’re looking for a countertop ice water purifier that fits your kitchen setup or exploring under-sink water purifiers for a more permanent solution, Coway has options built for real households. Understanding the full water purification process can also help you match the right system to your specific test results and household needs.
Frequently asked questions
How often should I test my tap water if I have a private well?
Test at least once a year for bacteria, nitrates, TDS, and pH. Schedule additional tests after any repairs, flooding, or nearby land-use changes that could affect your groundwater.
Can home test kits detect lead and PFAS accurately?
DIY kits can flag high lead levels, but certified lab tests are essential for detecting low concentrations and emerging contaminants like PFAS that strips simply cannot identify.
What are the EPA benchmarks for safe drinking water?
Key EPA limits include lead under 15 ppb, nitrate under 10 mg/L, pH between 6.5 and 8.5, and zero detectable coliforms or E. coli in any sample.
Should I retest my water after installing a filter or fixing a problem?
Yes, always. Retesting after remediation is the only way to confirm your fix actually worked and that your water meets safety standards before you resume regular use.
Recommended
- How to Test Tap Water Quality for Safe Drinking at Home – Coway Water Purifier
- 7-Step Home Water Filtration Checklist for Safer Drinking – Coway Water Purifier
- Essential Guide to Safe Drinking Water for Homeowners – Coway Water Purifier
- Step by Step Water Filtration Setup for Safe Drinking – Coway Water Purifier