
Uncategorized
Essential Guide to Safe Drinking Water for Homeowners
Oct
Millions of households rely on tap water without ever questioning its actual quality and safety. Yet studies show that over 45 percent of American tap water contains at least one harmful contaminant like lead, bacteria, or industrial chemicals. Most people focus on taste or clarity but the real risks are often invisible, hiding in plain sight and waiting to be found. If you think your water is clean just because it is clear, you might be missing the most important step in protecting your family’s health.
Table of Contents
- Step 1: Determine Your Water Quality Needs
- Step 2: Research Filtration Options Available
- Step 3: Install Chosen Water Filtration System
- Step 4: Test Water Quality Post-Installation
- Step 5: Maintain And Monitor Your Filtration System
Quick Summary
| Key Point | Explanation |
|---|---|
| 1. Assess your water quality needs | Conduct a thorough water quality assessment to identify contaminants specific to your location and household. |
| 2. Choose suitable filtration technologies | Match your water quality report with filtration systems designed for your contaminants, such as activated carbon or reverse osmosis. |
| 3. Follow proper installation procedures | Ensure correct installation by preparing adequately and following manufacturer instructions to guarantee system effectiveness. |
| 4. Test water quality post-installation | Verify filtration performance with home kits and schedule professional tests to monitor for contaminants regularly. |
| 5. Maintain and monitor your filtration system | Regularly replace filters and perform system checks to ensure optimal filtration and prevent unexpected repair costs. |
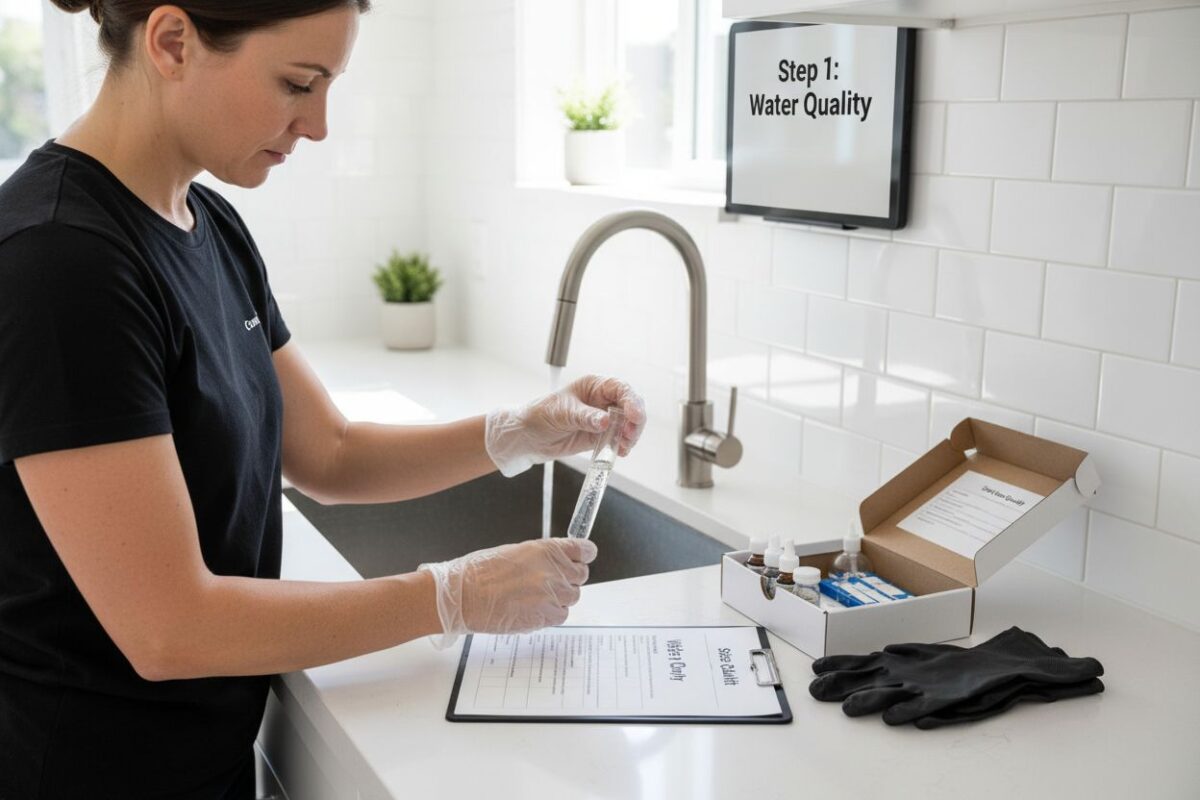
Step 1: Determine Your Water Quality Needs
Understanding your home’s water quality is the critical first step in ensuring safe drinking water. This initial assessment allows you to identify potential contaminants and develop a targeted strategy for water treatment. Water quality varies dramatically across different regions and even between neighboring households, making a personalized evaluation essential.
To begin your water quality assessment, you’ll want to collect a comprehensive water sample for professional testing. While municipal water reports provide general information, they cannot capture the unique characteristics of your specific water supply. Professional water testing kits and local environmental laboratories offer thorough analyses that reveal potential issues like heavy metals, bacterial contamination, pH levels, and mineral content.
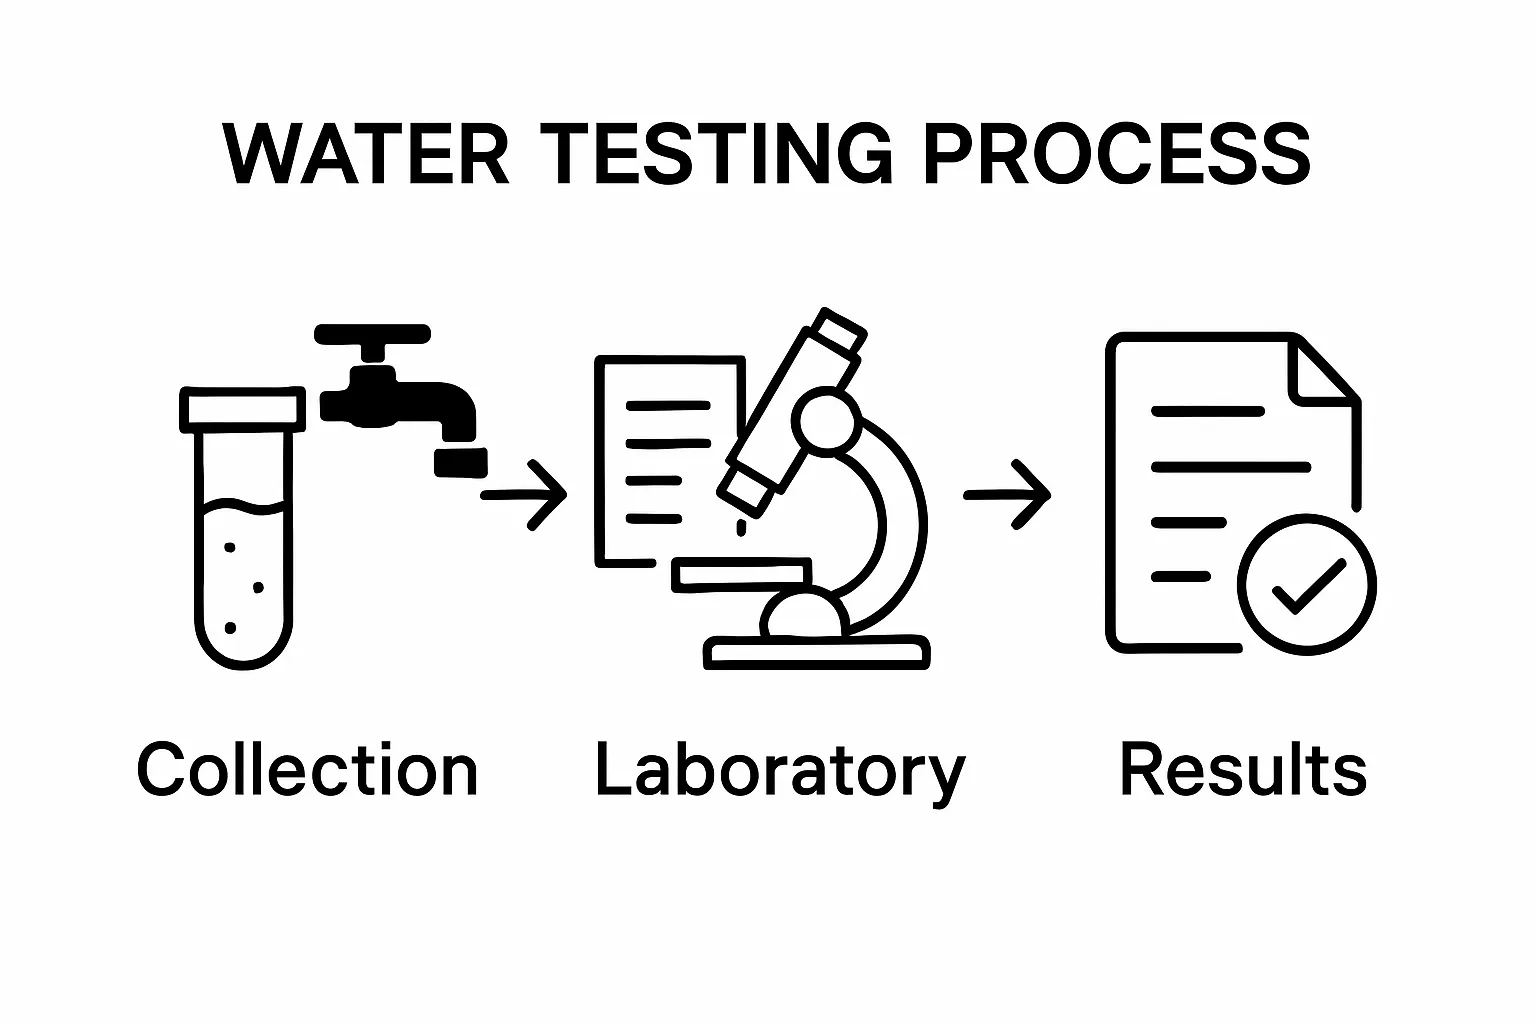
Our complete water filtration process guide recommends selecting a certified laboratory that can provide a detailed report. When choosing a testing service, look for providers accredited by the Environmental Protection Agency (EPA) who can test for a wide range of potential contaminants. The testing process typically involves collecting water samples from multiple sources in your home, including kitchen taps, bathroom fixtures, and outdoor spigots.
Key indicators to watch for during your water quality assessment include:
- Unusual taste or odor in drinking water
- Visible sediment or discoloration
- Persistent staining on fixtures or laundry
- Recurring health issues potentially linked to water consumption
Once you receive your water quality report, you’ll have a clear roadmap for selecting appropriate filtration or treatment solutions. The report will help you understand specific contamination risks and guide your decision about whether you need point-of-use filters, whole-house treatment systems, or more specialized water purification technologies. By taking this proactive approach, you’re laying the groundwork for a comprehensive strategy to protect your family’s health and ensure access to clean, safe drinking water.
Step 2: Research Filtration Options Available
Now that you understand your water quality, exploring filtration technologies becomes crucial in developing a targeted water treatment strategy. Different filtration systems address specific contaminant challenges, making comprehensive research essential for selecting the most effective solution for your household.
Begin by matching your water quality report results with appropriate filtration technologies. Activated carbon filters work exceptionally well for removing chlorine, sediment, and organic compounds, while reverse osmosis systems excel at eliminating dissolved minerals and heavy metals. Some households might require multi-stage filtration approaches that combine different technologies to provide comprehensive water purification.
Explore our essential types of water filters to understand the nuanced differences between various filtration methods. Consider key factors such as installation complexity, maintenance requirements, and long-term operational costs. Countertop and under-sink systems offer localized solutions, whereas whole-house filtration provides comprehensive water treatment across all household water sources.
Key considerations when researching filtration options include:
- Compatibility with your specific water contamination profile
- Annual maintenance and replacement filter costs
- Installation requirements and potential professional support needed
- Filtration rate and water production capacity
- Certified performance standards from recognized testing organizations
Consult multiple sources during your research, including manufacturer specifications, independent testing reports, and consumer reviews.
Here is a table summarizing common water filtration system types, the contaminants they target, and key considerations to help you compare your filtration options more easily.
| Filtration Type | Primary Contaminants Removed | Key Considerations |
|---|---|---|
| Activated Carbon | Chlorine, sediment, organic compounds | Simple installation, frequent filter changes |
| Reverse Osmosis | Heavy metals, dissolved minerals | Higher cost, may require professional help |
| Multi-Stage Filtration | Mix of organic and inorganic substances | Comprehensive removal, varied complexity |
| Countertop Systems | Sediment, basic chemicals | Easy to install, localized use |
| Whole-House Systems | Sediment, chlorine, some metals | Covers all taps, professional installation |
By methodically evaluating different filtration technologies, you’ll be equipped to make an informed decision that ensures safe, clean drinking water for your household.
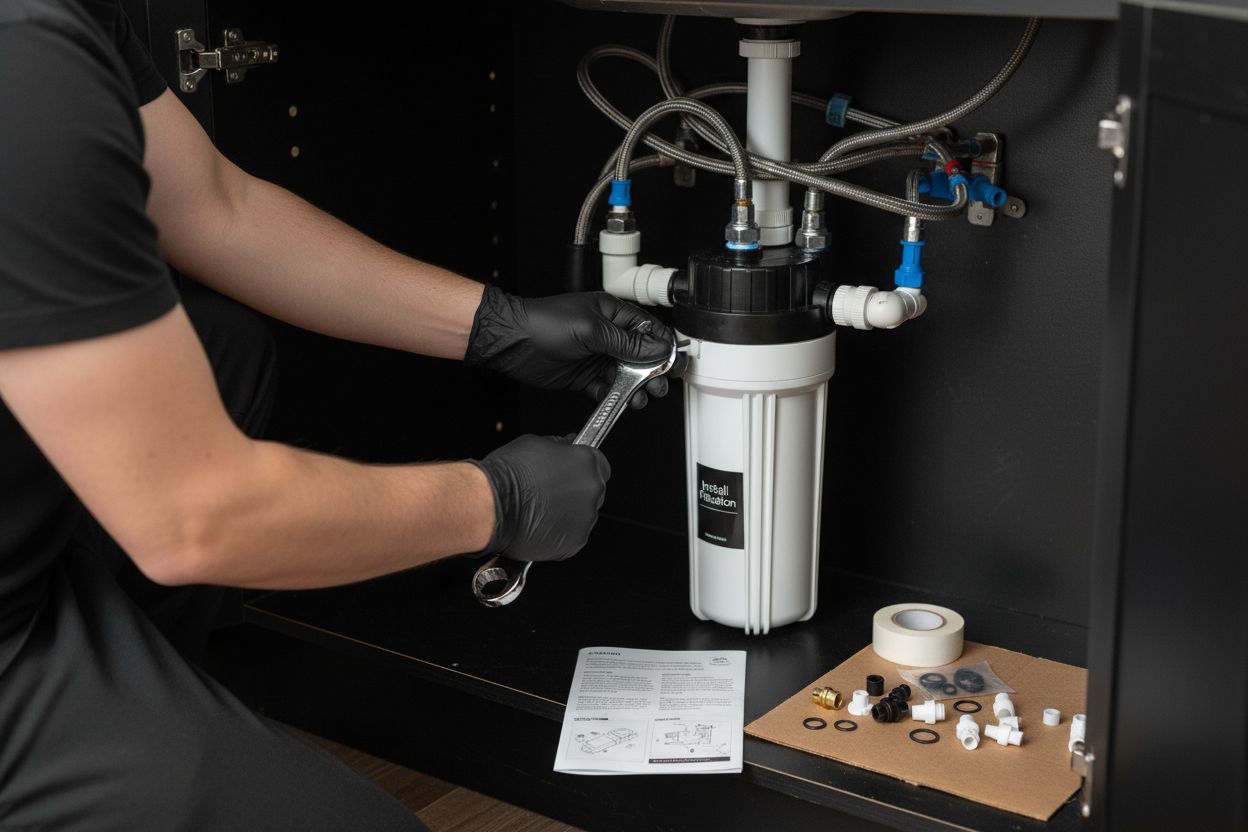
Step 3: Install Chosen Water Filtration System
Installing your water filtration system represents a critical moment in securing safe drinking water for your household. While installation complexity varies depending on the system type, careful preparation and attention to detail will ensure optimal performance and long-term reliability.
Before beginning installation, gather all necessary tools and carefully read the manufacturer’s instructions. Basic installation typically requires adjustable wrenches, Teflon tape, a bucket for potential water drainage, and protective gloves. For more complex systems like reverse osmosis or whole-house filtration, you might need additional specialized tools or consider professional installation.
Learn more about setting up under sink filters to understand the nuanced steps involved in different filter configurations. Countertop and under-sink systems generally require minimal plumbing modifications, while whole-house systems might involve connecting directly to your main water line, which could necessitate professional assistance.
Key installation preparation steps include:
- Shutting off the main water supply before beginning
- Clearing the installation area and ensuring proper ventilation
- Checking that all connection points are clean and free from debris
- Verifying you have all manufacturer-supplied components
Pay close attention to connection points, using Teflon tape on threaded connections to prevent potential leaks. After completing the physical installation, slowly reopen your water supply and check thoroughly for any signs of leakage or improper connections. Run water through the system for several minutes to flush out initial sediment and prepare the filter for regular use. Proper installation not only ensures effective water filtration but also protects your investment by preventing potential system damage or inefficient performance.
Step 4: Test Water Quality Post-Installation
Testing your water quality after installing a filtration system confirms the effectiveness of your chosen solution and provides peace of mind about your drinking water. This critical verification step ensures that your investment is delivering the purification results you anticipated during the selection and installation process.
Home water testing kits offer a convenient and immediate way to assess your filtration system’s performance. These kits typically include test strips or digital meters that can quickly analyze key water quality parameters like pH levels, chlorine content, and potential contaminant presence. While these home tests provide initial insights, they should not replace professional laboratory analysis for comprehensive water quality assessment.
Learn about essential steps for improving drinking water safety to understand the nuanced approaches to water quality verification. Professional laboratory testing remains the gold standard for thorough water quality analysis, offering detailed insights into microscopic contaminants that home test kits might miss.
Key parameters to evaluate during post-installation water quality testing include:
- Chlorine and chloramine levels
- Total dissolved solids (TDS)
- pH balance
- Presence of heavy metals
- Bacterial contamination indicators
Schedule your first comprehensive laboratory test within two weeks of installing your filtration system. This initial test provides a baseline measurement of your water quality and helps identify any potential installation issues or unexpected contamination sources. Subsequent annual testing will help you track your water quality over time and ensure your filtration system continues operating at peak efficiency. Remember that water quality can fluctuate based on seasonal changes, local infrastructure updates, and environmental factors, making regular testing an essential component of maintaining safe drinking water in your home.
Step 5: Maintain and Monitor Your Filtration System
Maintaining your water filtration system is crucial for ensuring consistent water quality and protecting your household’s health. Regular maintenance prevents performance degradation, extends system longevity, and guarantees the continued removal of potential contaminants from your drinking water.
Establishing a consistent maintenance schedule is the cornerstone of effective water filtration system management. Most filtration systems require filter replacements at specific intervals, typically ranging from three to six months depending on usage and water quality. Tracking these replacement dates through digital calendars or manufacturer-provided reminder systems helps prevent lapses in filtration effectiveness.
Explore our essential purifier maintenance checklist to understand the comprehensive approach to water filtration system upkeep. Pay attention to visual and performance indicators that might signal maintenance needs, such as changes in water taste, reduced water pressure, or unusual noises from the filtration system.
Key maintenance tasks to prioritize include:
- Replacing filters according to manufacturer recommendations
- Cleaning system components and connection points
- Checking for potential leaks or mechanical wear
- Monitoring water pressure and flow rates
- Documenting maintenance activities and filter replacement dates
Beyond routine maintenance, periodically conduct water quality tests to verify your system continues performing optimally. Unexpected changes in water quality might indicate the need for more frequent filter replacements or potential system recalibration. Remember that proactive maintenance not only ensures clean drinking water but also protects your investment by preventing costly repairs and extending your filtration system’s operational life. Treat your water filtration system like any critical home infrastructure maintenance item, with regular attention and systematic care.
Use this checklist table to stay on top of essential water filtration system maintenance tasks and recommended frequencies so you can keep your system running efficiently and your water safe.
| Maintenance Task | Recommended Frequency | What to Watch For |
|---|---|---|
| Replace filters | Every 3-6 months | Drop in water taste or flow |
| Clean system components | Every 3 months | Visible buildup, residue |
| Check for leaks | Monthly | Water pooling, drips at connections |
| Monitor water pressure | Quarterly | Sudden drops in water flow |
| Document maintenance | With every filter change | Missed replacement cycles |
| Run water quality tests | Annually or as needed | Unexpected changes in test results |
Take Control of Your Drinking Water Safety—Start With Proven Solutions
Struggling with uncertainty about the quality of your home’s drinking water can be overwhelming. This guide highlighted the importance of identifying hidden contaminants, choosing the right filtration system, and maintaining consistent water safety. For many homeowners, the fear of unseen health risks and the complexity of selecting the best filtration technology can lead to stress and inaction. You deserve practical answers that give you real confidence in every glass of water your family drinks. Dive into our Uncategorized resources for even more tips and real homeowner stories about overcoming these common water challenges.

Let today be the moment you move from concern to confidence. Explore the full range of Coway water purifiers that are designed with advanced filtration technology to address issues like heavy metals, bacterial contamination, and sediment—just as our guide recommends. Take advantage of free installation and maintenance support, and enjoy the peace of mind that comes with safe, clean drinking water for your entire household. Visit Coway Water Purifier now to get expert-backed solutions and start protecting your home’s health.
Frequently Asked Questions
What should I do first to assess my home’s water quality?
To assess your home’s water quality, start by collecting a comprehensive water sample for professional testing. This helps identify potential contaminants unique to your water supply.
How do I choose the right water filtration system for my needs?
Match your water quality report results with appropriate filtration technologies. Consider factors like contaminant types, installation complexity, maintenance requirements, and filtration capacity to select the most effective solution.
What are the key maintenance tasks for a water filtration system?
Key maintenance tasks include replacing filters as recommended, cleaning system components, checking for leaks, and monitoring water pressure and flow rates to ensure optimal performance.
How can I verify the effectiveness of my water filtration system?
Test your water quality after installation using home testing kits for immediate results. Schedule professional laboratory testing within two weeks to confirm that your system effectively removes contaminants.
Recommended
- Improve Drinking Water Safety: Essential Steps for Families – Coway Water Purifier
- Understanding Why Test Drinking Water for Safety – Coway Water Purifier
- Understanding Why Purify Tap Water for Health and Safety – Coway Water Purifier
- Understanding the Importance of Water Quality at Home – Coway Water Purifier