
Uncategorized
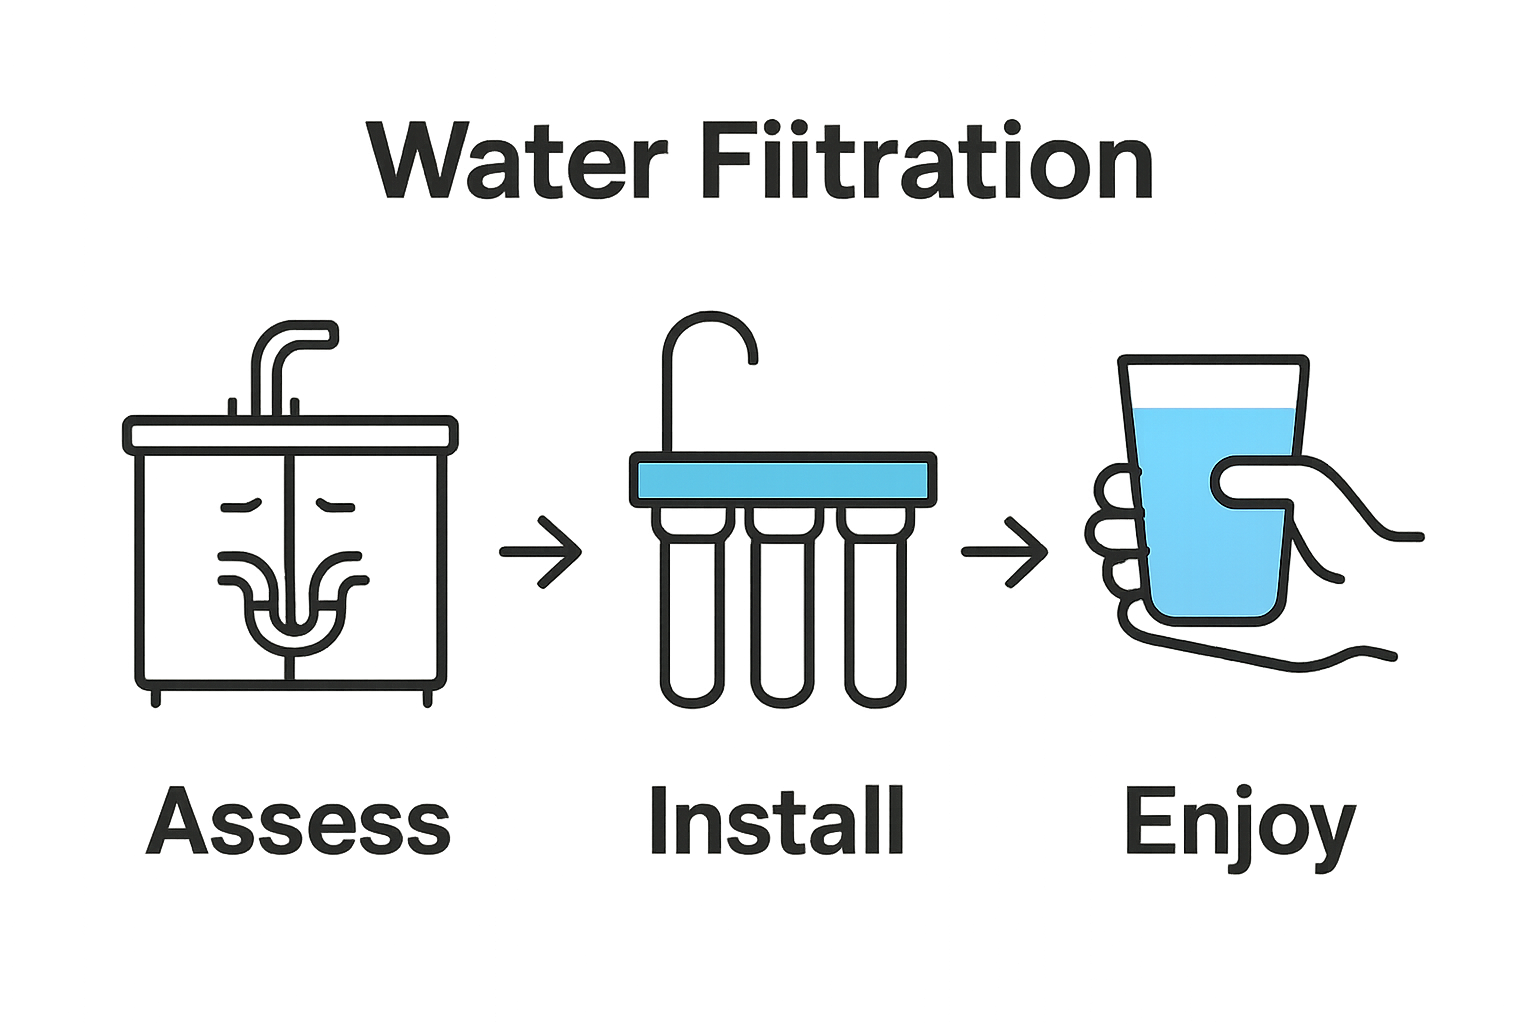
Setting Up Under Sink Filters: A Step-by-Step Guide
Sep
Choosing the right under sink water filter can completely change how you think about tap water. Most people do not realize that reverse osmosis systems can remove up to 99 percent of dissolved solids from your drinking water. Surprised? A hidden mistake during installation could make that top-rated filter almost useless. The smallest plumbing detail is what really keeps your family’s water pure every single day.
Table of Contents
- Step 1: Assess Your Plumbing Configuration
- Step 2: Select The Right Under Sink Filter System
- Step 3: Gather Necessary Tools And Materials
- Step 4: Install The Under Sink Filter System
- Step 5: Connect Water Supply And Improve Pressure
- Step 6: Test And Verify Water Quality
Quick Summary
| Key Point | Explanation |
|---|---|
| 1. Assess your plumbing setup first | Understanding your plumbing configuration informs the feasibility and approach of your filter installation, preventing mistakes. |
| 2. Choose the right filter system | Select a filtration system based on your local water quality and specific contaminant removal needs for optimal effectiveness. |
| 3. Gather essential tools beforehand | Organize the necessary tools and materials to facilitate a smooth installation process and avoid delays. |
| 4. Follow installation guidelines precisely | Adhering to manufacturer instructions during installation ensures optimal performance of your filtration system. |
| 5. Test water quality after installation | Running tests on your filtered water is crucial to confirm its safety and effectiveness in removing contaminants. |
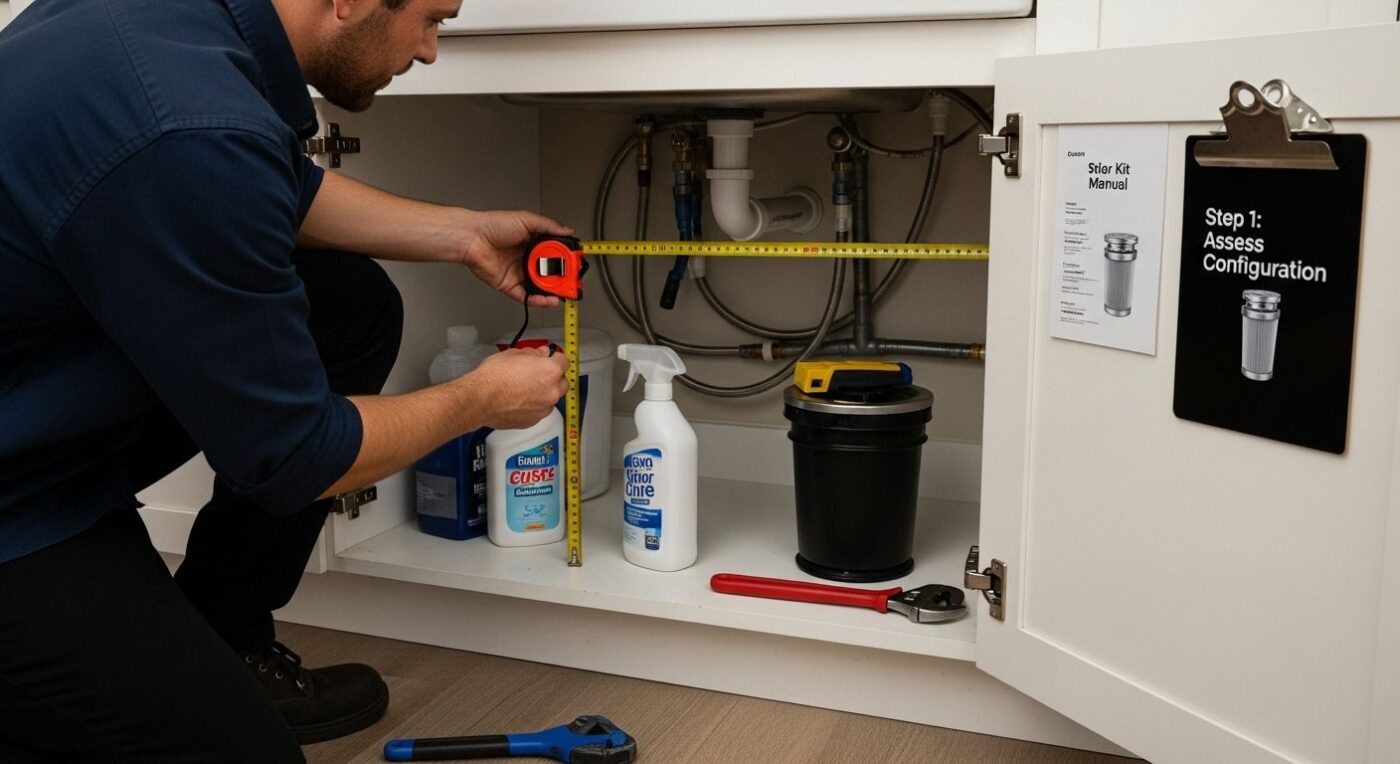
Step 1: Assess Your Plumbing Configuration
Setting up under sink filters requires a thorough understanding of your existing plumbing configuration. This critical first step determines the feasibility and approach for your water filtration installation. Before purchasing any equipment, you need to examine your sink’s current plumbing layout and identify specific characteristics that will impact your filter system.
Careful inspection begins with locating the primary water supply line under your sink. Most residential kitchens have flexible supply lines connecting to the main water input. Examine these lines closely to determine their material composition and current condition. Copper, PVC, and braided stainless steel are common materials, each requiring slightly different mounting approaches for under sink filters.
Measure the available space underneath your sink with precision. Not all under sink areas are created equal some have complex configurations with garbage disposals, cleaning supply storage, or irregular pipe layouts. Use a tape measure to document the horizontal and vertical clearances. Pay special attention to existing pipes, electrical connections, and potential obstructions that might interfere with filter installation.
Specific areas to evaluate include:
- Pipe diameter and connection types
- Distance between water supply lines
- Presence of existing shut off valves
- Structural limitations of cabinet space
According to Centers for Disease Control, understanding your water system configuration is crucial for maintaining water quality and preventing potential contamination during modification processes. This initial assessment helps prevent common installation mistakes and ensures a smoother setup process.
If your under sink area seems complex or you feel uncertain about the configuration, consider consulting a professional plumber. They can provide a detailed assessment and recommend the most suitable filtration system for your specific plumbing layout. A brief consultation can save significant time and prevent potential installation errors that might compromise your water filtration system’s effectiveness.
Step 2: Select the Right Under Sink Filter System
Choosing the appropriate under sink filter system is a critical decision that directly impacts your water quality and household health. This step transforms your basic water supply into a reliable source of clean, safe drinking water. The selection process requires careful consideration of multiple factors beyond simple filtration capabilities.
Water quality matters most when selecting your filtration system. Different filters target specific contaminants, so understanding your local water composition becomes crucial. Contact your municipal water department or invest in a comprehensive water testing kit to identify potential pollutants like heavy metals, chlorine, sediment, or microorganisms present in your tap water.
Filter technologies vary significantly in their approach and effectiveness. Reverse osmosis systems provide comprehensive filtration, removing up to 99% of dissolved solids. Activated carbon filters excel at improving taste and eliminating chlorine. Ceramic filters specialize in removing bacteria and particulate matter. Matching filter technology to your specific water quality needs ensures optimal performance.
Consider these essential selection criteria:
- Filtration rate and gallons per day (GPD) capacity
- Contaminant removal specifications
- Maintenance requirements and replacement costs
- Physical dimensions compatible with your under sink space
According to Centers for Disease Control, certified filters meeting NSF standards 53 or 58 provide the most reliable protection against waterborne contaminants. Look for these certification marks when evaluating potential systems.
Budget plays a significant role in your selection. While premium systems offer comprehensive filtration, more affordable options can still provide substantial water quality improvements. Learn more about understanding water purification technologies to make an informed decision that balances performance and cost. Remember, investing in quality water filtration is an investment in your family’s health and well being.
Step 3: Gather Necessary Tools and Materials
Preparing for your under sink filter installation requires methodical planning and gathering the right equipment. This crucial step ensures a smooth, efficient process that minimizes potential complications during the actual installation. Proper preparation can save hours of frustration and prevent unexpected trips to the hardware store midway through your project.
Your toolkit should include precision instruments and specialized plumbing equipment. A high quality adjustable wrench becomes your primary tool for connecting and securing filter components. Invest in a reliable pipe wrench with rubberized grips to prevent scratching delicate pipe surfaces. Teflon tape proves essential for creating watertight seals on threaded connections, preventing potential leaks that could damage your new filtration system.
Additional critical materials include a sharp utility knife for precise tubing cuts, measuring tape for accurate spacing, and a clean bucket to catch any residual water during the installation process. Safety equipment is non negotiable. Protective eyewear and rubber work gloves will shield you from potential water splashes and sharp metal edges. Consider keeping a stack of clean rags or paper towels nearby to manage unexpected moisture.
Essential tools for your under sink filter installation:
- Adjustable wrench
- Pipe wrench
- Teflon tape
- Utility knife
- Measuring tape
- Protective eyewear
- Rubber work gloves
- Clean bucket
- Paper towels or rags
Carefully review your specific filter system’s installation manual, as some specialized systems might require unique tools or adapters. Manufacturers often provide detailed recommendations that can save you time and prevent potential installation errors. Learn more about water filter maintenance and preparation to ensure you have everything needed for a successful setup.
Before beginning the installation, organize your tools in a clean, accessible workspace near the under sink area. Lay out each tool and material systematically, creating an efficient workflow that reduces the likelihood of misplacing critical components. A well prepared workspace is the hallmark of a successful home improvement project.
Below is a summary table of essential tools and materials required for installing an under sink filter, along with their purpose and any important notes.
| Tool/Material | Purpose | Notes |
|---|---|---|
| Adjustable wrench | Tighten and secure fittings | Main tool for most filter connections |
| Pipe wrench | Handle plumbing pipes | Rubberized grips prevent pipe damage |
| Teflon tape | Create watertight threaded seals | Apply to all threaded connections |
| Utility knife | Cut tubing and trim materials | Use for precise, clean cuts |
| Measuring tape | Measure space and ensure fit | Essential for mounting and spacing |
| Protective eyewear | Protect eyes from debris/splashes | Increases safety during installation |
| Rubber work gloves | Shield hands from sharp objects | Prevents injury and enhances grip |
| Clean bucket | Catch residual water | Useful during removal of old components |
| Paper towels/rags | Clean up spills and moisture | Helps maintain a tidy workspace |
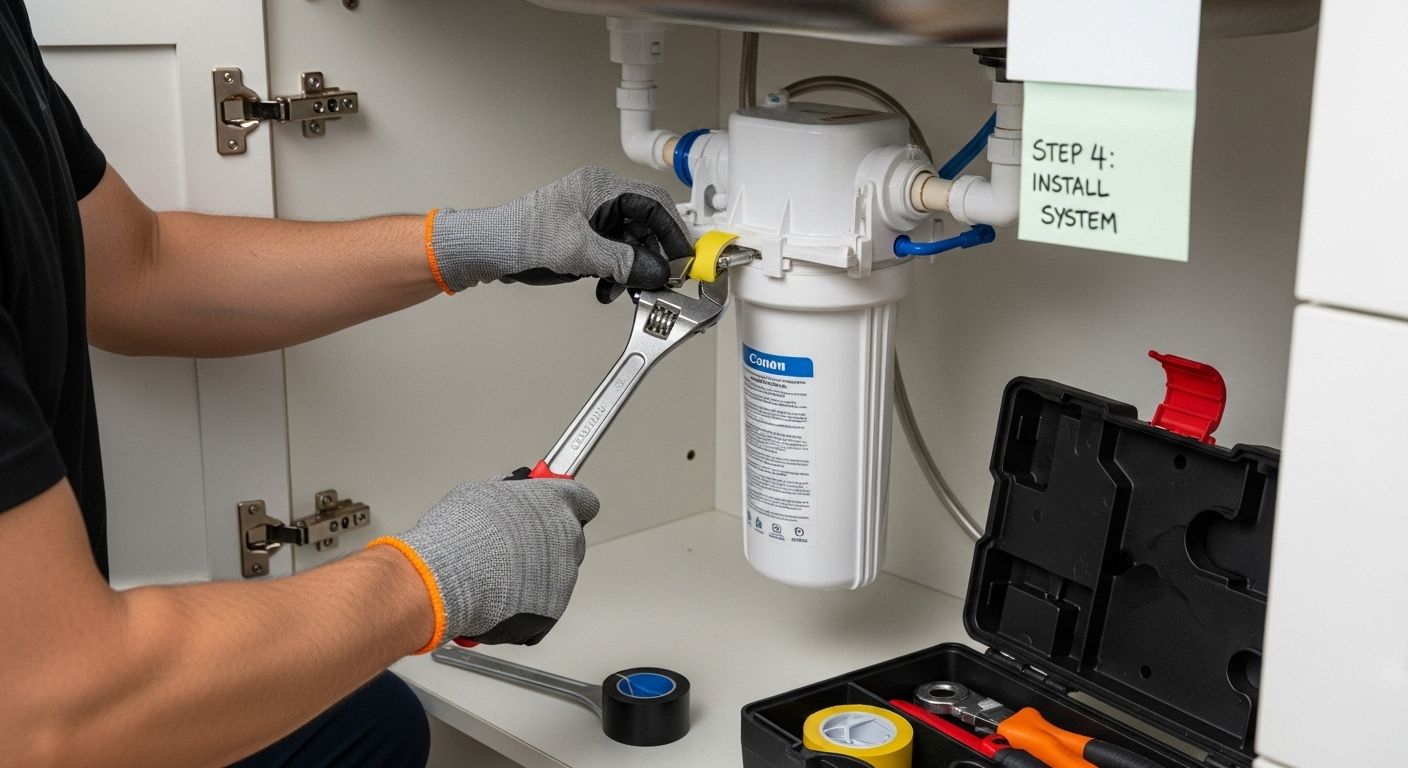
Step 4: Install the Under Sink Filter System
Installing your under sink filter system requires precision, patience, and a methodical approach. This critical stage transforms your preparatory work into a functional water filtration solution. Careful execution prevents potential water damage and ensures optimal system performance.
Begin by shutting off the main water supply to eliminate any risk of unexpected water flow. Locate the shut off valve beneath your sink or at the primary water entry point in your home. Open sink faucets to release residual water pressure and drain existing water from the lines. This precautionary step creates a dry, safe workspace for your installation.
Position your filter system according to the manufacturer’s specific guidelines. Most under sink filters require mounting to the cabinet wall using provided brackets or mounting hardware. Ensure the system is level and secure, using a spirit level to confirm precise placement. Apply Teflon tape to all threaded connections to create watertight seals that prevent potential leaks. Connect incoming water supply lines carefully, typically using compression fittings or specialized adapters included with your filtration system.
Critical installation checkpoints include:
- Verify all connections are tight and properly sealed
- Confirm filter orientation matches manufacturer specifications
- Check for any potential interference with existing plumbing
- Ensure mounting brackets are securely fastened
According to Environmental Protection Agency guidelines, following manufacturer instructions precisely is crucial for maintaining water treatment system effectiveness. Take your time during connections, double checking each step to prevent future complications.
Explore professional maintenance strategies to complement your installation process. After completing connections, slowly turn the water supply back on and carefully inspect all connection points for potential leaks. Run water through the system for several minutes, allowing air to purge and confirming smooth operation. A successful installation means clean, filtered water flows consistently without any signs of water seepage or irregular pressure.
Step 5: Connect Water Supply and Improve Pressure
Connecting your under sink filter system to the water supply represents a pivotal moment in your installation journey. This step transforms your carefully selected filtration equipment into a functional water treatment solution. Precise connections ensure consistent water flow and prevent potential leaks that could compromise your entire system.
Begin by identifying the appropriate connection points on your existing water supply lines. Most under sink filter systems require connection to the cold water line using specialized adapter fittings. Clean the connection areas thoroughly, removing any debris or mineral buildup that might interfere with a secure seal. Apply Teflon tape to threaded connections, wrapping it clockwise to create a watertight barrier that prevents potential water seepage.
Water pressure plays a critical role in filter performance. Inconsistent or low water pressure can significantly reduce filtration efficiency and impact your overall water quality.
Key pressure and connection considerations:
- Verify compatibility of adapter fittings
- Check for potential leaks after initial connection
- Measure water pressure using a reliable gauge
- Confirm smooth water flow through the filter system
According to Environmental Protection Agency guidelines, maintaining appropriate water pressure is essential for the longevity and effectiveness of your home water systems. Take time to make precise adjustments, testing connections gradually to ensure optimal performance.
Explore advanced water maintenance strategies to complement your installation process. After completing connections, slowly open the water supply valve and observe the system carefully. Look for any signs of leakage, unusual sounds, or irregular water flow. A successful connection means steady, clean water streaming smoothly through your new under sink filtration system.
Step 6: Test and Verify Water Quality
Testing and verifying water quality represents the culmination of your under sink filter installation process. This critical step transforms your technical work into a tangible health investment, ensuring the water flowing from your tap meets the highest safety standards. Your filtration system’s true performance becomes evident during comprehensive quality testing.
Begin by running water through the system for approximately 10 to 15 minutes, allowing the filter to flush out any initial sediment or manufacturing residues. Collect water samples in clean, clear glasses and perform visual and sensory assessments. High quality filtered water should appear crystal clear, without any noticeable cloudiness, discoloration, or suspended particles. Smell the water carefully checking for any unusual odors that might indicate incomplete filtration.
Utilize professional water testing kits designed to analyze multiple contaminant parameters. These comprehensive test strips or digital meters can reveal critical information about pH levels, chlorine content, heavy metal presence, and potential bacterial contamination. Look for kits that provide detailed readings across various water quality indicators. Compare your test results against baseline municipal water quality standards to confirm your filter’s effectiveness.
Critical water quality verification points:
- Check water clarity and transparency
- Test pH levels and mineral content
- Verify absence of chlorine and heavy metals
- Confirm microbial safety
- Assess overall taste and odor
Water testing provides more than just immediate insights. It establishes a baseline for future monitoring, helping you track your filtration system’s long term performance. Maintain a record of these initial test results to compare against future assessments, ensuring consistent water quality over time.
Discover advanced water maintenance techniques to complement your quality verification process. If test results indicate any concerns, do not hesitate to consult water treatment professionals. A successful water quality test means clean, safe, and great tasting water that meets or exceeds your household’s health standards.
This table provides a checklist for verifying your water quality after installation, so you can ensure the safety and performance of your under sink filtration system.
| Verification Step | What to Check For | Why It Matters |
|---|---|---|
| Water clarity | Crystal clear with no cloudiness | Indicates removal of sediments |
| pH level | Neutral or within safe range | Ensures balanced mineral content |
| Absence of chlorine | No chlorine odor/smell | Confirms filter removes chemicals |
| Heavy metal presence | Negative or very low readings | Guarantees removal of harmful metals |
| Microbial safety | No bacteria or microbial traces | Ensures water is safe to drink |
| Taste and odor assessment | Fresh, clean taste and smell | Confirms overall effectiveness |
| Record test results | Maintain documented results | Facilitates future maintenance checks |
Transform Your Water: Step Up Your Under Sink Filtration With Coway
You have just learned the vital steps for setting up an under sink filter—assessing plumbing, choosing reliable filtration, ensuring leak-free installation, and finally verifying water quality. But the biggest challenge is finding a system that truly delivers on safety and convenience, without the hassle of complicated installation or guesswork about water pressure, contaminants, and ongoing maintenance. Many homeowners struggle to match their specific plumbing to a suitable filter and often worry about whether their chosen system meets modern health and safety standards.
Uncategorized Archives – Coway Water Purifier

Why wait to secure your family’s health? Experience the reassurance and proven performance of Coway’s advanced under sink water purifiers. With professional installation, NSF-certified filtration technology, and effortless maintenance, Coway takes the pressure and uncertainty out of water purification. Explore the available systems and make your home healthier today at Coway Water Purifier. Start your upgrade now and enjoy purified water with complete peace of mind.
Frequently Asked Questions
How do I assess my plumbing configuration for an under sink filter?
Assessing your plumbing configuration involves locating the primary water supply line, examining its material, measuring the available space under your sink, and identifying any existing pipes or obstructions that may affect installation.
What factors should I consider when selecting an under sink filter system?
Consider the quality of your water, the types of contaminants present, filter technology (like reverse osmosis or activated carbon), filtration rate, maintenance requirements, and your budget when choosing a filter system.
What tools are necessary for installing an under sink filter system?
Essential tools include an adjustable wrench, pipe wrench, Teflon tape, utility knife, measuring tape, protective eyewear, rubber gloves, and a clean bucket to catch any residual water during installation.
How can I verify the water quality after installing my under sink filter?
Run water through the filter for about 10 to 15 minutes to flush it. Collect samples and check for clarity, smell, and taste. Use professional water testing kits to assess pH levels, chlorine content, heavy metals, and microbial safety.
Recommended
- 7 Essential Water Filter Maintenance Tips for Homeowners
- What is Under-Sink Water Purifier? Understanding Its Importance
- Complete Office Water Purification Guide for Healthier Spaces
- Understanding Water Filter Lifespan
- Stainless Steel Cat & Dog Water Fountain with 12 Replacement Filters
- How to Fix A Leaky Bathroom Faucet