
Uncategorized
UV Purification Process Explained: Step-by-Step for Clean Water
Dec
Over 40 million American households rely on private wells and unregulated water sources, yet many face hidden risks from contaminants and microbes. Clean, safe water is a constant concern whether you live in a city or rural corner of the United States. Understanding how to choose the right purification method gives you confidence that your water is truly healthy to drink. This guide will lead you through each essential step to ensure your water stays safe with the help of UV purification.
Table of Contents
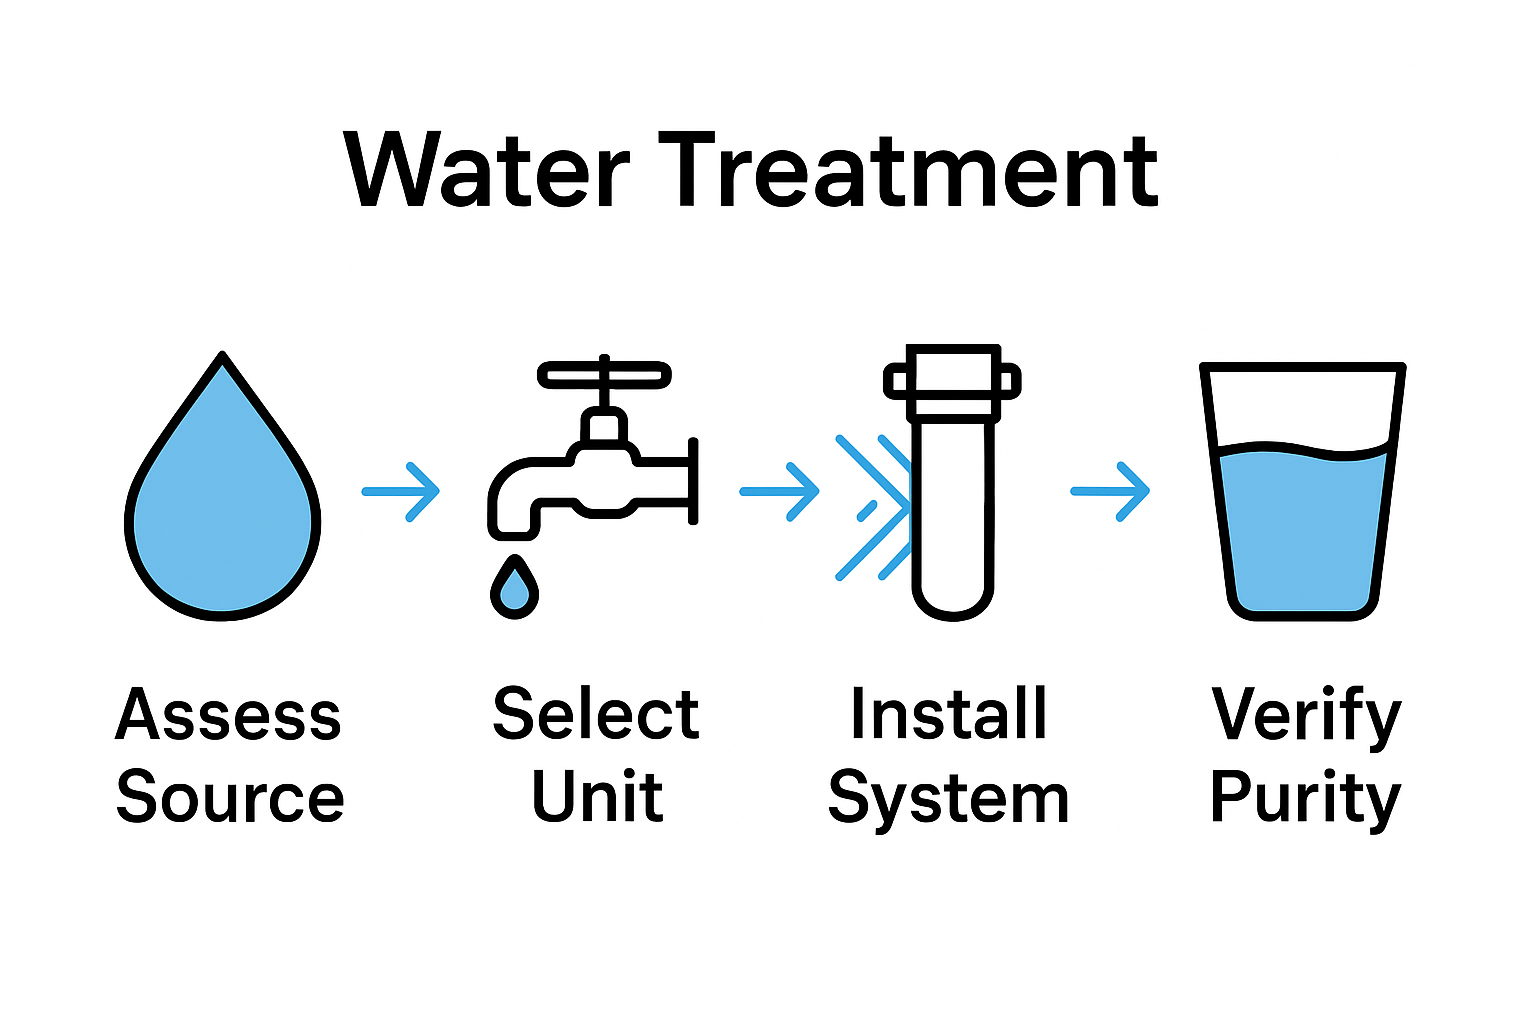
- Step 1: Assess Water Source And Requirements
- Step 2: Select And Prepare The UV Purifier Unit
- Step 3: Install And Set Up The System Properly
- Step 4: Operate And Monitor The Purification Process
- Step 5: Test And Verify Water Purity Regularly
Quick Summary
| Key Point | Explanation |
|---|---|
| 1. Evaluate Water Quality First | Analyze your water source for microbial levels, pH, and turbidity to determine suitability for UV purification. |
| 2. Choose the Right UV System | Select a UV purifier based on water quality assessments and specific technical specifications for optimal performance. |
| 3. Install with Precision | Follow manufacturer instructions carefully for lamp placement and electrical connections to ensure effective disinfection. |
| 4. Monitor System Performance Regularly | Continuously track UV intensity and flow rates to prevent malfunctions and maintain effective water purification. |
| 5. Test Water Quality Periodically | Conduct regular tests to verify the effectiveness of UV purification against established drinking water standards. |
Step 1: Assess Water Source and Requirements
Before diving into UV water purification, you need a crystal clear understanding of your water source and its unique characteristics. Evaluating water quality parameters is crucial for determining the most effective treatment strategy.
Start by collecting a representative water sample and conducting a comprehensive analysis. Pay close attention to critical factors like microbial contamination levels, pH, total dissolved solids, and turbidity. These measurements will help you understand whether your water is a good candidate for UV purification. Some key aspects to examine include the water’s clarity, potential sediment content, and overall chemical composition.
Pro Tip: When in doubt, consider getting a professional water quality test. A detailed analysis can save you time and ensure you choose the right purification method.
Once you have a complete picture of your water source, you will be ready to move forward with selecting the appropriate UV purification system that matches your specific water characteristics and treatment needs.
Step 2: Select and Prepare the UV Purifier Unit
Choosing the right UV purification system is critical for ensuring effective water treatment. Selecting a unit involves carefully evaluating technical specifications and performance metrics that match your specific water quality requirements.
When preparing your UV purifier, focus on key design considerations that impact disinfection efficiency. Innovative flow dynamics and preventing lamp fouling are essential factors to consider during unit selection and setup. Look for systems with robust construction, clear performance indicators, and compatibility with your water source characteristics. Pay special attention to the unit’s power rating, flow rate capacity, and recommended maintenance schedule.
Pro Tip: Always check the manufacturer’s guidelines for precise installation requirements and recommended pre-filtration steps to maximize your UV purifier’s effectiveness.
Once you have selected and prepared your UV purification unit, you will be ready to move forward with the next critical stage of water treatment and sanitization.
Step 3: Install and Set Up the System Properly
Installing a UV water purification system requires precision and attention to detail. Proper system installation involves careful lamp placement and adherence to critical safety standards that ensure optimal performance and water safety.
Step-by-step installation procedures require specific tools and careful preparation. Begin by carefully reading the manufacturer’s instructions and gathering all necessary equipment. Ensure you have a stable mounting location with consistent electrical supply and appropriate water connection points. Pay close attention to positioning the UV lamp at the correct angle and distance to maximize water exposure and disinfection efficiency. Verify all electrical connections are secure and that the unit is properly grounded.
Pro Tip: Always wear protective gloves and eyewear during installation, and double-check all connections before powering on the system.
Once your UV purification system is installed and calibrated, you will be prepared to activate the unit and begin the critical process of water treatment and microbial elimination.

Step 4: Operate and Monitor the Purification Process
Successfully operating a UV water purification system requires consistent monitoring and proactive maintenance. Monitoring UV intensity and maintaining consistent water flow rates are critical for ensuring effective disinfection.
Routine system monitoring involves carefully tracking key performance indicators and recognizing potential signs of malfunction. Regularly check the UV lamp output, inspect water quality indicators, and verify the system’s overall performance. Pay special attention to the lamp’s operational hours, watching for any reduction in UV intensity or changes in water clarity. Most systems have built-in indicators that can help you quickly identify potential issues before they become significant problems.
Pro Tip: Keep a maintenance log to track system performance, lamp replacements, and any observed changes in water quality.
By maintaining a vigilant approach to monitoring your UV purification system, you will ensure consistent water safety and optimal performance throughout the unit’s operational lifecycle.
Step 5: Test and Verify Water Purity Regularly
Regular water testing is crucial to ensure the ongoing effectiveness of your UV purification system. Periodic verification of water samples through comprehensive microbial analysis helps confirm the continued performance of your disinfection process.
Comprehensive testing involves detailed assessment of microbial inactivation and compliance with established drinking water standards. Obtain professional water testing kits that can accurately measure bacterial levels, verify UV system performance, and detect any potential contaminants. Focus on examining key indicators like total bacterial count, specific pathogen presence, and overall water clarity. Aim to conduct these tests quarterly or immediately following any significant changes in your water source or purification system.
Pro Tip: Document each water test result to track your system’s performance and identify any emerging trends or potential issues.
Consistent and thorough water quality testing will provide peace of mind and ensure your UV purification system continues to deliver safe, clean drinking water for you and your family.
Discover Effective Water Purification Solutions with Coway
If you’ve just learned the intricate steps involved in UV purification and want to take control of your home’s water quality, Coway offers reliable solutions tailored to your needs. The article highlights critical factors like assessing water quality, selecting the right UV purifier, and regular monitoring—all essential for safe and clean water. Don’t let uncertainty about water safety hold you back from enjoying fresh, contaminant-free water every day.

Explore our range of cutting-edge water purifiers designed with advanced UV sanitization technology that matches your specific water quality needs. Visit the Uncategorized Archives – Coway Water Purifier to learn more about the latest models and options. Take the first step toward healthier water and peace of mind by checking out our full product lineup at https://cowayswaterpurifier.com. Act now to secure free delivery and professional installation so you can start experiencing the benefits of pure water without delay.
Frequently Asked Questions
What is the first step in the UV purification process?
Before starting the UV purification process, assess your water source and its characteristics. Collect a representative sample and evaluate factors such as microbial contamination levels, pH, and turbidity to determine if your water is suitable for UV treatment.
How do I select the right UV purification system?
Choose a UV purification system based on your specific water quality requirements. Evaluate the unit’s technical specifications, performance metrics, and design features like flow rate and power rating to ensure it meets your needs for effective disinfection.
What are the key installation considerations for a UV purification system?
Proper installation involves careful lamp placement and adherence to safety standards. Follow the manufacturer’s instructions, ensure a stable mounting location, and verify all electrical connections to maximize the efficiency of your UV purification system.
How can I ensure my UV purification system operates effectively?
Regularly monitor the system by checking UV intensity and maintaining consistent water flow rates. Track performance indicators and maintenance schedules to spot any potential issues early and ensure effective disinfection of your water.
Why is regular testing important for water purity after UV treatment?
Periodic water testing is essential to confirm the ongoing effectiveness of your UV purification system. Conduct comprehensive microbial analysis quarterly to verify the performance and ensure your water remains safe and clean for consumption.
What should I do if I notice a change in water quality?
If you observe a change in water quality, immediately conduct a comprehensive water test to identify any potential contaminants. Assess the performance of your UV purification system to determine if maintenance is required to restore water safety.
Recommended
- Understanding the Role of UV in Water Purification – Coway Water Purifier
- What Is UV Sterilization? Complete Guide for 2024 – Coway Water Purifier
- 7 Top Water Filtration Methods You Need to Know – Coway Water Purifier
- Understanding Water Purification Terms Explained Clearly – Coway Water Purifier
- The Science of Cleaning 101 Understand Chemicals, Tools, and Techniques