
Uncategorized
How to Assess Water Quality in Your Office
May
TL;DR:
- Water looks safe but can still harbor harmful contaminants undetectable without proper testing. Regular assessment, starting with the Consumer Confidence Report and correct sampling, is essential for maintaining office water safety over time. Continuous management, including targeted testing and system maintenance, protects employee health effectively.
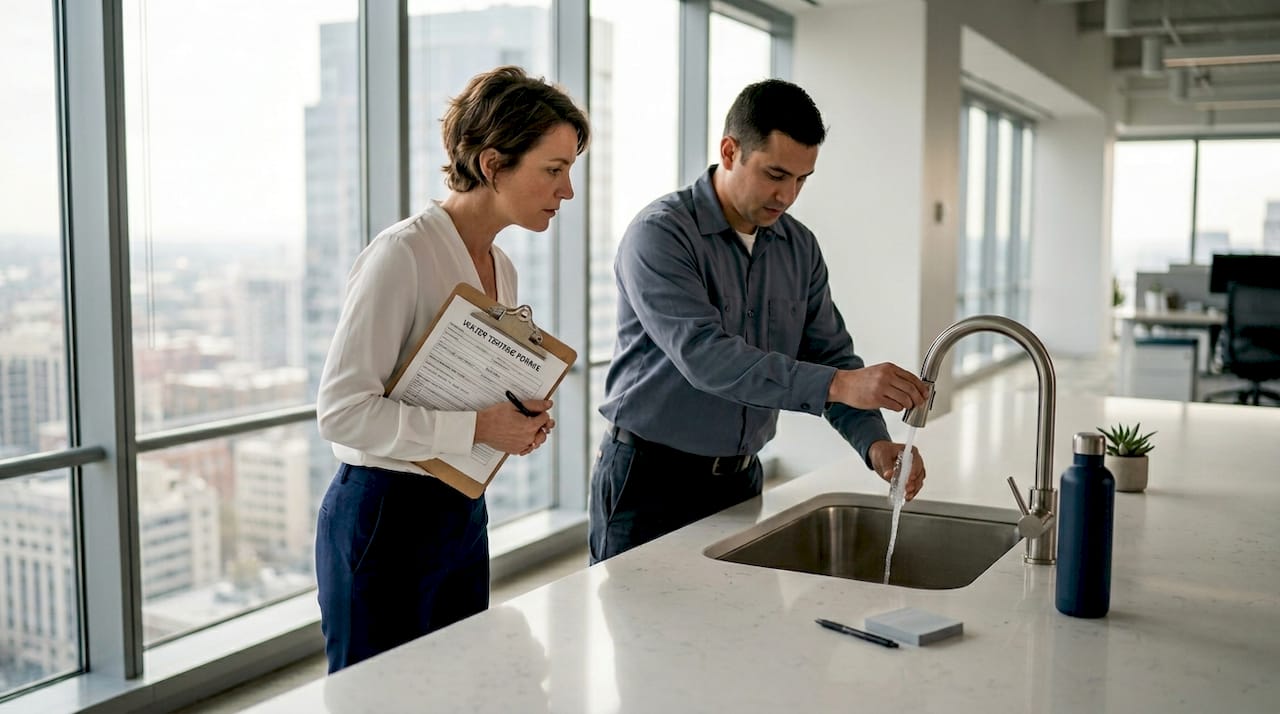
You walk into the office, fill a glass from the tap, and drink without a second thought. That water looks clear. It tastes fine. It must be safe. Except that assumption can be dangerously wrong. Learning how to assess water quality in office environments is one of the most overlooked responsibilities an office manager can take on, and one of the most impactful ones for employee health. Contaminated water can be odorless and colorless, making it impossible to detect without proper testing. This guide walks you through exactly what to do.
Table of Contents
- Key takeaways
- How to assess water quality in office: starting with the right preparation
- Practical office water testing methods
- Interpreting test results and deciding next steps
- Legionella: the risk most offices ignore
- Comparing testing approaches for your office
- My take: water testing is not a checkbox
- Upgrade your office water after every assessment
- FAQ
Key takeaways
| Point | Details |
|---|---|
| Looks can deceive | Clear, odorless water can still carry lead, bacteria, and PFAS at harmful levels. |
| Start with your CCR | Request the Consumer Confidence Report from your local utility as the first step in any office water assessment. |
| Match the test to the risk | DIY kits track basic parameters, but certified lab tests are required for lead, PFAS, and Legionella. |
| Sample collection matters | First-draw samples catch localized pipe contamination that flushed samples will miss entirely. |
| Testing is not a one-time event | Ongoing monitoring and a Water Management Program are what actually keep office water safe over time. |
How to assess water quality in office: starting with the right preparation
Before you order a test kit or call a lab, you need to understand what you are dealing with. The quality of your office drinking water is shaped by two things: what comes in from the utility and what happens inside your building’s plumbing. Both deserve your attention.
The single best starting point is requesting your annual Consumer Confidence Report. The CCR lists source water, detected contaminants, and violations from your local utility. This document tells you what your water contained before it ever reached your building. It is free, it is required by federal law, and most offices never bother reading it. That is a mistake.
Once you have the CCR in hand, look at your building’s plumbing. Buildings constructed before 1986 may contain lead pipes or lead solder, which can leach directly into drinking water even if the utility supply is perfectly clean. Knowing the age and material of your plumbing helps you decide which contaminants to prioritize in your testing plan.
Here are the contaminants office environments should be most concerned about:
- Lead and copper: Leach from old pipes and fixtures, especially after water has been sitting stagnant overnight or over a weekend
- PFAS (per- and polyfluoroalkyl substances): Industrial chemicals that do not break down and have been linked to serious health outcomes
- Bacteria and coliform: Indicators of sewage intrusion or treatment failures
- Legionella: A waterborne bacterium that thrives in building water systems at certain temperatures
Pro Tip: Before testing, document every water outlet in your office. Faucets, break room sinks, water dispensers, ice machines, and cooling towers all represent different sampling points with different risk profiles. A simple map prevents you from missing high-risk spots.
You should also gather information about any recent plumbing work, building shutdowns, or changes in water pressure. Extended periods of low or no water use, like after holidays or a remote work period, significantly increase contamination risk because stagnant water is where bacteria and chemical leaching accelerate. Understanding these factors shapes a much more targeted assessment.
Practical office water testing methods
Once you have your background information ready, you can move into actual testing. The key is using the right tool for the right question.
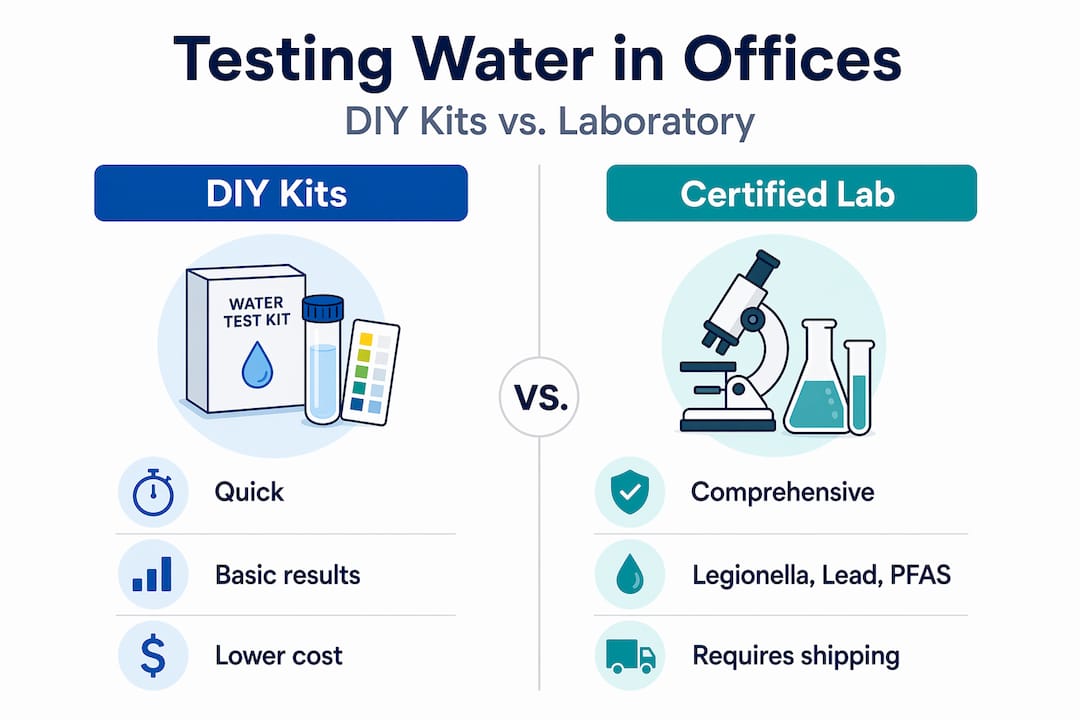
Understanding what DIY kits can and cannot do
Office water testing kits available at hardware stores or online are fast, affordable, and genuinely useful for some parameters. They can give you a quick read on pH, total hardness, total dissolved solids (TDS), and in some cases basic chlorine or nitrate levels. That is worth knowing. But DIY test kits cannot replace certified lab tests for health risk contaminants. Lead, PFAS, Legionella, arsenic, and volatile organic compounds require laboratory-grade analysis with equipment that no consumer kit can replicate.
Think of DIY kits as a dashboard warning light. They tell you something might be worth a closer look. They do not diagnose the problem.
When to go straight to a certified laboratory
Professional laboratory testing is the gold standard for detecting lead, PFAS, arsenic, and biological contaminants. Certified labs follow EPA-approved methods and provide legally defensible results. If your building is older, you have had a recent plumbing change, or employees have reported unusual taste or illness, skip the DIY kit and go directly to a certified lab.
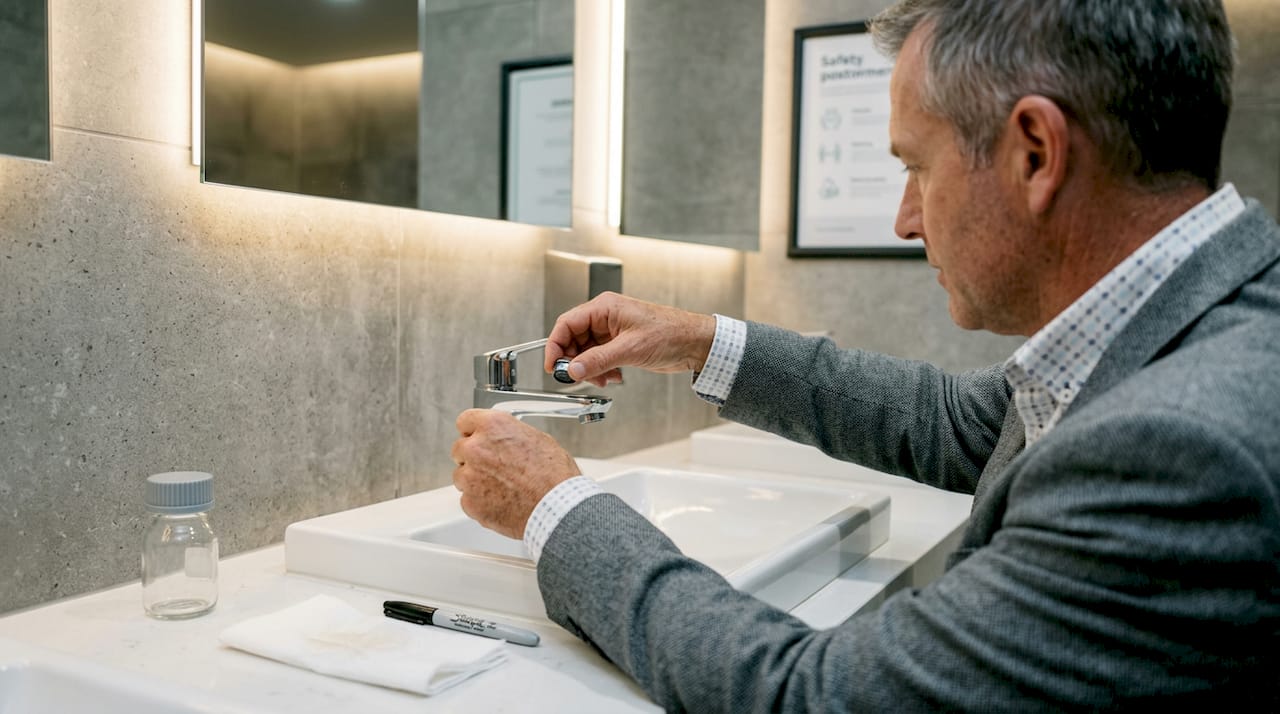
How to collect water samples correctly
This step is where many offices go wrong, and the consequences are real. Misapplying sampling methods, such as flushing the tap before collecting a lead sample, can produce a false negative that masks serious contamination.
Follow this sequence for accurate sample collection:
- Do not run the water before collecting a first-draw sample. Let water sit stagnant for at least six hours, ideally overnight. This captures any lead or copper that has leached from pipes and fixtures directly into standing water.
- Collect your first-draw sample from the first liter that flows out of the tap. Use the lab’s supplied container. Do not rinse it beforehand.
- Collect a flushed sample after running the water for two to three minutes. This represents the quality of the incoming utility supply.
- Label every sample immediately with the date, time, location, and whether it is first-draw or flushed. Unlabeled samples are useless.
- Refrigerate and transport samples to the lab the same day, or use the lab’s supplied ice packs if mailing.
Pro Tip: Order your sample containers from the certified lab before you start. Labs often pre-treat containers with preservatives specific to the contaminant being tested. Using the wrong container invalidates results.
Covering multiple sampling points across the office, the break room faucet, the water dispenser inlet, and a bathroom tap, gives you a far more accurate picture of where contamination may be concentrated.
Interpreting test results and deciding next steps
Getting your results back is only useful if you know what the numbers mean. Here is a quick reference for the most common parameters:
| Parameter | Safe Level | Action Threshold | What It Means |
|---|---|---|---|
| Lead | 0 ppb (no safe level) | 15 ppb (EPA action level) | Plumbing corrosion risk, requires immediate response |
| Total Coliform | Not detected | Any detection | Possible sewage or microbial contamination |
| pH | 6.5 to 8.5 | Outside this range | Can affect pipe corrosion and disinfectant effectiveness |
| TDS | Under 500 mg/L | Over 500 mg/L | High mineral content, not always a health risk alone |
| Legionella | Not detected | Any detection | Requires immediate investigation and remediation |
The EPA’s lead action level is 15 parts per billion. If your results exceed that threshold, you are required to notify affected employees and take corrective action. Do not wait. Lead exposure has no safe level and causes serious neurological harm, particularly with long-term exposure.
If results come back clean, that does not mean you are done. Water quality changes. Pipe conditions change. Here is how to build an ongoing monitoring schedule:
- Test first-draw samples from high-use kitchen and break room taps at least annually
- Retest after any plumbing repair, building renovation, or extended closure of more than two weeks
- Track TDS readings monthly using a handheld meter as a quick trend indicator, recognizing that TDS meters do not identify specific contaminants
- Review the CCR from your utility every year when it is published
When test results indicate contamination, your response depends on the contaminant. Lead typically requires replacing fixtures or installing point-of-use filters certified to NSF/ANSI Standard 53. Bacterial contamination may require flushing, disinfection, or a boil-water advisory. PFAS results warrant consultation with your local health department. For a practical reference on office water safety steps, a structured checklist makes the process much less overwhelming.
Legionella: the risk most offices ignore
Legionella is not a contaminant most office managers think about daily, but it should be on every building water assessment list. Legionella bacteria cause Legionnaires’ disease, a severe form of pneumonia. They do not spread person to person. They spread through inhaling aerosolized water droplets from contaminated building systems.
Office environments are particularly vulnerable because of low water use patterns, dead-end pipe sections, and fluctuating building occupancy. Temperature control and flushing pipe dead legs are the primary preventive strategies, and they only work if they are performed consistently.
The CDC recommends maintaining hot water above 140°F at the heater and cold water below 77°F throughout the distribution system. Between those temperatures, Legionella thrives. If your office has a cooling tower, decorative fountain, ice machine, or any complex water storage system, the risk is even higher.
Practical steps to reduce Legionella risk include:
- Flush all taps, showerheads, and water outlets that have been unused for more than a week
- Inspect and clean water storage tanks and cooling towers on a regular schedule
- Maintain water heater temperature settings and verify them with a thermometer, not just the dial
- Coordinate with your building management team to review the plumbing schematic for dead-end segments
Legionella testing is a validation step within a comprehensive Water Management Program. Detection triggers corrective action. It is not a pass or fail score. It is a signal that the system needs attention.
Maintaining water quality is a continuous process that requires integrating testing with maintenance routines and corrective measures. You cannot test your way to safety. You have to manage your way there.
Comparing testing approaches for your office
Not every office has the same budget or the same risk profile. Here is a practical comparison to help you choose the right approach:
| Method | Best For | Limitations | Cost Range | Turnaround |
|---|---|---|---|---|
| DIY test kits | Quick monitoring of pH, TDS, hardness | Cannot detect lead, PFAS, or bacteria reliably | $10 to $50 | Immediate |
| Certified lab panel | Lead, bacteria, PFAS, metals, Legionella | Requires proper sample collection | $100 to $500+ | 5 to 14 days |
| On-site professional service | Complex systems, Legionella programs | Higher cost, scheduling required | $300 to $1,000+ | Same day to 1 week |
| TDS meter (handheld) | Trend monitoring between lab tests | Does not identify specific contaminants | $15 to $40 | Immediate |
DIY methods can track filter performance or TDS but miss the contaminants that actually harm people. Use them as a supplement between scheduled lab tests, not as a substitute.
Pro Tip: When hiring a lab or professional testing service, confirm they are certified under your state’s drinking water program. Certification ensures they follow EPA-approved methods and that results will hold up if regulatory action is needed.
For offices with recent plumbing changes, older buildings, or any history of water-related complaints, a full professional lab panel is worth the investment every single time. The cost of a lab test is a rounding error compared to the cost of an employee health incident. You can learn more about how specific contaminants affect your team by reviewing common office water pollution risks before finalizing your testing scope.
My take: water testing is not a checkbox
I have seen dozens of office environments where water quality gets a single test during a lease renewal and then nothing for years. Management checks the box, files the paperwork, and moves on. That is not water quality management. That is liability documentation.
What I have learned from working with office environments is that the real danger is not the first test. It is the assumption that passing once means passing forever. Pipes corrode. Occupancy patterns shift. Building systems age. A water system that tested clean in January can have a very different story by December, especially after summer shutdowns, construction work, or even a prolonged holiday closure.
The offices that actually protect their employees are the ones treating water assessment as an ongoing practice, not a task. They have scheduled lab tests, routine flushing logs, and someone accountable for following up on results. That person does not need to be an expert. They need a system and the willingness to follow through.
One thing I would push back on: the idea that only large offices with complex systems need to worry. A small office with a single water line running through old pipes in a pre-1986 building can have more significant lead exposure than a corporate tower with a modern water management program. Size is not the determining factor. Infrastructure and oversight are.
— Soldierboy
Upgrade your office water after every assessment

Running a thorough water quality assessment gives you clarity. What you do with that clarity determines whether your office water is truly safe. Cowayswaterpurifier offers a range of water purification systems designed to address exactly the kinds of contaminants office assessments uncover, from lead and bacteria to PFAS. Whether you need a countertop unit for a small break room or an under-sink system for a higher-volume office kitchen, the right filter installed after a proper assessment is the most effective step you can take. Start with the water purification process guide to match purification technology to what your test results actually showed, then explore Cowayswaterpurifier’s full lineup to find the system that fits your space and budget.
FAQ
What is the first step to assess office water quality?
Request your annual Consumer Confidence Report from your local utility. It provides baseline data on contaminants detected in your source water before it reaches your building’s plumbing.
Can DIY test kits accurately assess office drinking water?
DIY kits check basic parameters like pH and TDS but cannot detect lead, PFAS, or Legionella. Certified laboratory testing is required for a reliable health safety assessment.
How often should office water be tested?
Test at minimum once a year for high-use taps, and retest after any plumbing work, renovation, or building closure longer than two weeks.
What does the EPA lead action level mean for offices?
If lead levels exceed 15 parts per billion, offices must notify employees and take corrective action. There is no safe level of lead exposure, so any detection warrants attention.
How do you reduce Legionella risk in an office water system?
Maintain hot water above 140°F, keep cold water below 77°F, flush unused outlets weekly, and implement a formal Water Management Program that includes regular testing as a validation step.
Recommended
- Why Test Water Quality in Offices Today – Coway Water Purifier
- Office Water Safety Checklist 2026: 70% Fewer Risks – Coway Water Purifier
- Complete Office Water Purifier Installation Guide – Coway Water Purifier
- Complete Office Water Purification Guide for Healthier Spaces – Coway Water Purifier