
Uncategorized
How to Clean Water Filters Naturally for Safer Drinking
Jan
Most American households with water purifiers rarely realize that regular maintenance can boost filter performance and safety by up to 60 percent. Staying proactive matters because even the cleanest water systems can harbor hidden bacteria or mineral buildup if neglected. With a straightforward routine using natural cleaning solutions, you can protect your family’s health and keep your filter running smoothly for years to come.
Table of Contents
- Step 1: Gather Necessary Cleaning Supplies And Tools
- Step 2: Disconnect And Safely Remove The Filter Unit
- Step 3: Rinse And Scrub Filter Components With Safe Solutions
- Step 4: Sanitize Parts To Eliminate Hidden Contaminants
- Step 5: Reassemble And Test Filter For Proper Flow
Quick Summary
| Key Point | Explanation |
|---|---|
| 1. Use natural cleaners efficiently | White vinegar and baking soda are effective, safe, and non-toxic alternatives for cleaning water filters. |
| 2. Safely disconnect water filter | Always turn off the water supply and release pressure before removing the filter to avoid leaks. |
| 3. Rinse and scrub components gently | Use warm water and a soft brush to clean components, preserving their integrity while removing buildup. |
| 4. Sanitize with effective solutions | Soak parts in a diluted vinegar solution to eliminate bacteria without harsh chemicals after cleaning. |
| 5. Properly reassemble and test the filter | Ensure all components are correctly reinstalled and check for leaks by slowly turning the water back on. |
Step 1: Gather necessary cleaning supplies and tools
Cleaning your water filter naturally requires assembling a thoughtful collection of safe and effective supplies. Natural cleaning solutions like white vinegar and baking soda will be your primary allies in maintaining your filtration system without harsh chemicals.
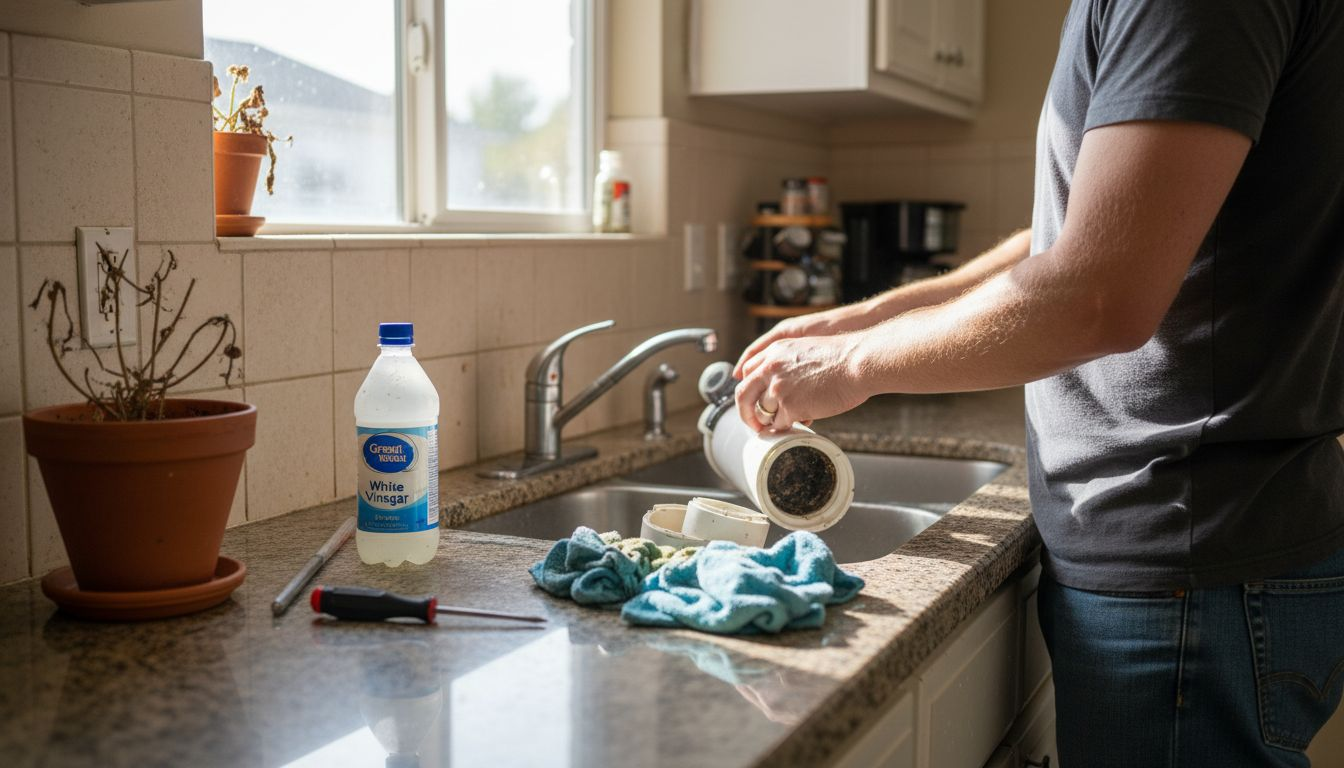
Your essential toolkit should include white vinegar (a powerful natural descaling agent), baking soda, a soft bristle brush or microfiber cloth, clean warm water, and disposable gloves. The soft brush helps gently scrub away sediment while avoiding scratching delicate filter surfaces. Vinegar’s antibacterial properties make it an excellent natural cleaning solution that dissolves mineral buildup and eliminates bacteria without introducing toxic residues.
As you gather your supplies, ensure everything is clean and ready to use. Arrange your materials on a clear workspace with good lighting so you can inspect each component carefully during the cleaning process. Having everything prepared beforehand will make your filter maintenance smooth and efficient.
Pro Tip: Keep a dedicated set of cleaning tools specifically for your water filter maintenance to prevent cross contamination with other household cleaning supplies.
Here’s a quick summary of common natural cleaning supplies and their main benefits for water filter maintenance:
| Cleaning Supply | Primary Benefit | Safe for Filter Components |
|---|---|---|
| White vinegar | Dissolves minerals and bacteria | Yes, safe for most surfaces |
| Baking soda | Gentle abrasive, deodorizes | Safe for plastic and ceramic |
| Microfiber cloth | Non-scratching cleaning | Ideal for delicate surfaces |
| Soft bristle brush | Removes sediment and buildup | Gentle on filter cartridges |
| Hydrogen peroxide | Natural sanitizer | Used in diluted sanitizing steps |
Step 2: Disconnect and safely remove the filter unit
Disconnecting your water filter requires careful attention to prevent potential water damage or system complications. Manufacturer guidelines recommend shutting off the water supply before beginning any removal process to minimize unexpected leaks or spills.
Start by locating the main water valve connected to your filtration system. Turn the valve completely off to stop water flow. Next, open a nearby faucet to release any residual pressure in the pipes. This step prevents sudden water surges when you begin removing the filter unit. Carefully unscrew the filter housing using gentle, consistent pressure to avoid damaging the threads or housing components. Some systems might require specific tools or techniques unique to their design, so consulting your specific model’s manual is always recommended.
Work slowly and methodically to prevent water spillage or accidental damage. Place a towel or shallow container underneath the filter area to catch any dripping water. Inspect the housing and surrounding connections for any signs of wear or mineral buildup before proceeding to the next cleaning steps.
Pro Tip: Take a quick smartphone photo of your filter’s current configuration before disconnecting to help you remember the exact placement during reinstallation.
Step 3: Rinse and scrub filter components with safe solutions
Natural cleaning methods provide an effective way to restore your water filter’s performance without using harsh chemicals. Begin by carefully removing the filter components and preparing a gentle cleaning workspace that allows thorough but careful treatment.
Start with a warm water rinse to remove loose debris and sediment from each component. For more intensive cleaning, create a natural cleaning solution using white vinegar and warm water. Submerge the filter parts and let them soak for approximately 15 to 20 minutes to help dissolve mineral deposits and biofilm. Use a soft bristled brush to gently scrub the surfaces, paying special attention to areas with visible buildup. Water filtration maintenance requires a delicate touch to preserve the filter’s structural integrity and prevent accidental damage.
Rinse each component thoroughly with clean water to remove any remaining vinegar solution. Inspect the parts carefully for any signs of wear or damage before reassembling. Ensure all surfaces are completely dry before reinstalling to prevent potential bacterial growth or system complications.
Pro Tip: Wear clean rubber gloves during the entire cleaning process to maintain hygiene and protect both your hands and the filter components.
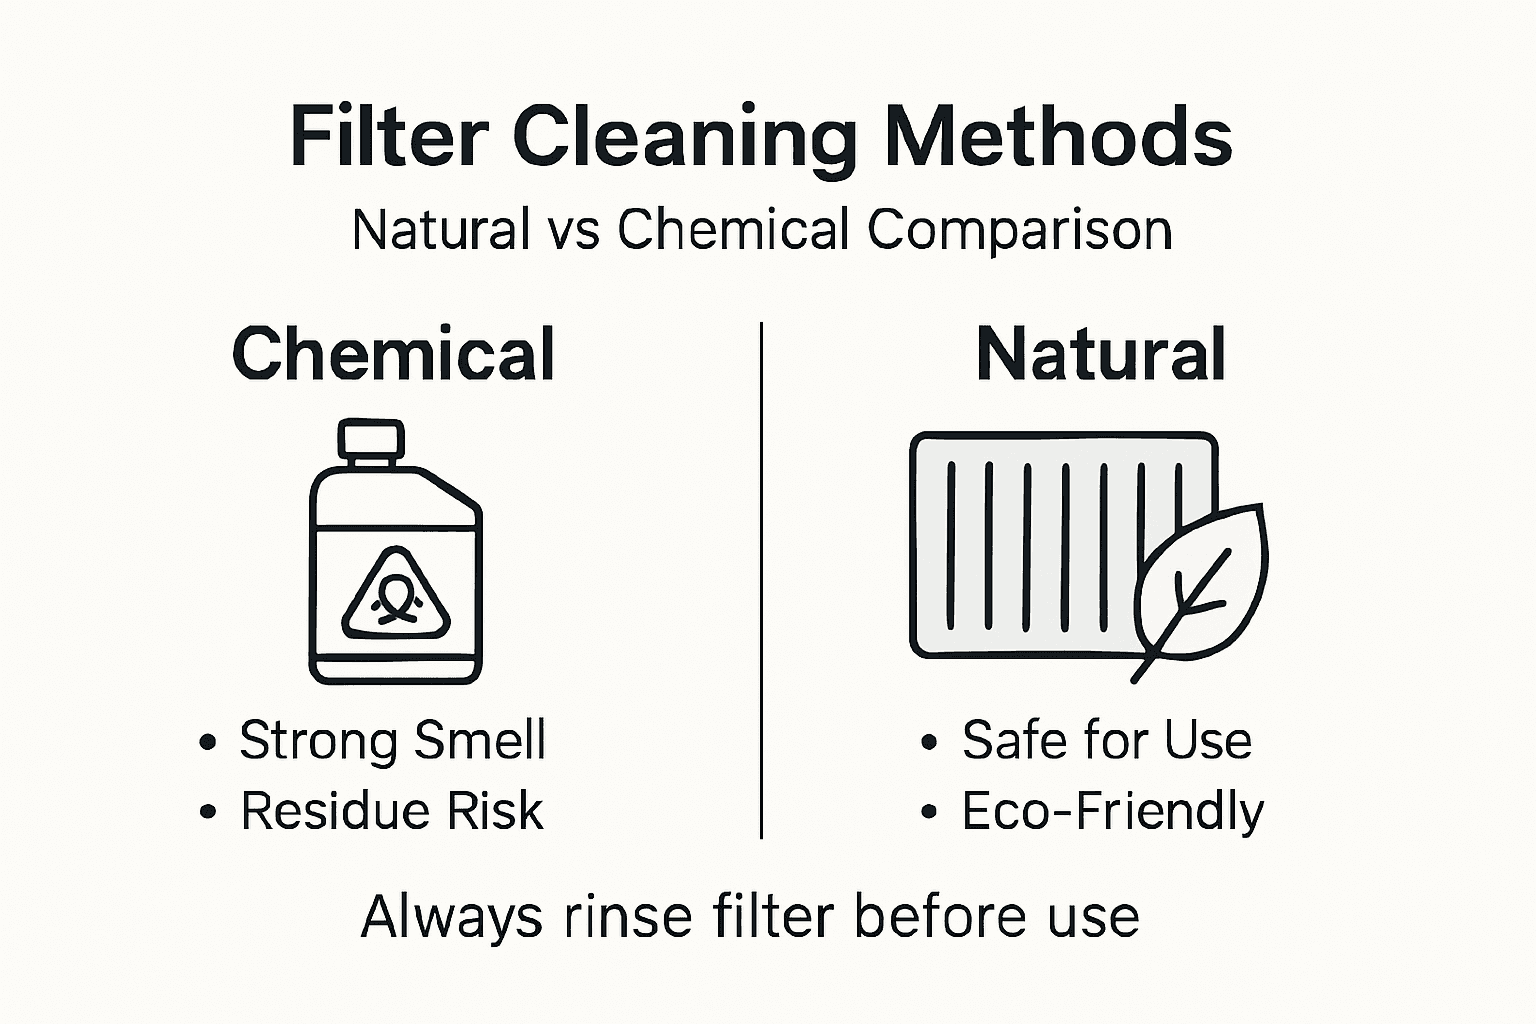
This table compares standard chemical-based cleaning with natural methods for water filter maintenance:
| Aspect | Chemical Cleaners | Natural Methods |
|---|---|---|
| Safety risk | High skin/respiratory irritation | Minimal, skin-safe ingredients |
| Environmental impact | Can leave harmful residues | Eco-friendly, biodegradable |
| Suitability for filters | May damage components | Gentle on all filter types |
| Residue concern | Possible chemical traces | No toxic residue left behind |
Step 4: Sanitize parts to eliminate hidden contaminants
Natural sanitization techniques offer a powerful way to eliminate microscopic threats from your water filter components without using harsh chemical treatments. The goal is to create a clean environment that prevents bacterial growth and ensures your filtration system remains effective.
Prepare a diluted solution using white vinegar or hydrogen peroxide. For vinegar sanitization, mix one part white vinegar with three parts water. Submerge the cleaned filter components completely in this solution and let them soak for 10 to 15 minutes. This process helps neutralize bacteria and potential pathogens that might have survived the initial cleaning. Natural antimicrobial methods can also include brief sunlight exposure, which provides additional natural disinfection through ultraviolet radiation.
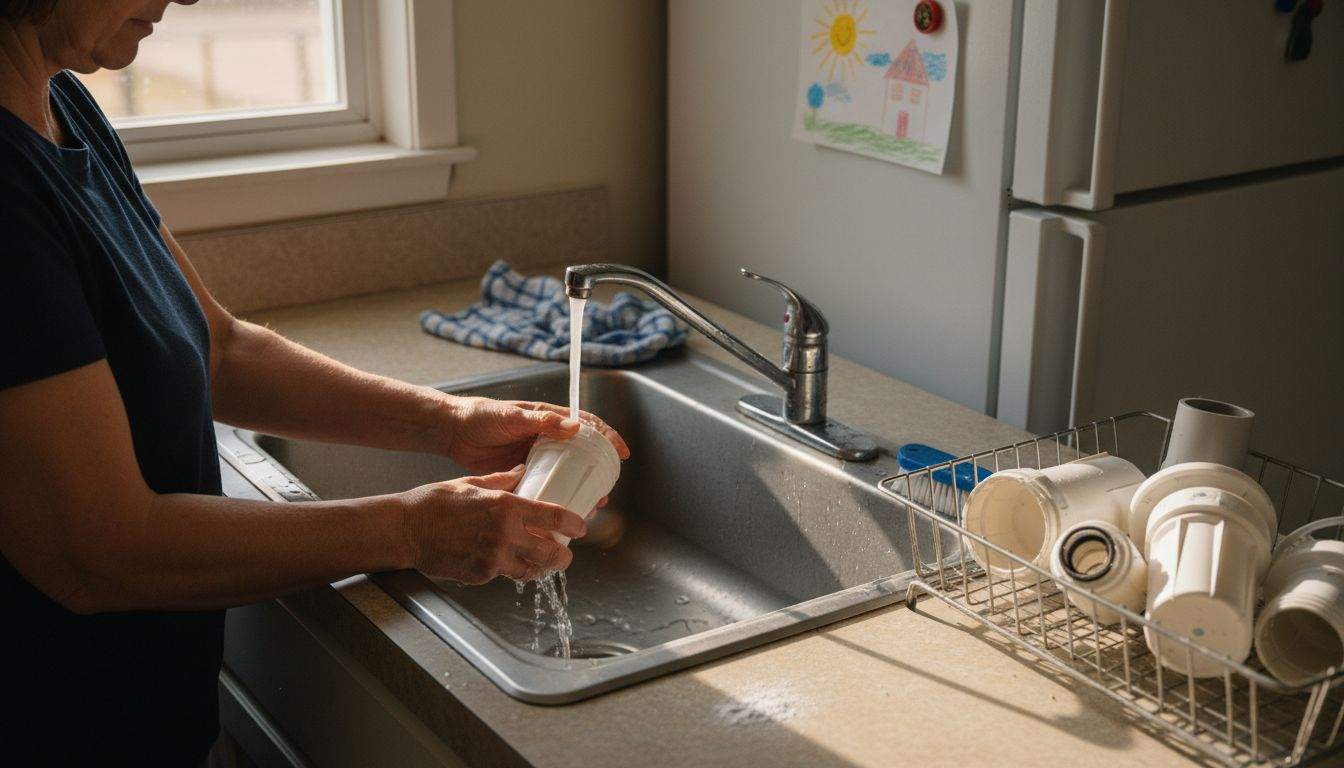
After sanitizing, rinse the components thoroughly with clean water to remove any residual sanitizing solution. Shake off excess water and allow the parts to air dry completely on a clean towel. Ensure no moisture remains before reassembling your water filter to prevent potential bacterial regrowth.
Pro Tip: Use filtered or distilled water for final rinsing to avoid reintroducing any potential contaminants during the sanitization process.
Step 5: Reassemble and test filter for proper flow
Carefully reinstalling your water filter requires precision and attention to ensure your system functions optimally. The goal is to rebuild the filter unit exactly as it was originally configured, preventing potential leaks or performance issues.
Begin by reviewing the components and referring to your manufacturer’s manual to confirm the correct reassembly sequence. Place each cleaned and sanitized part back into its original position. Pay special attention to seals and gaskets ensuring they are seated correctly and undamaged. Water filter testing procedures recommend turning the water supply back on slowly and checking for any signs of leakage. Start with low water pressure to minimize potential risks and observe the water flow carefully. Check connections at each junction and watch for unexpected drips or unusual water patterns.
Once reassembled, run water through the filter for several minutes. Observe the water clarity and flow rate to confirm the cleaning process did not compromise the filter’s performance. If water pressure seems reduced or the stream appears inconsistent, you may need to recheck the assembly or contact the manufacturer for additional guidance.
Pro Tip: Keep a clean white towel or paper towel nearby during testing to quickly identify any water leaks or unexpected moisture around the filter connections.
Keep Your Drinking Water Pure with Advanced Coway Solutions
Cleaning your water filters naturally is important for safer drinking water but it can sometimes feel complicated and time-consuming. If you want to avoid the hassle of regular filter maintenance while ensuring consistent water purity, Coway’s range of advanced water purifiers offers the perfect solution. Designed with innovative filtration technology and UV sanitization, these systems reduce the need for frequent manual cleaning and deliver clean, healthy water directly to your home.

Explore our selection of reliable water purifiers at Coway Water Purifier and discover models that suit every need from countertop to under-sink units. Customize your choice with options that include comprehensive installation and maintenance services so you can enjoy peace of mind with every glass of water. Ready to upgrade your water quality and simplify your life? Start today by visiting our Uncategorized Archives – Coway Water Purifier to learn more and choose the perfect system designed for your home and health.
Frequently Asked Questions
How can I clean my water filter naturally?
To clean your water filter naturally, gather supplies like white vinegar, baking soda, and a soft brush. Submerge the filter components in a mix of vinegar and water for 15-20 minutes, then scrub gently to remove buildup.
What are the benefits of using natural cleaning solutions for water filters?
Using natural cleaning solutions like white vinegar and baking soda minimizes the risk of harmful chemical residues while effectively breaking down mineral deposits. This keeps your water safe and maintains the integrity of your filter components.
How often should I clean my water filter naturally?
It’s recommended to clean your water filter every 3-6 months, depending on usage and water quality. Regular cleaning helps ensure optimal performance and safety for your drinking water.
What should I do if my water filter shows signs of wear during cleaning?
If you notice wear or damage while cleaning, stop the process and consider replacing the worn parts before reassembling. Inspect gaskets and seals, as replacing damaged components can prevent future leaks.
How can I test my water filter after cleaning?
After cleaning, reassemble your water filter and slowly turn the water supply back on. Observe the water flow and check for any leaks in the connections before running water through the filter for a few minutes to test its clarity.
Is it safe to use chemical cleaners on my water filter?
Using chemical cleaners on water filters is not recommended, as they can leave harmful residues that contaminate your drinking water. Stick to natural cleaning methods for safety and effectiveness.
Recommended
- How to Maintain Home Water Filters for Clean, Safe Water – Coway Water Purifier
- How to Ensure Safe Drinking Water for Home and Business – Coway Water Purifier
- DIY Water Purification Methods for Clean Drinking Water – Coway Water Purifier
- Water Filter Replacement Workflow for Safe Drinking Water – Coway Water Purifier
- Understanding The Safest Drain Cleaning Methods – Legacy Plumbing & Drain – Emergency Plumbers Of Sacramento
- Porównanie rękawic do sprzątania – Expert Comparison 2026