
Uncategorized
DIY Water Purification Methods for Clean Drinking Water
Dec
Over 60 percent of American households admit they are not fully prepared to purify water in emergencies or outdoor situations. Unexpected events can quickly make access to clean drinking water a major concern, putting your health at risk. This guide explains how to build a reliable water purification system using practical, science-based steps, so every American can have peace of mind no matter what comes their way.
Table of Contents
- Step 1: Gather Essential Water Purification Supplies
- Step 2: Choose the Most Effective DIY Purification Method
- Step 3: Build and Assemble Your Water Purification Setup
- Step 4: Test and Verify Water Purity for Safety
- Step 5: Maintain and Store Purified Water Properly
Quick Summary
| Key Insight | Explanation |
|---|---|
| 1. Assemble a water purification kit | Collect essential items for purifying water, including storage containers, filters, and treatment chemicals. |
| 2. Choose the right purification method | Select techniques like boiling or chemical treatments based on your situation and water source conditions. |
| 3. Build a reliable filtration system | Create a multi-layer filter with materials like sand, charcoal, and gravel for effective water filtration. |
| 4. Test water for purity | Verify the safety of filtered water through boiling, visual checks, and possibly chemical test strips. |
| 5. Maintain and store purified water | Use clean, food-grade containers and keep water stored in stable, cool, dark conditions to ensure long-term safety. |
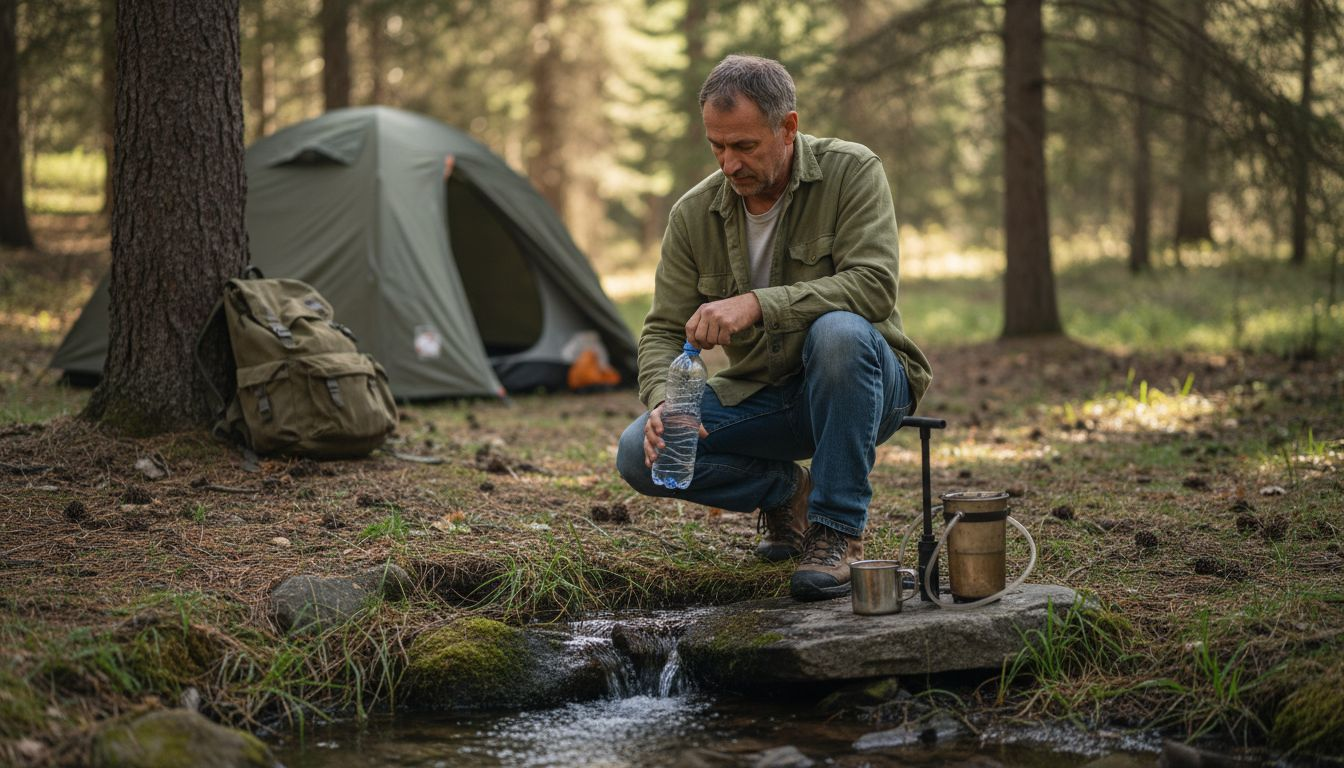
Step 1: Gather Essential Water Purification Supplies
In this crucial step, you will collect the necessary equipment and materials to effectively purify water in emergency situations or during outdoor activities. Your goal is to assemble a comprehensive kit that ensures safe drinking water under various conditions.
Start by gathering key supplies that cover multiple water purification methods. According to emergency preparedness guidelines, storing at least one gallon of water per person per day is essential. Your kit should include water storage containers with tight fitting lids, designed for long term water preservation. Select food grade plastic containers or specialized water storage tanks that can hold multiple gallons safely.
Your purification equipment should include several critical items water treatment tablets, portable water filters, a metal pot for boiling, and chemical disinfection agents like chlorine or iodine. Choose filters with micron ratings between 0.1 and 0.4 for maximum bacteria and protozoa removal. Pack multiple filtration options to increase reliability. Include a stainless steel pot or kettle capable of boiling water, which remains one of the most effective purification methods. Consider compact, lightweight options for emergency kits and more robust containers for home preparedness.
Pro Tip: Check your water purification supplies every six months, replacing expired tablets, inspecting filter conditions, and ensuring storage containers remain clean and undamaged.
Step 2: Choose the Most Effective DIY Purification Method
Selecting the right water purification technique is critical to ensuring your drinking water is safe and free from harmful contaminants. Your choice will depend on available resources, water source, and specific environmental conditions you are facing.
Effective DIY water filtration methods require careful consideration of design and material selection. Boiling remains one of the most reliable techniques, with Hope Force International confirming its ability to kill bacteria, viruses, and parasites. When boiling water, bring it to a rolling boil for at least one minute at sea level, and three minutes at higher altitudes above 5000 feet. Chemical treatments like chlorination provide an alternative method using unscented household bleach to disinfect water effectively.
For more complex purification needs, consider multi stage filtration approaches. Combine mechanical filtration using cloth or commercial filters with chemical treatment methods. Ceramic filters can remove sediment, while activated carbon filters address taste and odor issues. Always verify your chosen method’s effectiveness against potential contaminants in your specific water source.
Pro Tip: Test your selected water purification method before an emergency occurs to understand its limitations and practice proper technique.
Here’s a summary of common water purification methods and their primary advantages:
| Purification Method | Key Advantage | Typical Use Case |
|---|---|---|
| Boiling | Kills all germs | Home or camping |
| Chemical Treatment | Fast and portable | Emergencies and travel |
| Filtration (Physical) | Removes most particulates | Hiking and outdoor survival |
| Activated Carbon | Improves taste and odor | Home preparedness |
| Sunlight UV Exposure | No fuel or chemicals needed | Remote or sunny locations |
Step 3: Build and Assemble Your Water Purification Setup
Building an effective DIY water purification system requires careful planning and precise assembly of filtering components. Your goal is to create a reliable setup that can transform potentially contaminated water into a safe drinking source using readily available materials.
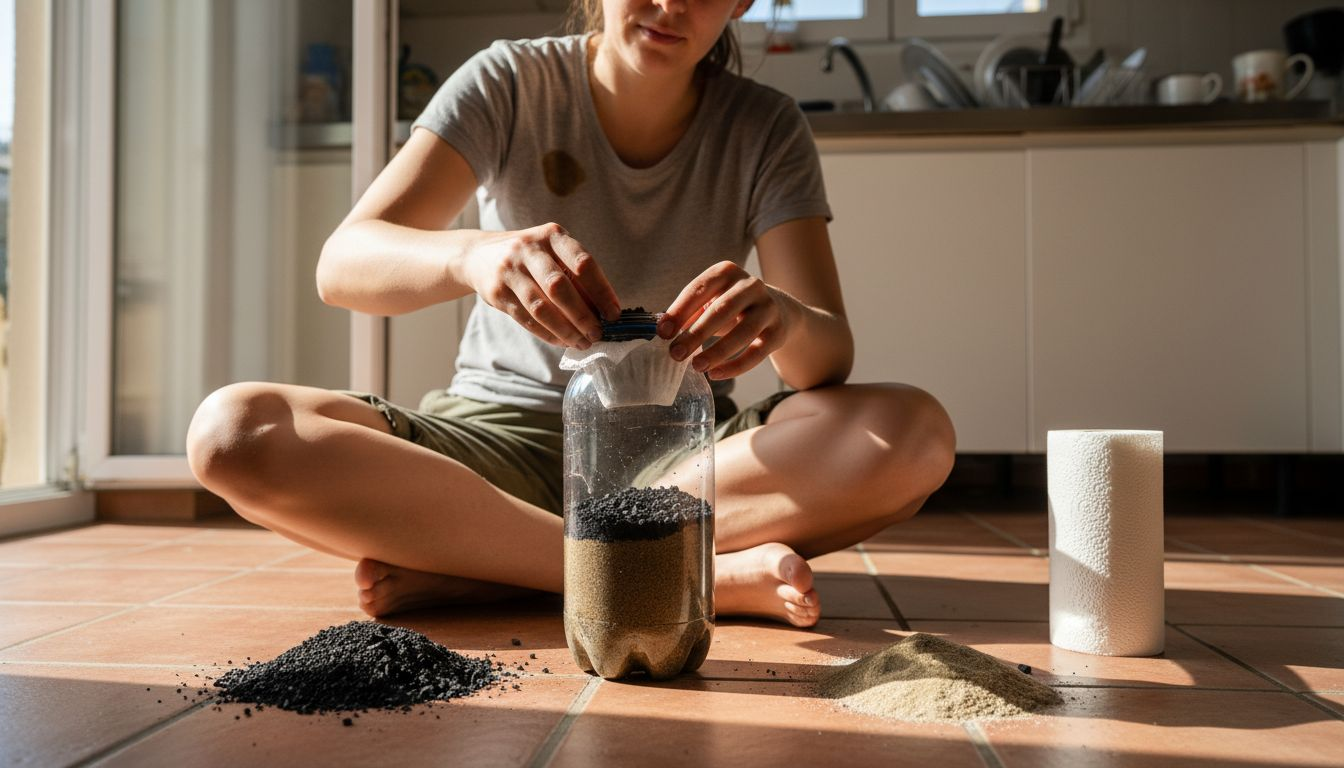
DIY water filtration techniques offer innovative solutions for creating multi layer filtering systems. The West Virginia Division of Natural Resources recommends constructing a simple water filter using a plastic bottle with strategically layered filtration materials. Start by gathering materials like clean plastic bottles, fine and coarse sand, small rocks, gravel, and activated charcoal. Arrange these materials in specific layers starting from the bottle opening: first add a layer of fine cloth or pantyhose to prevent material loss, then layer fine sand, pulverized charcoal, coarse sand, and finally small rocks or gravel as a support base.
Ensure each layer is approximately one to two inches thick and compacted gently to create an effective filtering mechanism. The activated charcoal layer is particularly crucial for removing chemical contaminants and improving water taste. After assembling your filter, test it with sediment laden water and observe how effectively it removes particulate matter. Consider exposing your filtered water to direct sunlight for additional UV radiation treatment to neutralize potential biological contaminants.
Pro Tip: Always have multiple backup filtering components and practice assembling your water purification setup before an actual emergency occurs.
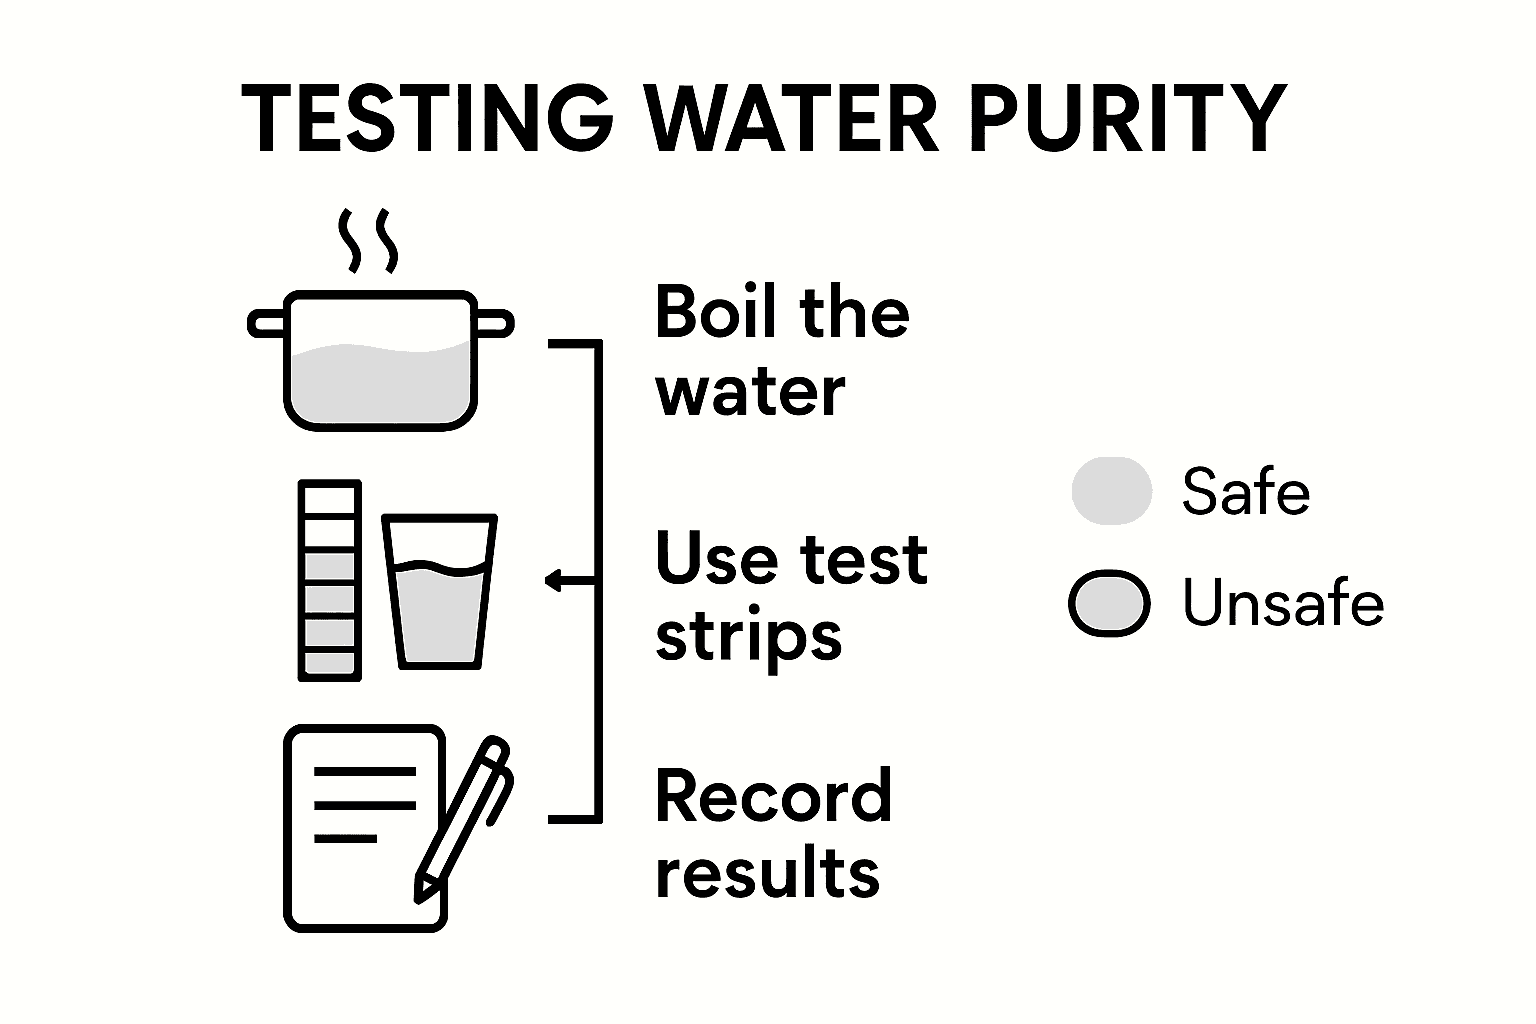
Step 4: Test and Verify Water Purity for Safety
Testing and verifying water purity is a critical final step in your DIY water purification process. Your objective is to ensure the water you have filtered is safe for consumption through systematic evaluation and verification techniques.
University of Georgia Extension recommends boiling water for comprehensive microorganism elimination, suggesting a thorough 10 minute boiling process to neutralize potential biological contaminants. After boiling, improve water palatability through aeration techniques like gently shaking the container or carefully pouring water between clean containers to reintroduce oxygen and enhance taste. Use multiple verification methods to confirm water safety including visual inspection for clarity, smell testing for unusual odors, and if possible professional water testing kits that can detect chemical and bacterial contaminants.
Consider using chemical test strips that can quickly assess water pH levels and detect the presence of harmful bacteria or heavy metals. Cross reference your DIY filtration results with multiple testing approaches. Pay special attention to water sourced from unknown or potentially contaminated environments. Remember that even clear looking water can harbor microscopic threats requiring thorough purification and rigorous safety verification.
Pro Tip: Maintain a log of your water purification and testing process, recording source location, filtration method used, and test results for future reference and continuous improvement.
Step 5: Maintain and Store Purified Water Properly
Maintaining and storing your purified water correctly is essential to preserving its safety and quality. Your primary objectives are preventing recontamination and ensuring long term water storage that remains clean and drinkable.
University of Georgia Extension guidelines recommend specific water storage protocols, emphasizing the importance of using clean containers and strategic storage conditions. Select food grade containers made from materials like high density polyethylene or glass that do not leach chemicals. Store your water containers in cool, dark locations away from direct sunlight and potential chemical contaminants. Temperature stability is crucial preventing bacterial growth and maintaining water quality.
Implement a systematic water rotation strategy to prevent stagnation and potential contamination. Mark your storage containers with the date of initial storage and plan to rotate water supplies every six months. Use airtight containers with secure lids to prevent dust, debris, and airborne contaminants from entering. Consider storing water in multiple smaller containers rather than one large tank, which allows easier management and reduces the risk of losing entire water reserves if one container becomes compromised.
Pro Tip: Create a dedicated water storage log tracking each container’s fill date, water source, and purification method to maintain meticulous records of your emergency water supply.
Refer to this guide to select the right water storage container:
| Container Material | Durability | Best For |
|---|---|---|
| Food Grade Plastic | Lightweight, strong | Short to medium term use |
| Glass | Chemical free | Home long term storage |
| Metal (Stainless) | Impact resistant | Boiling and transport |
| Commercial Tank | Large volume safe | Household preparedness |
Secure Your Home Water Supply with Advanced Filtration Solutions
While DIY water purification methods offer crucial knowledge and emergency strategies, ensuring clean, safe drinking water every day requires reliable technology. The challenges of removing contaminants, verifying water purity, and maintaining long-term safety can be daunting. You deserve peace of mind with systems that handle these tasks effortlessly.
Explore Uncategorized Archives – Coway Water Purifier for a range of smart water purifiers designed to deliver consistent quality. Our Coway water filtration units combine advanced filtration technology and UV sanitization to eliminate germs, improve taste, and refresh your water supply. Don’t wait for an emergency to realize your water needs—invest now to protect your family’s health.

Ready to upgrade your water experience without hassle? Visit Coway Water Purifier to discover models tailored for your home. With expert installation, free delivery, and ongoing maintenance, you can enjoy worry-free clean water every day. Take control of your drinking water safety today and make the switch from temporary fixes to proven reliability.
Frequently Asked Questions
What is the best method for DIY water purification?
Boiling is one of the most effective DIY water purification methods, as it kills bacteria, viruses, and parasites. Bring the water to a rolling boil for at least one minute to ensure it is safe to drink.
How do I build a simple DIY water filter?
To build a simple DIY water filter, use a clean plastic bottle layered with filtering materials such as fine cloth, sand, and activated charcoal. Start with a layer of fine cloth, add fine sand, then activated charcoal, followed by coarse sand, and finally small rocks for support.
How do I test if my purified water is safe to drink?
You can test your purified water by boiling it for at least 10 minutes to kill microorganisms. Additionally, conduct visual inspections for clarity and use chemical test strips to check for harmful bacteria or heavy metals.
How often should I check and maintain my water purification supplies?
Check your water purification supplies every six months to replace expired items, inspect filters, and clean storage containers. Regular maintenance helps ensure that your purification methods will be effective when needed.
What kind of containers should I use for storing purified water?
Use food-grade containers made of high-density polyethylene or glass for storing purified water, as they do not leach chemicals. Ensure that these containers have tight-fitting lids and store them in cool, dark places to preserve water quality.
How can I improve the taste of purified water?
You can improve the taste of purified water by aerating it, which involves gently shaking the container or pouring it between clean containers to reintroduce oxygen. Additionally, using activated charcoal in your filtration setup can help remove chemical contaminants that affect taste.
Recommended
- 7 Effective Water Purification Methods for Your Home – Coway Water Purifier
- 7 Top Water Filtration Methods You Need to Know – Coway Water Purifier
- Understanding Sustainable Water Purification Methods – Coway Water Purifier
- How to Ensure Safe Drinking Water for Home and Business – Coway Water Purifier
- How to Remove Salt from Softened Water for Plants – Lushy Gardens
- Understanding the Effects of Water Contamination – My WordPress