
Uncategorized
Complete Office Water Purifier Installation Guide
Oct
Most offices trust their tap water without a second thought. Yet shockingly, over 43 percent of US office buildings have water systems that test positive for contaminants like lead or bacteria. You might think that installing a simple water purifier is enough to fix the problem. The real surprise? The right installation and ongoing care matter just as much as the device itself, and skipping a single step can leave your workplace at risk.
Table of Contents
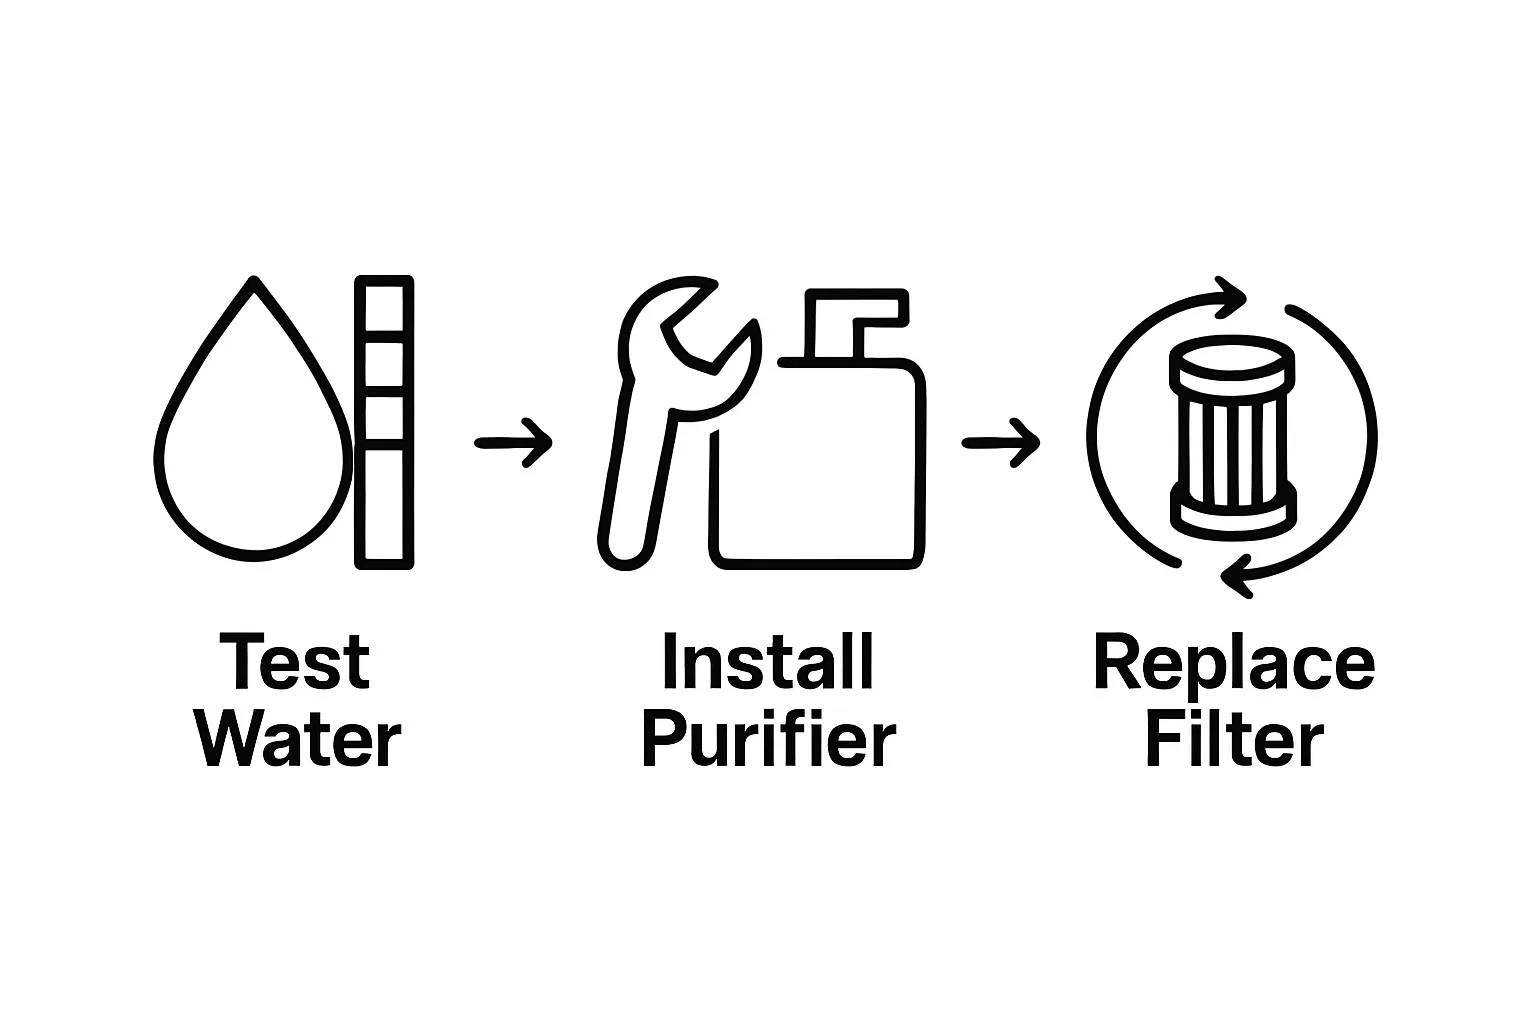
- Step 1: Assess Your Office’s Water Quality
- Step 2: Choose The Right Purifier Model
- Step 3: Gather Necessary Tools And Materials
- Step 4: Install The Water Purifier Unit
- Step 5: Connect And Test The System
- Step 6: Maintain For Optimal Performance
Quick Summary
| Key Point | Explanation |
|---|---|
| 1. Assess Your Water Quality First | Conduct a comprehensive water quality test to identify contaminants and specific needs for tailored filtration solutions. |
| 2. Choose the Right Purifier Model | Select a water purifier based on size, filtration capabilities, and water quality test results for optimal performance. |
| 3. Gather Essential Tools for Installation | Prepare the necessary tools and materials to ensure a smooth, efficient installation process without delays. |
| 4. Regular Maintenance is Crucial | Schedule consistent maintenance, including filter replacements and system inspections, to ensure long-term efficiency and water quality. |
| 5. Document Everything for Future Reference | Keep detailed records of water quality tests, installation processes, and maintenance activities for ongoing assessment and improvements. |
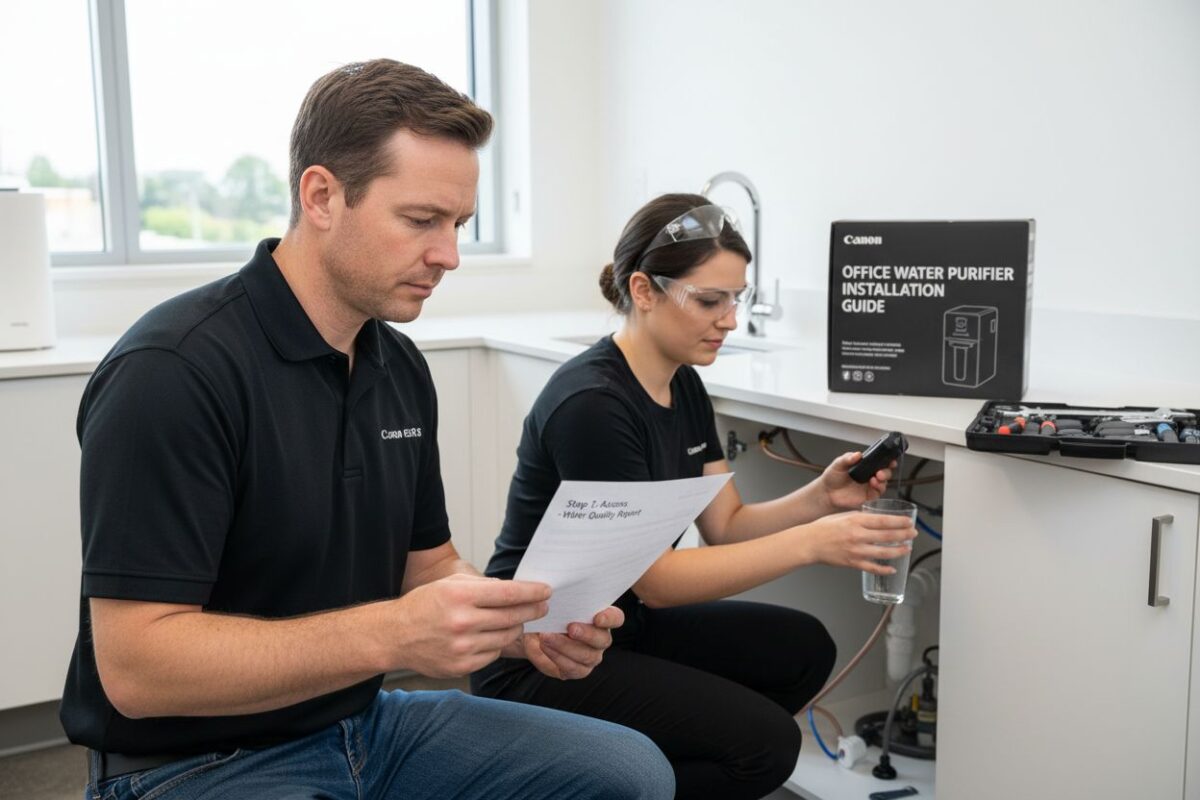
Step 1: Assess Your Office’s Water Quality
Before installing a water purifier in your office, understanding your current water quality is crucial. This initial assessment helps you select the most appropriate filtration system tailored to your specific needs. Water quality varies significantly across different locations, and what works for one office might not be optimal for another.
Start by obtaining a comprehensive water quality test. These tests analyze critical parameters like pH levels, mineral content, potential contaminants, and bacterial presence. Professional testing services can provide detailed reports that reveal hidden issues not visible to the naked eye. Many local water departments offer affordable testing options, or you can purchase comprehensive home testing kits from scientific supply stores.
While conducting your assessment, pay special attention to water characteristics that might indicate problematic conditions. Unusual taste, slight discoloration, or a metallic odor could signal underlying contamination issues. Hard water with high mineral content can leave residue on office equipment, potentially causing long term damage to coffee machines, water coolers, and other appliances. Learn more about identifying water quality issues in office environments.
Key testing parameters should include:
- Total dissolved solids (TDS)
- pH balance
- Presence of heavy metals
- Microbial contamination levels
- Chlorine and chloramine concentrations
Document your findings meticulously. A detailed report will not only guide your water purifier selection but also serve as a baseline for future comparisons.
 Some testing services provide digital reports that can be easily shared with your office management or facilities team, ensuring everyone understands the current water quality landscape.
Remember, water quality assessment is more than a technical exercise it is an investment in your office’s health and productivity. Clean, safe water contributes to employee wellness, reduces potential health risks, and demonstrates your organization’s commitment to providing a superior workplace environment.
Step 2: Choose the Right Purifier Model
Selecting the appropriate water purifier for your office is a critical decision that directly impacts employee health and workplace productivity. The water quality assessment from the previous step will serve as your primary guide in navigating this selection process. Each office environment has unique requirements influenced by factors like employee count, water consumption patterns, and specific contamination challenges.
Consider the physical space and infrastructure of your office when evaluating potential water purification systems. Compact countertop models might work perfectly for smaller offices with limited square footage, while larger organizations may require under-sink or centralized filtration systems. Evaluate your available electrical connections, plumbing configurations, and maintenance capabilities before making a final selection.
Technical specifications play a crucial role in your decision making process. Look for purification systems that offer multi stage filtration technologies capable of removing various contaminants. Explore our comprehensive guide to office water purification solutions to understand the nuanced requirements of different filtration approaches.
Key considerations for your purifier selection should include:
- Filtration efficiency percentage
- Water output capacity
- Maintenance requirements
- Energy consumption levels
- Warranty and service support
Budget constraints are another critical factor. While high end water purifiers might seem expensive initially, they often provide long term value through superior filtration, reduced maintenance costs, and enhanced water quality. Calculate the total cost of ownership, which includes initial purchase price, installation expenses, filter replacement costs, and potential energy consumption.
Engaging with professional water treatment specialists can provide invaluable insights during your selection process. Many reputable manufacturers offer consultation services to help you identify the most suitable water purification system for your specific office environment. These experts can perform detailed assessments and recommend models that precisely match your water quality test results and operational requirements.
Step 3: Gather Necessary Tools and Materials
Preparing for a successful water purifier installation requires meticulous planning and the right equipment. This step transforms your preparation from theoretical to practical, ensuring you have everything needed to complete the installation smoothly and efficiently. Professional installers understand that having tools organized beforehand prevents unnecessary delays and potential complications during the process.
Your toolset will vary slightly depending on the specific water purifier model, but most office water purifier installations demand a core set of professional grade tools. Precision is key when working with plumbing and electrical connections, so invest in high quality tools that provide accurate measurements and secure connections. Avoid using household or low grade tools, as they might compromise the integrity of your installation.
Find comprehensive installation guidelines for water purification systems to understand specific model requirements and recommended tools.
Essential tools for your water purifier installation include:
- Adjustable wrench
- Plumber’s tape
- Pipe cutter
- Level
- Drill with various drill bit sizes
- Screwdriver set
- Measuring tape
- Bucket for potential water spillage
- Safety glasses
- Work gloves
Beyond physical tools, gather all manufacturer provided materials like mounting brackets, connection adapters, and installation manuals. These components are specifically designed for your water purifier model and ensure proper fit and functionality. Take time to review the installation manual thoroughly before beginning the process, noting any unique requirements or specialized tools mentioned.
Organize your workspace strategically before starting the installation. Clear the area around your intended installation site, protect surrounding surfaces, and ensure you have adequate lighting and ventilation. Having a clean, organized workspace not only makes the installation process more efficient but also reduces the risk of accidental damage to your new water purification system or surrounding office infrastructure.
Below is a concise table highlighting the essential tools and materials required for installing an office water purifier, along with their main purposes.
| Tool/Material | Purpose |
|---|---|
| Adjustable wrench | Tighten and loosen plumbing connections |
| Plumber’s tape | Seal pipe threads to prevent leaks |
| Pipe cutter | Cut pipes accurately for proper fitting |
| Level | Ensure purifier is installed evenly |
| Drill with drill bits | Make holes for mounting or plumbing access |
| Screwdriver set | Secure screws and mounting hardware |
| Measuring tape | Measure spaces and ensure accurate placement |
| Bucket | Catch any water spillage during installation |
| Safety glasses | Protect eyes during drilling and cutting |
| Work gloves | Protect hands from sharp objects and debris |
| Mounting brackets/adapters | Secure unit and connect to plumbing system |
| Installation manual | Provide model-specific installation instructions |
Step 4: Install the Water Purifier Unit
Installing your office water purifier requires precision, patience, and careful attention to detail. This critical step transforms your carefully selected equipment into a functional workplace hydration solution. Begin by thoroughly reviewing the manufacturer’s installation guide, as each model has unique specifications that must be followed meticulously to ensure optimal performance and maintain warranty conditions.
Choose your installation location strategically. The area should provide easy access for future maintenance, be near a reliable water source, and have sufficient electrical outlets. Proximity to electrical connections and water lines is crucial. Ensure the surface is level, stable, and can support the unit’s weight. If you are installing an under sink model, verify that the cabinetry can accommodate the system without compromising structural integrity.
Explore detailed guidelines for under sink water filter installations to understand specific placement requirements for different system types.
Key installation checkpoints include:
- Confirm water line compatibility
- Verify electrical connection requirements
- Check mounting surface stability
- Ensure proper drainage setup
- Validate manufacturer recommended clearances
When connecting water lines, use plumber’s tape to create secure, leak free connections. Tighten fittings carefully, avoiding over tightening which could damage seals or threading. Some water purifier models require specific adapters or connection kits, so refer to your installation manual for precise instructions. If you encounter complex plumbing configurations or feel uncertain about any step, consider consulting a professional installation technician.
After physical installation, conduct a comprehensive system check. Slowly open water valves, watching for any signs of leakage around connections. Run a complete initial flush cycle as recommended by the manufacturer, which helps remove any manufacturing residues and prepares the filtration system for regular use. Document the installation process, including date, model details, and any unique configuration notes for future reference and maintenance tracking.
Step 5: Connect and Test the System
Connecting and testing your new office water purifier is a critical phase that validates the entire installation process. This step ensures your system functions precisely as intended, providing safe and clean water for your workplace. Approach this stage with methodical care, understanding that thorough testing prevents potential future complications.
Electrical connections require particular attention. Before plugging in the water purifier, verify that the electrical outlet meets the manufacturer’s specifications. Surge protectors can provide an additional layer of protection against potential electrical fluctuations that might damage sensitive filtration components. Ensure the power cord is not stretched tightly and has sufficient slack to prevent strain on the connection points.
Learn more about comprehensive water filtration system testing procedures to understand advanced verification techniques.
Critical testing checkpoints include:
- Verify water flow rates
- Check for any unusual sounds during operation
- Confirm temperature settings
- Test water dispensing mechanisms
- Inspect initial water quality output
Initiate a comprehensive system test by running multiple water cycles. The first few cycles will help flush out any initial manufacturing residues and air pockets in the system. Monitor water clarity, taste, and temperature during these initial runs. Any significant deviations from expected performance should prompt immediate consultation with the manufacturer’s technical support team.
Document your testing process meticulously. Record the date, time, and specific observations during each test cycle. This documentation serves multiple purposes it provides a baseline for future maintenance, helps track the system’s initial performance, and can be valuable if you need to invoke the manufacturer’s warranty. Pay special attention to water pressure, ensuring it remains consistent and meets the purifier’s operational requirements.
Final verification involves conducting a comprehensive sensory and technical assessment. Taste the water, examine its clarity, and confirm that all digital displays and indicators are functioning correctly. Your goal is not just operational functionality but ensuring the water purifier delivers the high quality hydration your office environment demands.
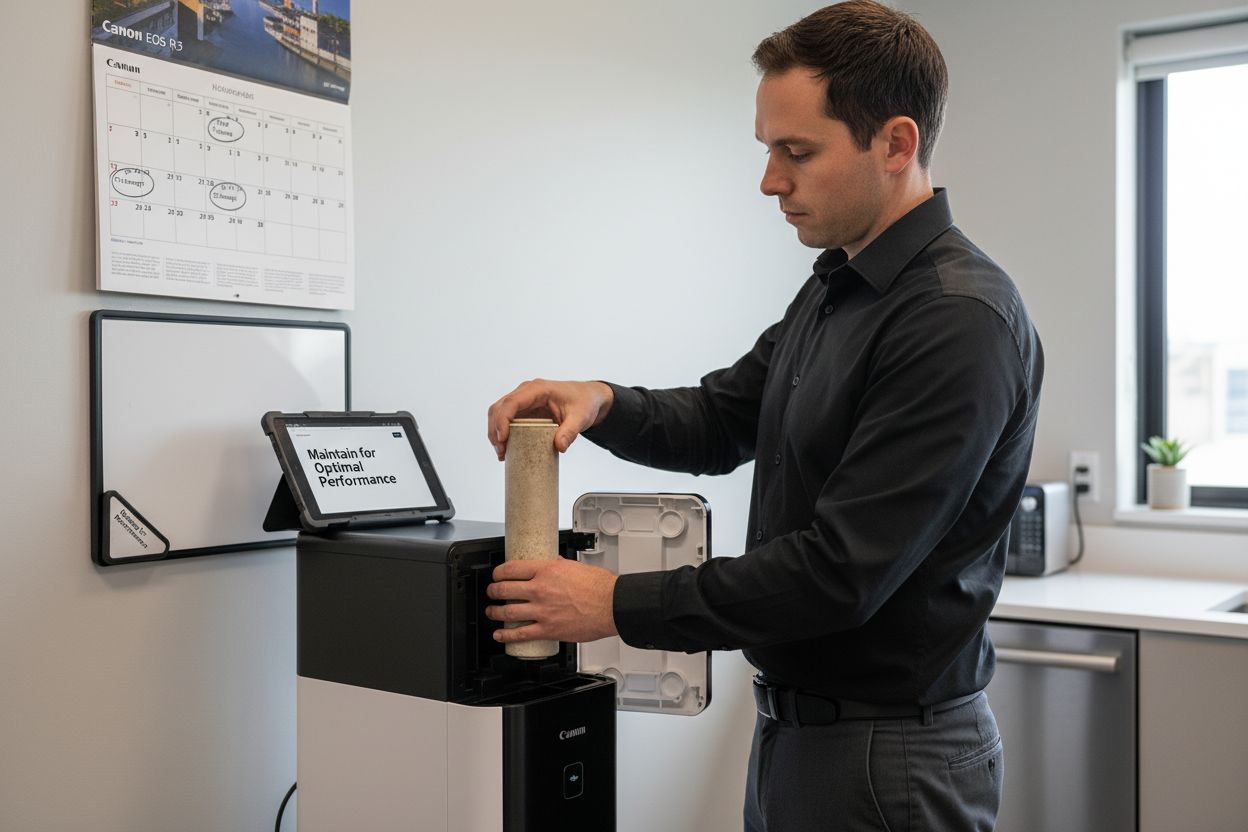
Step 6: Maintain for Optimal Performance
Maintaining your office water purifier is not just a recommendation it is a critical responsibility that ensures long term system reliability, water quality, and workplace health. Regular maintenance prevents potential system failures, maintains filtration efficiency, and protects your initial investment. Think of maintenance as routine healthcare for your water purification system, where consistent attention prevents more significant problems from developing.
Filter replacement represents the most crucial aspect of ongoing maintenance. Each water purifier model has specific filter replacement schedules, typically ranging from three to six months depending on usage and water quality. Keep a detailed log of filter replacement dates, tracking performance changes and monitoring the system’s overall efficiency. Some advanced water purifiers offer digital tracking mechanisms that alert you when filter replacements become necessary, transforming maintenance from a manual to an automated process.
Explore our comprehensive purifier maintenance checklist for detailed guidance to understand best practices for system care.
Key maintenance activities include:
- Monthly visual system inspections
- Quarterly comprehensive cleaning
- Biannual professional system evaluations
- Annual deep cleaning and component assessment
- Regular water quality testing
Beyond filter replacements, periodic sanitization of the water purifier becomes essential. Use manufacturer recommended cleaning solutions to prevent bacterial growth and mineral buildup. Pay special attention to dispensing nozzles, drip trays, and external surfaces that frequently contact water or human touch. These areas can become breeding grounds for microorganisms if not cleaned regularly.
Establish a dedicated maintenance team or assign specific personnel responsible for tracking and executing maintenance protocols. This approach ensures accountability and prevents maintenance tasks from being overlooked. Consider creating a digital maintenance calendar with automated reminders, integrating filter replacement schedules, cleaning timelines, and professional service appointments. By treating your water purifier with consistent, structured care, you guarantee a reliable, high performing system that continues to deliver exceptional water quality for your office environment.
The following table summarizes the main maintenance activities for an office water purifier, including frequency and their importance for long-term system efficiency.
| Maintenance Activity | Recommended Frequency | Importance |
|---|---|---|
| Visual system inspection | Monthly | Detects visible damage, leaks, or irregularities |
| Filter replacement | 3–6 months | Maintains water quality and filtration efficacy |
| Comprehensive cleaning | Quarterly | Removes buildup/bacteria, keeps system hygienic |
| Professional evaluation | Biannually | Identifies technical issues requiring expertise |
| Deep cleaning/component check | Annually | Ensures all parts are functioning as intended |
| Water quality testing | Regular/intermittent | Monitors ongoing effectiveness of the system |
Upgrade Your Office Hydration Experience Now
Is your team struggling with inconsistent water quality, confusing installation steps, or worries about long-term purifier maintenance? After reading the Complete Office Water Purifier Installation Guide, you understand how important it is to get each step right. Choosing the wrong model, using the wrong tools, or missing essential maintenance can create ongoing headaches that lower productivity and may affect health. Your business and your employees deserve water that is pure, safe, and ready at every turn. Explore all available Coway water purifier solutions to find a perfect match for your office needs. Discover advanced filtration, UV sanitization, and free professional installation, all backed by certified service and ongoing support.

Do not leave your team’s health to chance. Take the next step toward a hassle-free installation and workplace wellness by exploring Coway’s complete purifier range. See which system meets your requirements, get expert guidance, and enjoy fast delivery with comprehensive customer care. Start your office’s clean water journey today at https://cowayswaterpurifier.com before the next workday begins.
Frequently Asked Questions
What should I consider when assessing my office’s water quality?
Before installing a water purifier, you should conduct a comprehensive water quality test to evaluate parameters like pH levels, mineral content, contamination presence, and bacterial loads. Look out for unusual taste, discoloration, or odor as indicators of potential issues.
How do I choose the right water purifier model for my office?
Selecting the appropriate water purifier depends on factors such as your office’s square footage, employee count, and specific water contamination challenges. Evaluate models for filtration efficiency, maintenance needs, and energy consumption based on your unique requirements.
What tools and materials do I need to install an office water purifier?
Essential tools include an adjustable wrench, plumber’s tape, pipe cutter, screwdriver set, and a drill. Additionally, gather necessary manufacturer-provided materials like mounting brackets and installation manuals to ensure a smooth installation process.
How can I ensure my water purifier is maintained properly?
Regular maintenance is crucial for long-term efficiency. This includes timely filter replacements, monthly visual inspections, quarterly cleanings, and annual professional evaluations. Keeping track of these tasks through a maintenance calendar or log will help maintain optimal performance.
Recommended
- Complete Office Water Purification Guide for Healthier Spaces – Coway Water Purifier
- Complete Water Purifier Installation Guide for Homeowners – Coway Water Purifier
- Understanding the Benefits of Filtered Water for Offices – Coway Water Purifier
- Setting Up Under Sink Filters: A Step-by-Step Guide – Coway Water Purifier