
Uncategorized
Step by Step Purifier Maintenance for Peak Performance
Jan
Over one third of American families rely on water filtration systems to help protect their loved ones’ health at home. Regular water purifier maintenance is not just a chore for safety-focused homeowners, it is a powerful way to prevent contamination and keep every sip fresh. This guide makes it simple for American households to maintain their Coway water purifier step by step, safeguarding both your family’s wellbeing and your investment in clean water.
Table of Contents
- Step 1: Gather Essential Tools And Supplies
- Step 2: Power Down And Disconnect The Purifier
- Step 3: Remove And Clean Filter Components
- Step 4: Inspect And Sanitize The Purifier Housing
- Step 5: Reassemble And Test System Functionality
Quick Summary
| Key Point | Explanation |
|---|---|
| 1. Gather essential tools first | Collect cleaning cloths, gloves, tools, and filters to ensure smooth maintenance. |
| 2. Power down for safety | Unplug the purifier and disconnect water lines to prevent electrical hazards. |
| 3. Clean filters thoroughly | Regularly remove, clean, and inspect filter components to maintain optimal performance. |
| 4. Sanitize the purifier housing | Use approved disinfectants to clean the internal housing, preventing microbial growth. |
| 5. Test system functionality | After reassembly, run a test cycle to ensure there are no leaks and water quality is optimal. |
Step 1: Gather essential tools and supplies
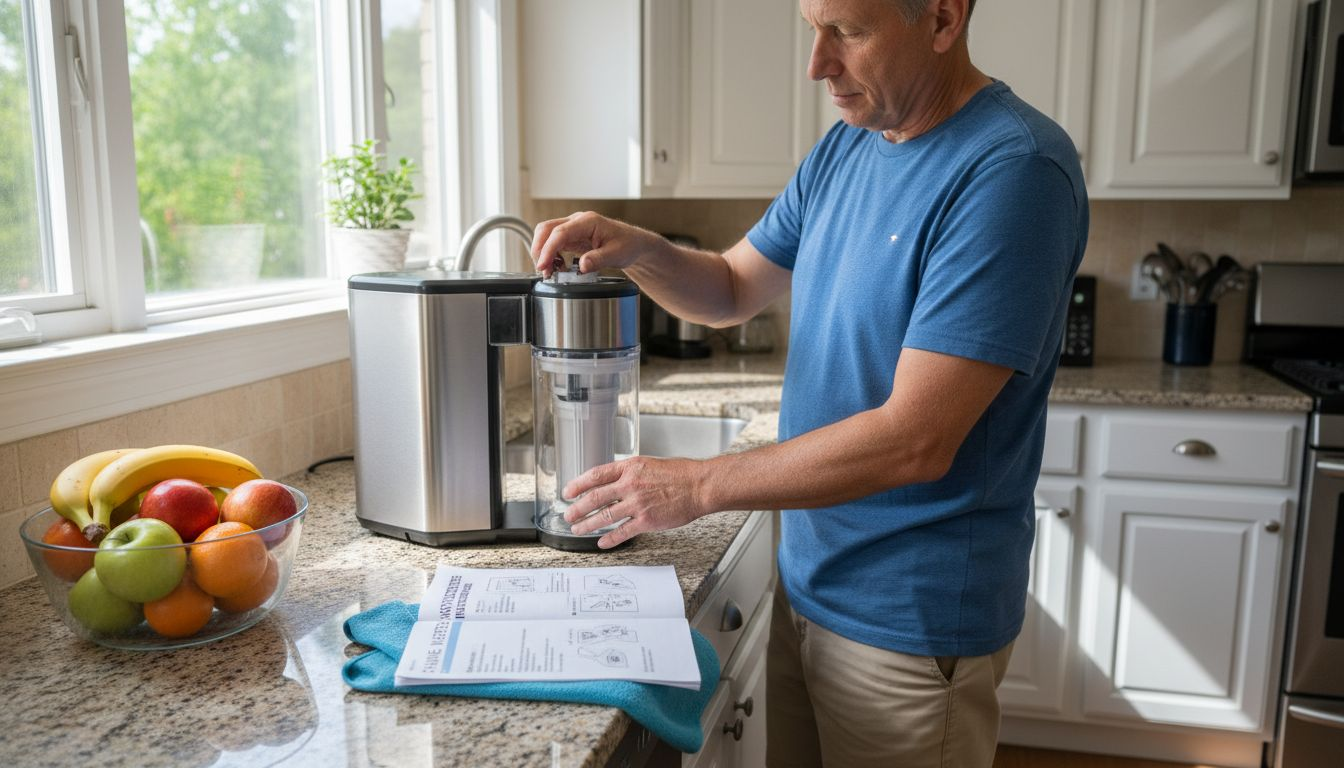
Preparing for water purifier maintenance requires assembling the right equipment to ensure a smooth and effective process. By collecting all necessary tools and supplies beforehand, you will save time and protect your valuable filtration system from potential damage during maintenance.
Your maintenance toolkit should include several key components. Start by gathering cleaning microfiber cloths, disposable gloves, and specialized cleaning solutions designed for water treatment systems. You will also need basic tools like adjustable wrenches, needle nose pliers, and a small flashlight for inspecting internal components. Certified replacement filters that meet NSF standards are crucial for maintaining your purifier’s performance and ensuring water quality. Consider keeping spare pre-filters, activated carbon filters, and RO membranes on hand, as understanding each component’s role is essential for effective maintenance.
Here’s a quick guide to the main water purifier filter components and their functions:
| Component Type | Main Function | Recommended Maintenance Frequency |
|---|---|---|
| Pre-filter | Removes sediments and large particles | Every 3–6 months, clean or replace |
| Activated Carbon | Reduces chlorine, odors, and chemicals | Replace every 6–12 months |
| RO Membrane | Removes dissolved solids, heavy metals | Replace every 2 years or as needed |
| UV Chamber | Disinfects against bacteria and viruses | Wipe clean yearly, replace bulb as needed |
Before beginning any maintenance work, organize your workspace and lay out your tools within easy reach. Having a clean, well-lit area with all supplies prepared will make your maintenance process smoother and more efficient.
Pro tip: Keep a dedicated plastic storage container for your water purifier maintenance toolkit to ensure all components remain clean, organized, and readily accessible whenever needed.
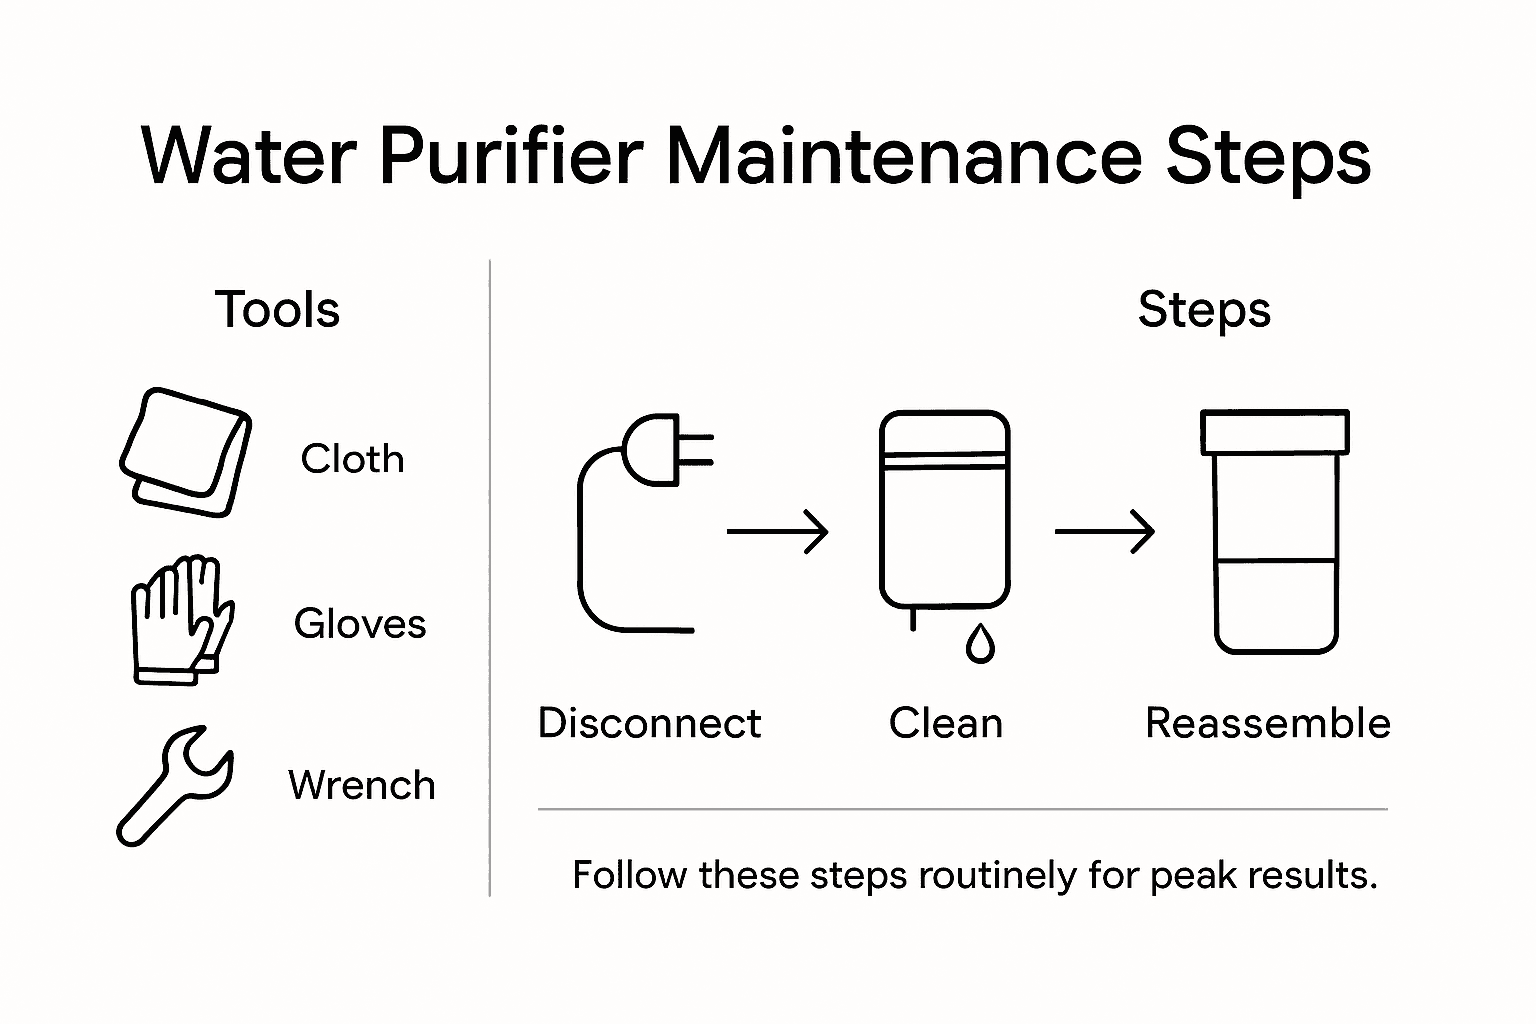
Step 2: Power down and disconnect the purifier
Safety is paramount when preparing your water purifier for maintenance. This step involves carefully powering down and disconnecting your system to prevent electrical hazards and potential water damage during the maintenance process.
Secure isolation of all energy sources is critical before beginning any maintenance work. Start by unplugging the purifier from the electrical outlet. If your model is hardwired, locate your home’s circuit breaker and switch off the specific circuit powering the water purification system. Next, carefully disconnect the water supply lines. Use an adjustable wrench to gently loosen and remove the water input and output connections, taking care not to damage the threading or surrounding components. Before performing maintenance, operators must completely power down the system to prevent electrical risks.
After disconnecting power and water sources, place a towel or shallow tray underneath the purifier to catch any residual water that might drain from the system. This prevents potential water damage to your floor or workspace and helps keep your maintenance area clean and organized.
Pro tip: Take a quick photo of your purifier’s current connections before disconnecting anything to help you reassemble everything correctly during reinstallation.
Step 3: Remove and clean filter components
Now that your water purifier is safely powered down, you will carefully remove and clean the various filter components to maintain optimal performance and water quality. This critical step ensures that your filtration system continues to provide clean, safe drinking water for your household.
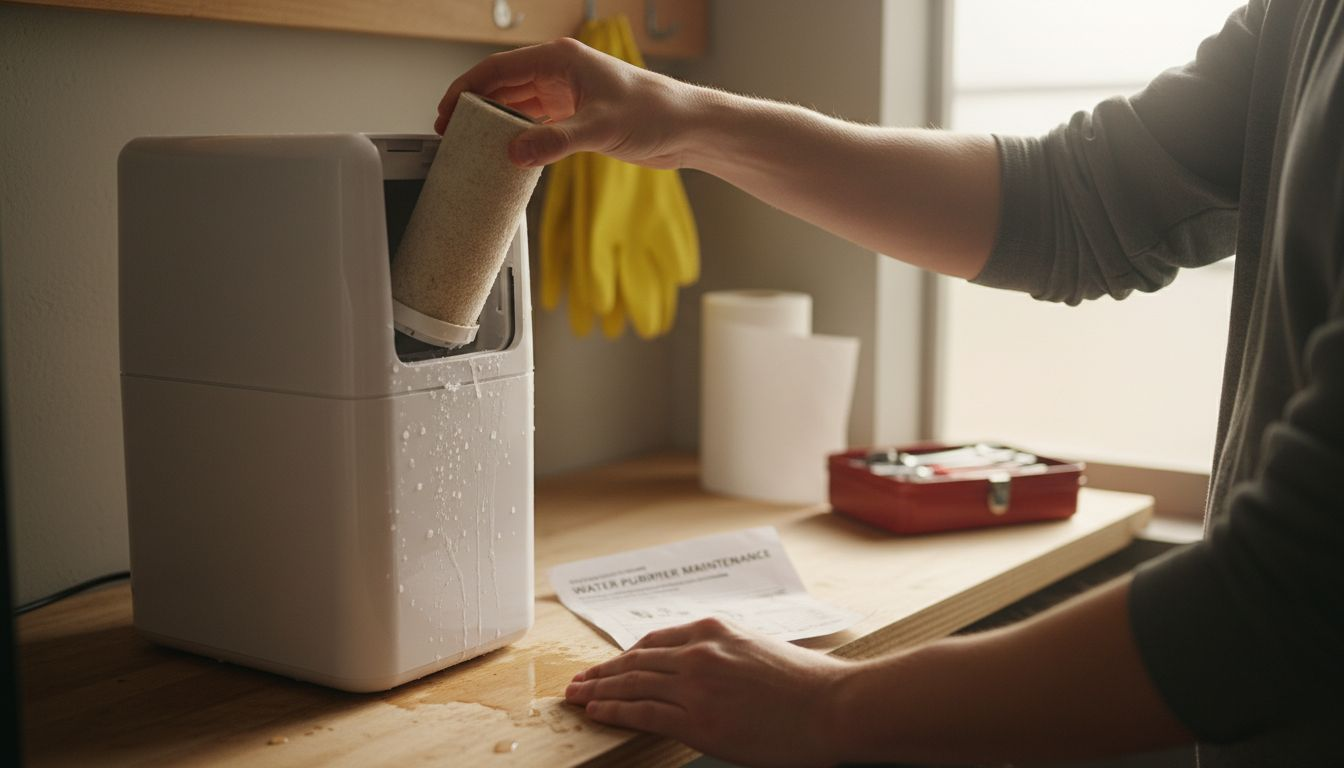
Water distribution maintenance manuals emphasize the importance of removing and cleaning filter media regularly to maintain consistent flow rates and water quality. Begin by gently removing each filter component using your hands or the appropriate tools. Carefully extract pre-filters, carbon filters, RO membranes, and UV chambers according to manufacturer guidelines. Inspect each component for signs of wear, buildup, or damage. Use soft brushes, lukewarm water, and mild cleaning solutions specifically designed for water purification systems to rinse away accumulated sediments and particles.
As you clean each component, pay close attention to the condition of seals, gaskets, and filter media. Some components may require soaking in approved sanitizing solutions, while others might need complete replacement if they show significant wear. Arrange the cleaned components on a clean towel, allowing them to air dry completely before reassembly.
Pro tip: Create a small diagram or take photos of the filter arrangement before disassembly to ensure accurate reassembly and prevent potential installation errors.
Step 4: Inspect and sanitize the purifier housing
With the filter components removed, you will now focus on thoroughly inspecting and sanitizing the internal housing of your water purifier to eliminate potential contaminants and ensure optimal system performance. This crucial step helps maintain water quality and prevent potential health risks.
ANSI standards specify comprehensive disinfection protocols for water treatment facilities to prevent microbial growth and contamination. Use a bright flashlight to carefully examine the entire housing interior, checking for signs of sediment buildup, scale deposits, or potential microbial growth. Routine cleaning procedures recommend using EPA-approved disinfectants that effectively eliminate microorganisms without damaging system components. Select a specialized water purification system cleaner and apply it according to manufacturer instructions, using soft microfiber cloths or soft-bristled brushes to gently scrub all interior surfaces.
Carefully rinse the housing multiple times with clean water to remove all cleaning solution residues. Pay special attention to corners, seams, and areas around gasket connections where contaminants might accumulate. Allow the housing to air dry completely before reassembling the filter components to prevent moisture related issues.
Pro tip: Wear protective gloves and work in a well-ventilated area when applying sanitizing solutions to protect yourself and ensure thorough cleaning.
Step 5: Reassemble and test system functionality
With all components cleaned and sanitized, you will now carefully reassemble your water purifier and verify its operational performance. This final step ensures that your maintenance efforts have successfully restored the system to optimal working condition.
After maintenance, reassembly requires correctly reinstalling filters and seals to prevent potential leaks and ensure proper water flow. Begin by systematically replacing each filter component into its original position, paying close attention to proper alignment and orientation. Ensure all seals and gaskets are seated correctly and securely to prevent any potential water leakage. Gently tighten connections using appropriate tools, being careful not to overtighten and risk damaging the delicate components.
Once reassembly is complete, slowly reconnect the water supply and electrical connections. Gradually restore power to the system and run a complete test cycle. Monitor the initial water flow, checking for consistent pressure and observing the clarity and quality of the water output. Listen for any unusual sounds and watch for potential leaks around connection points. Allow the system to run for several minutes to ensure all components are functioning smoothly and that the water quality meets your expectations.
Pro tip: Keep a small notebook or digital log documenting your maintenance process, including the date of service, components replaced, and any observations during testing.
Below is a summary of maintenance steps and their main objectives:
| Step | What It Involves | Key Purpose |
|---|---|---|
| Gather tools & supplies | Collect all necessary equipment | Ensure efficiency and avoid missing items |
| Power down & disconnect | Unplug and disconnect water lines | Prevent electric shock and water damage |
| Remove & clean filters | Take out and clean/inspect filters | Optimize water quality and flow |
| Sanitize housing | Clean internal surfaces with disinfect | Eliminate contaminants and microbial buildup |
| Reassemble & test | Reinstall parts, test operation | Verify leak-free, proper purifier function |
Keep Your Water Purifier Performing at Its Best with Coway Solutions
Maintaining a water purifier is essential to ensure clean, safe drinking water and protect your health. This article highlights key challenges such as timely filter replacement, thorough cleaning, and proper system reassembly. If you find these steps overwhelming or want a hassle-free approach, Coway’s advanced water purifiers offer innovative filtration systems combined with expert maintenance services that take the worry out of upkeep. Featuring state-of-the-art technologies like UV sanitization and easy-to-replace filters, Coway helps you enjoy pure water without the maintenance stress.

Discover the full range of reliable water purification products and service support at Uncategorized Archives – Coway Water Purifier. Take control of your home’s water quality today by visiting https://cowayswaterpurifier.com and explore models tailored for every need. Don’t wait until performance drops—get yours now with free delivery and installation for a seamless, clean water experience.
Frequently Asked Questions
How often should I maintain my water purifier for peak performance?
To maintain peak performance, conduct maintenance every 3 to 6 months. This includes cleaning and replacing filters and sanitizing the housing to ensure optimal water quality.
What tools do I need for water purifier maintenance?
Gather essential tools such as cleaning microfiber cloths, adjustable wrenches, and specialized cleaning solutions. Ensure you also have certified replacement filters that meet performance and safety standards ready for use.
What is the process for inspecting and sanitizing my water purifier’s housing?
After disassembling the purifier, inspect the interior for buildup or microbial growth, then clean it with an EPA-approved disinfectant. Rinse thoroughly with clean water and allow the housing to air dry completely before reassembling.
How can I ensure proper reassembly of my water purifier after maintenance?
Take a systematic approach by replacing each filter component in its original position while checking seals and gaskets for correct seating. Document the disassembly process with a diagram or photos to ensure accurate reassembly and to prevent leaks.
What should I do if I notice leaks after reassembling my water purifier?
If you observe leaks, check that all connections and seals are tightened and properly positioned. Gently re-tighten any loose connections and, if necessary, replace damaged gaskets or seals to ensure a leak-free operation.
Is it necessary to wear gloves during the cleaning process?
Yes, wearing disposable gloves is crucial during the cleaning and sanitizing steps. This helps protect your hands from harsh cleaning chemicals and maintains hygiene while handling filter components.
Recommended
- 7 Essential Steps for Your Purifier Maintenance Checklist – Coway Water Purifier
- Complete Guide to Maintenance in Purifier Performance – Coway Water Purifier
- Step by Step Filter Maintenance for Water and Air Purifiers – Coway Water Purifier
- Understanding the Role of Service in Purifier Lifespan – Coway Water Purifier
- CPAP Cleaner and Sanitiser | Portable Ozone CPAP Disinfector